|
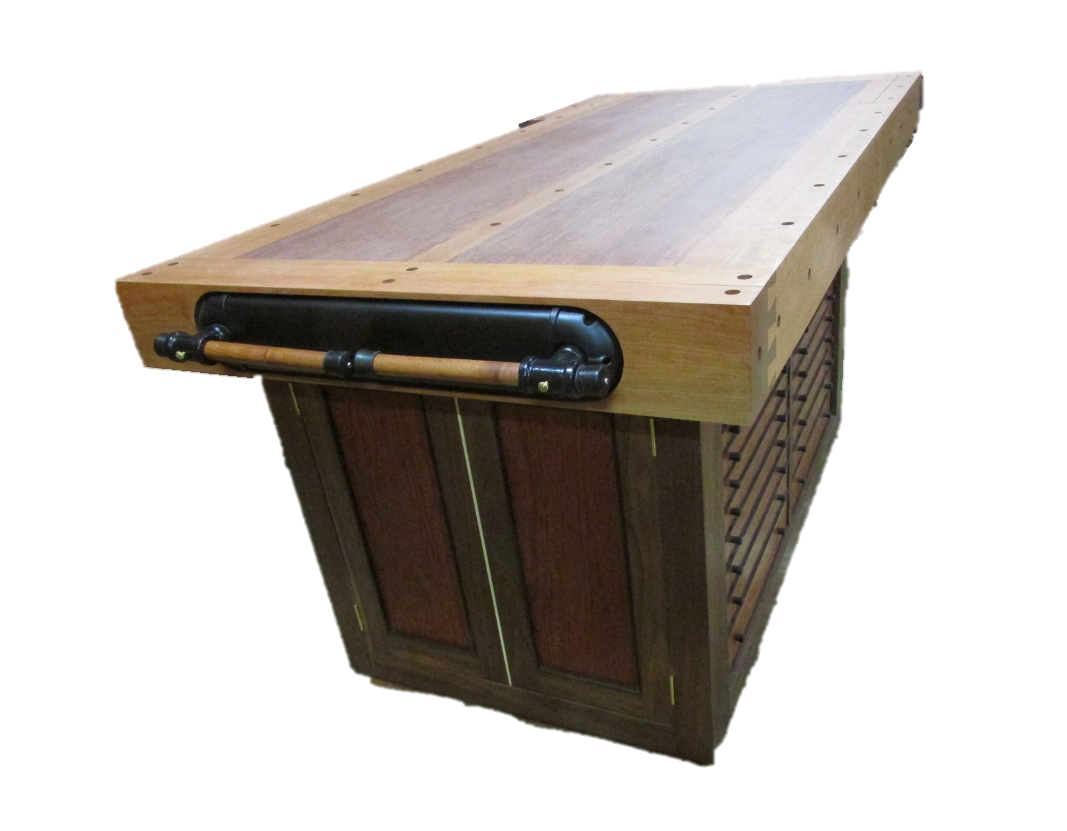
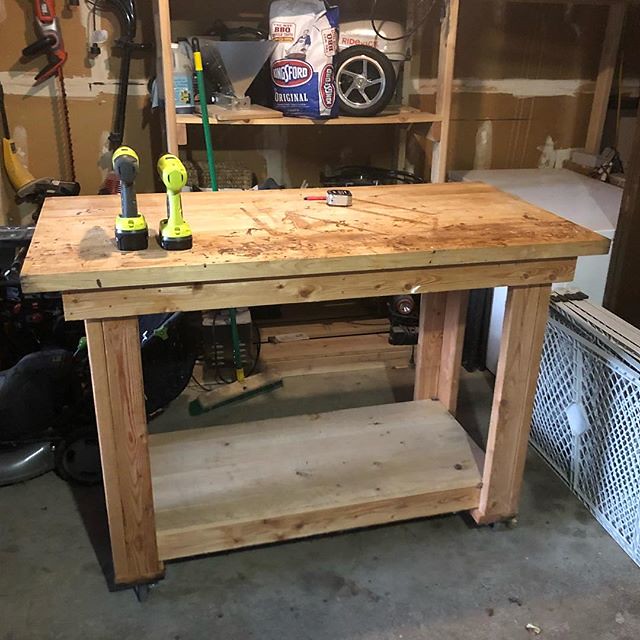
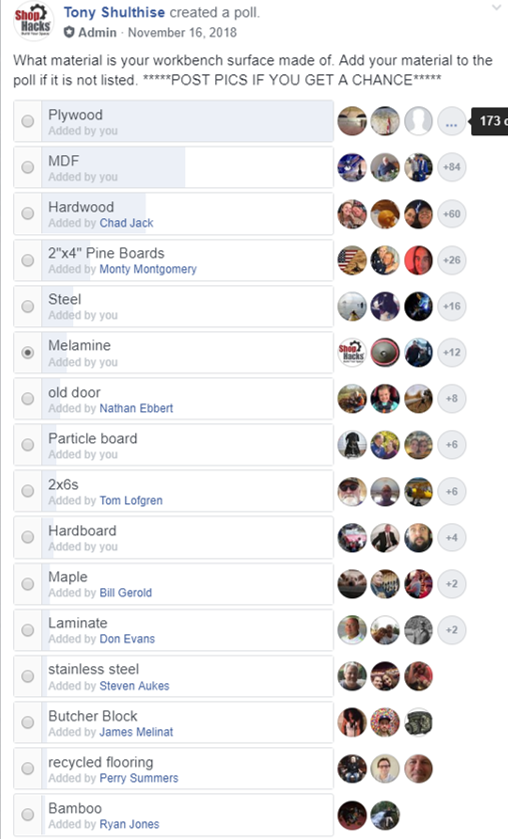
When you SUBSCRIBE to the Shop Hacks Newsletter you receive a helpful article like this one every Friday at 3:30 PM Eastern. The workbench may be the most used piece of equipment in most shops. Workbenches range from a pair of sawhorses with an old door or piece of plywood laid across them to a work of art like the one below that Richard Csepregi posted in the Shop Hacks Facebook group. (Click on the photo to see more details in his post) We all have a workbench of some sort. I think it is a fair bet that 99.999% of our workbenches don't look nearly as nice as Richard's ;-) Chances are that your workbench looks more like the one below. In this article I'll discuss the various materials that you can use to build or restore the most common types of workbenches and how much each option costs for a 2' x 8' version... a common size for a countertop type workbench. You may be surprised to find that you can restore your workbench to for a little over $1 per square foot. Shop Hacks exists to help you Build YOUR Space! Let's get started... Based on the results of this Shop Hacks Facebook group poll, it looks like Plywood and MDF make up the bulk of your workbench tops but pine and hardwood round out the top choices. It's not difficult to imagine why. Plywood and MDF are readily available, cheap and durable and make great general use work surfaces. Pine and Hardwood can be made into thick, flat tops with plenty of mass to absorb energy, which is essential for hand work such as chiseling. We also have mechanics and metalworkers in the Shop Hacks tribe and they often use metal workbenches to handle heavy metal parts and fabrication as well as oils and greases. There's no perfect workbench for everyone but this article will help you determine what fits your needs the best. I've used many types of workbench surfaces over the years. Plywood, laminate, MDF, melamine, flooring products and epoxy coatings. They all have their own unique advantages. Let's talk about "shop feel" for a minute... Many of you are aware of the transformation my workshop has been undergoing over the last few years. I've been focusing a lot of energy on two goals for any shop improvement I make...
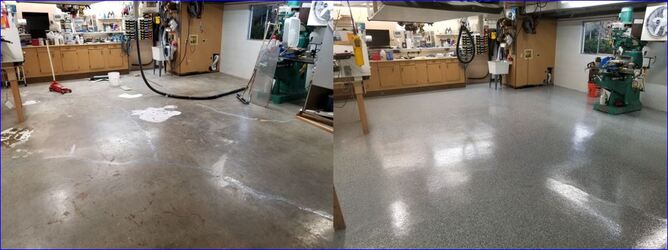
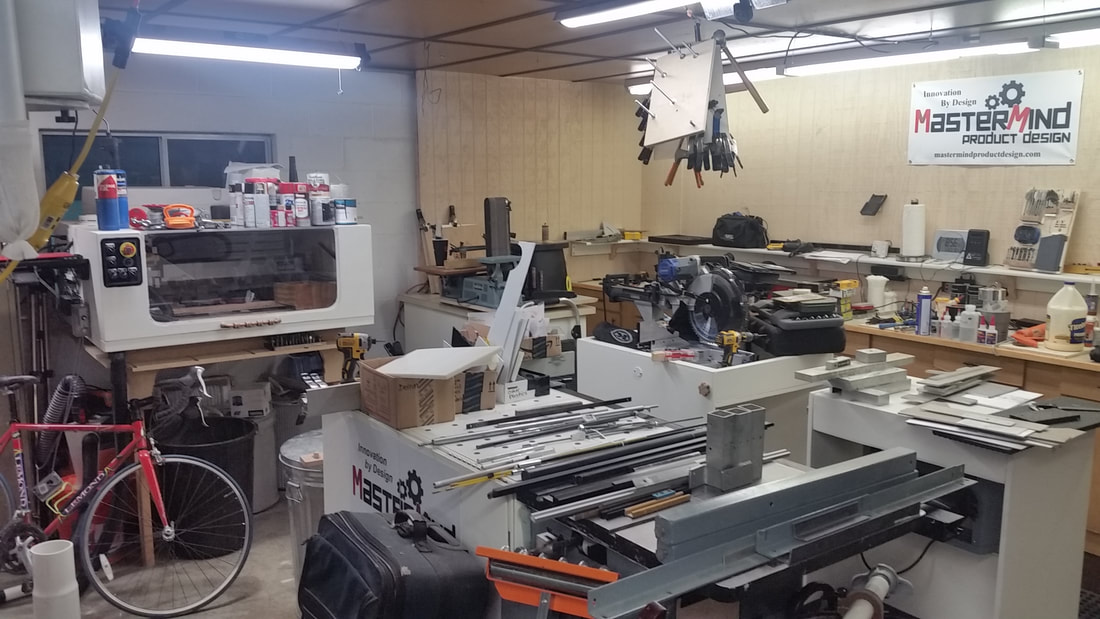
This second point is something that never crossed my mind for over 30 years. I was very happy with organized tools and materials, a few florescent lights, dingy gray floors, block walls, ineffective dust collection and a very basic workbench made of dark stained plywood. I don't have pictures of the very start of my journey to create a workshop destination but these photos will give you a feel for the transformation that has occurred over the past couple of years. For me, the transformation involved the following areas...
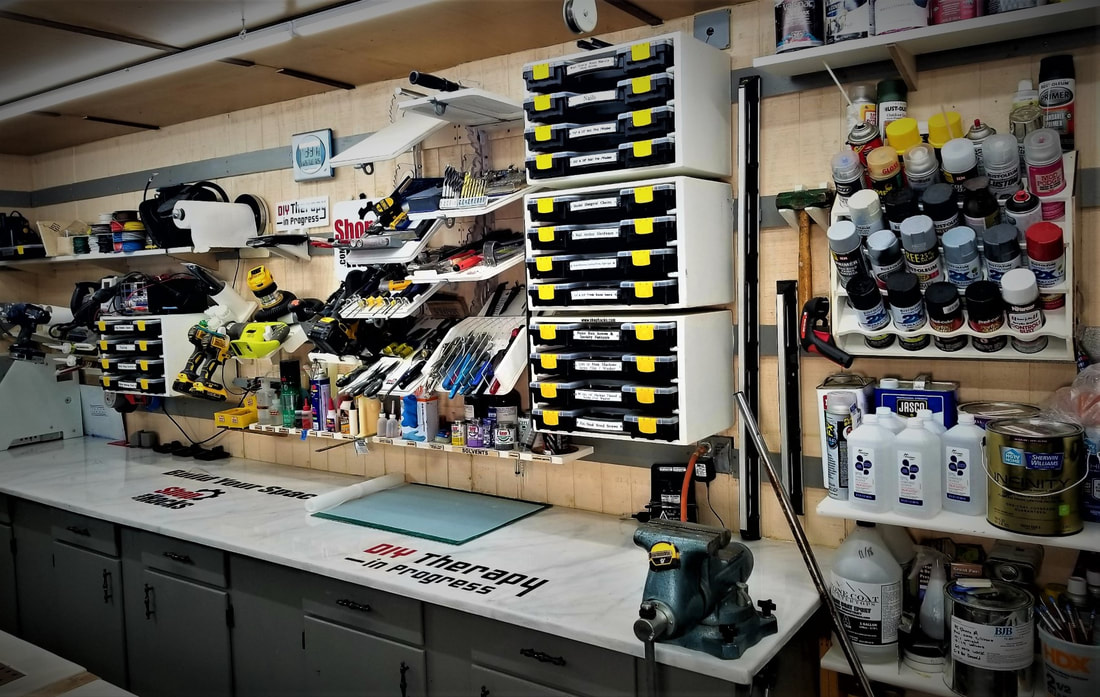
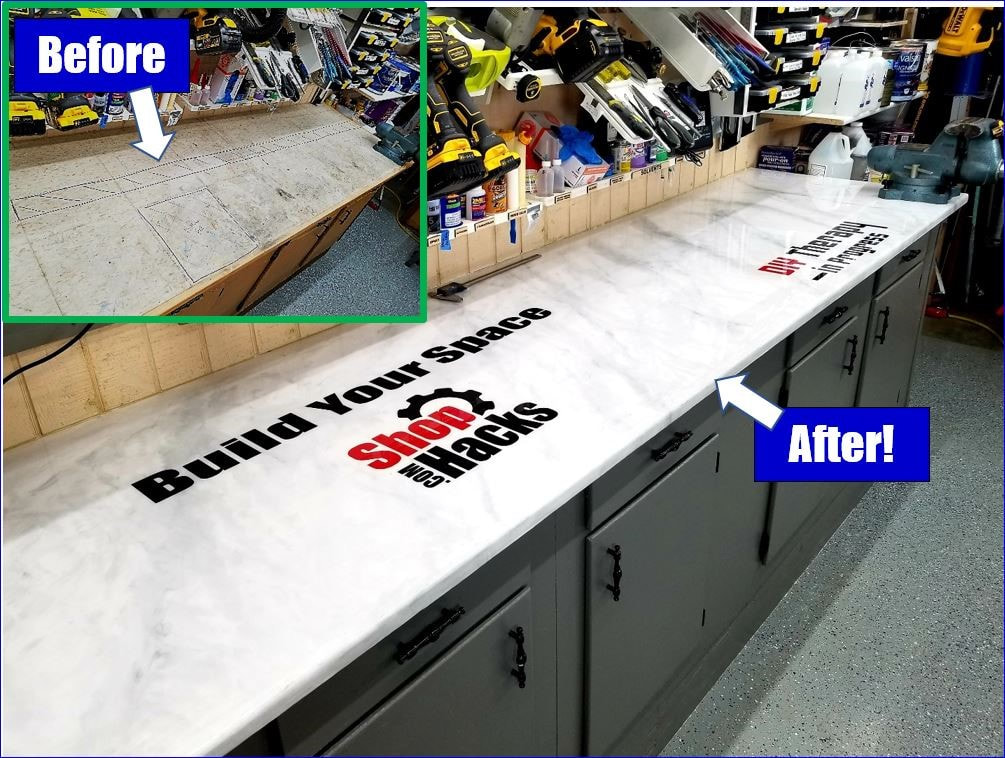
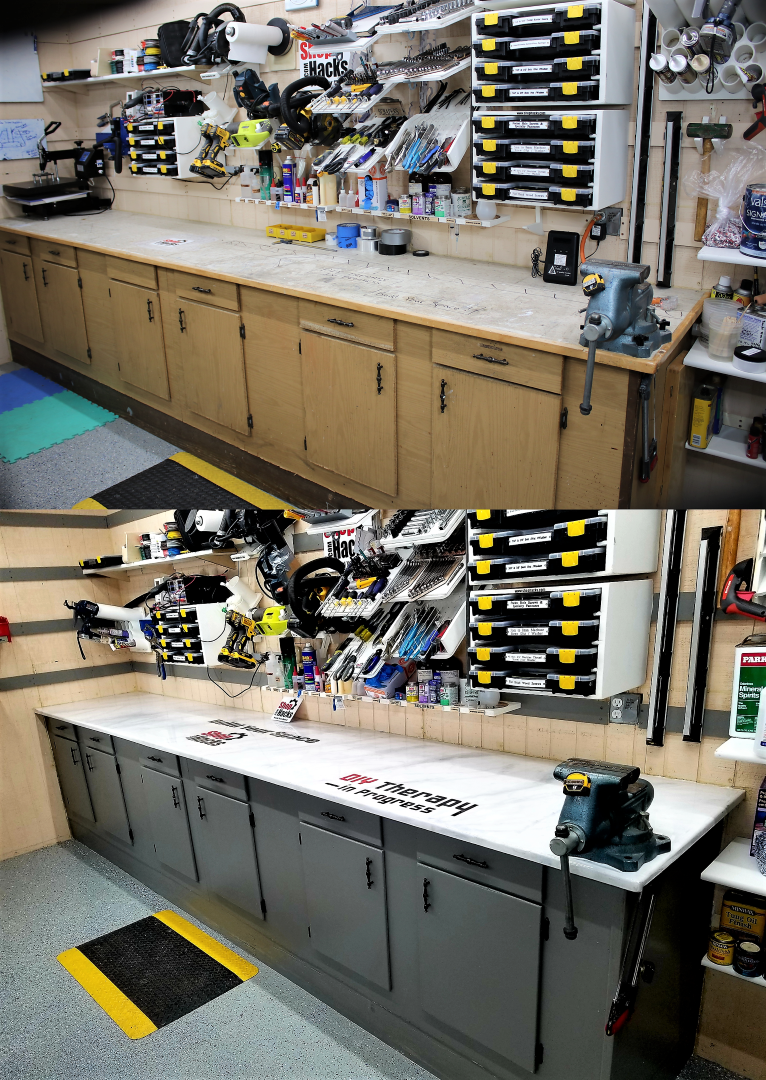
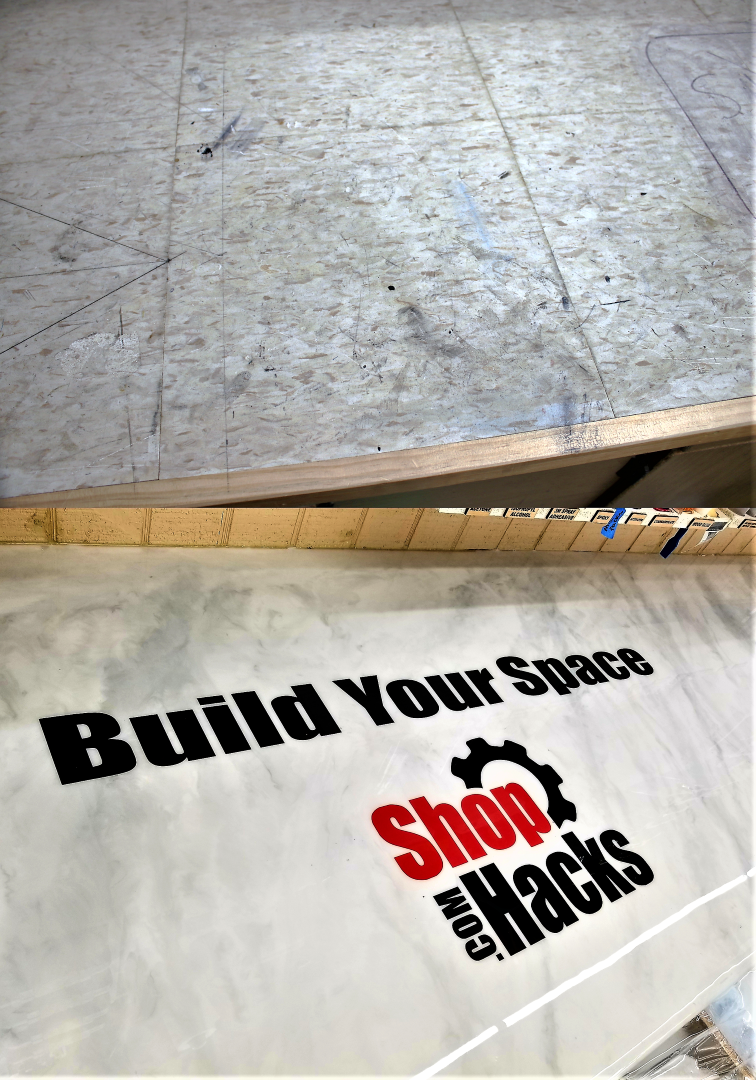
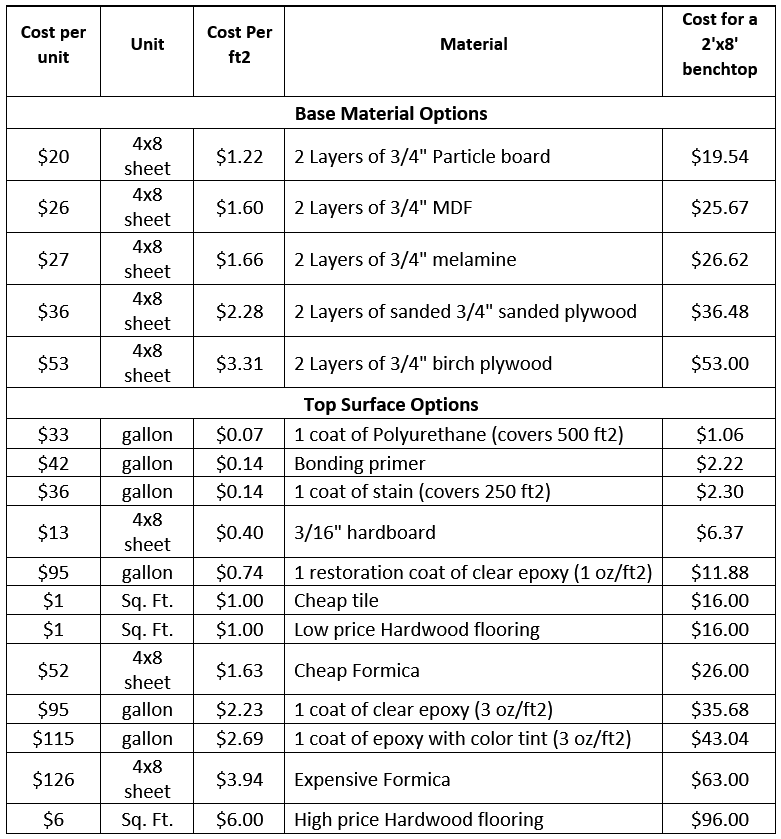
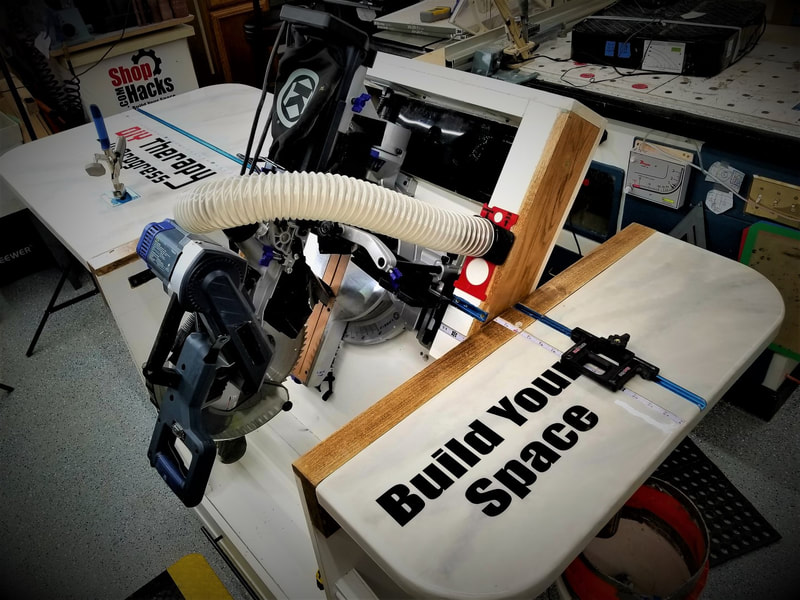
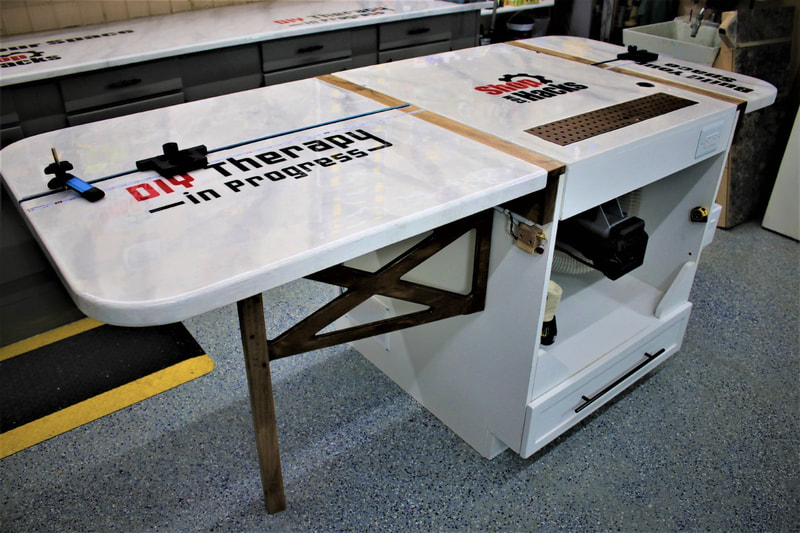
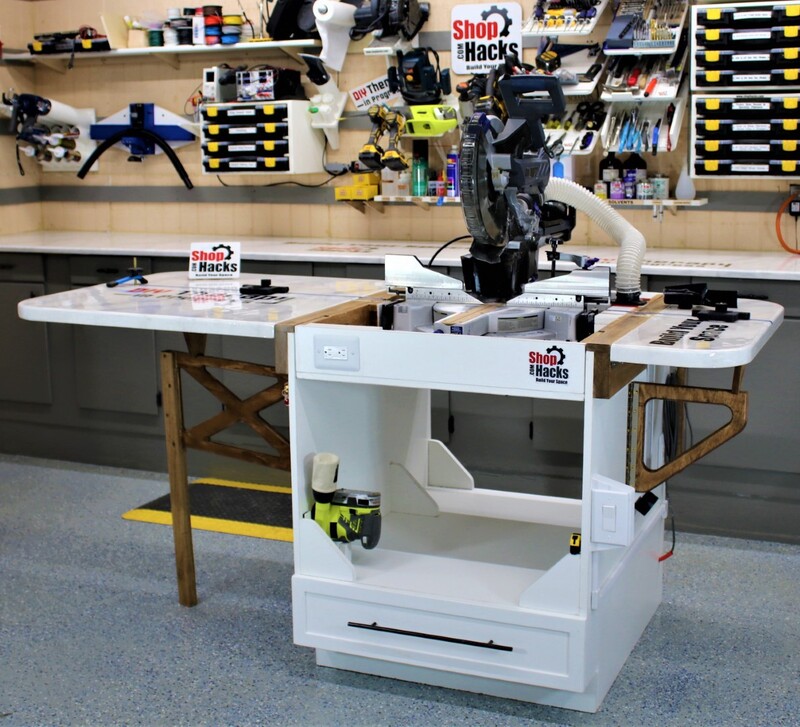
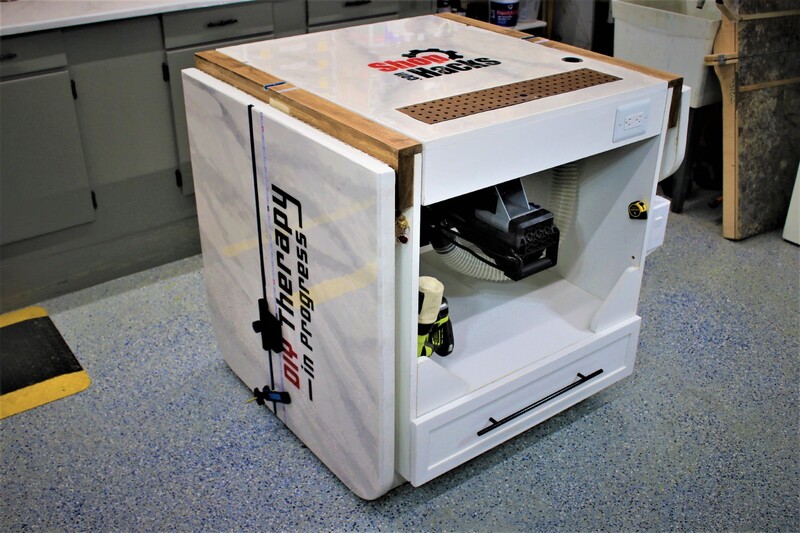
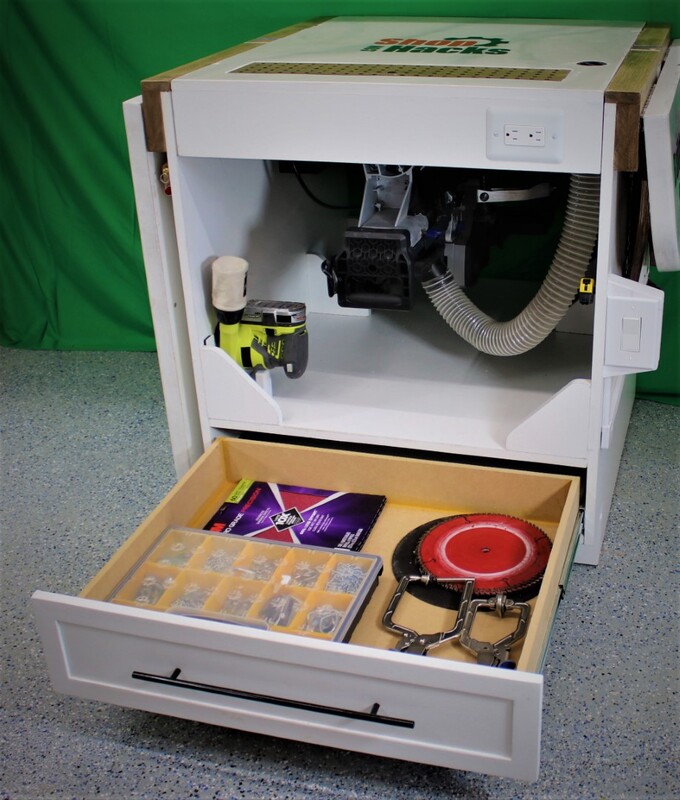
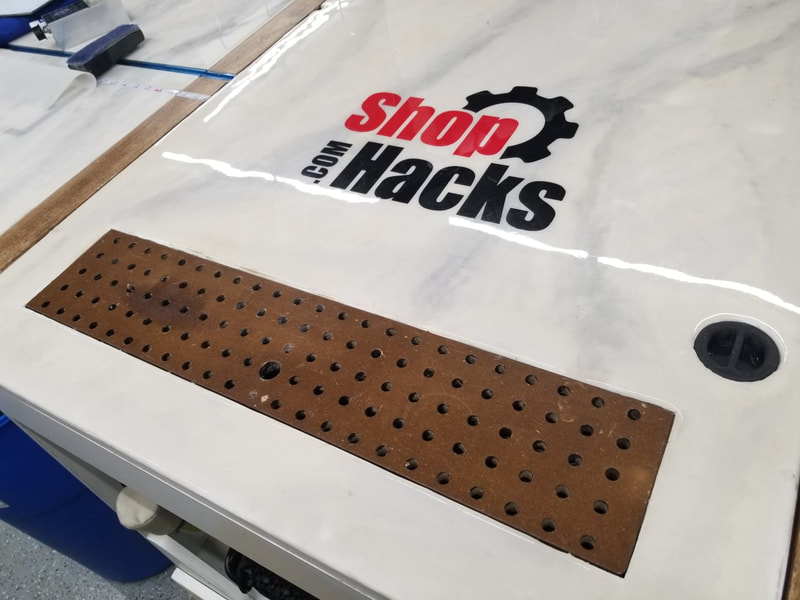
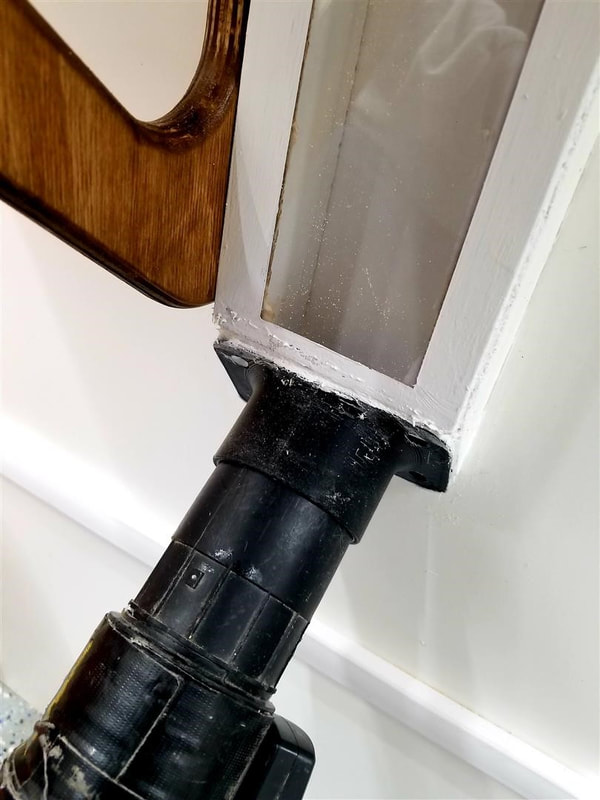
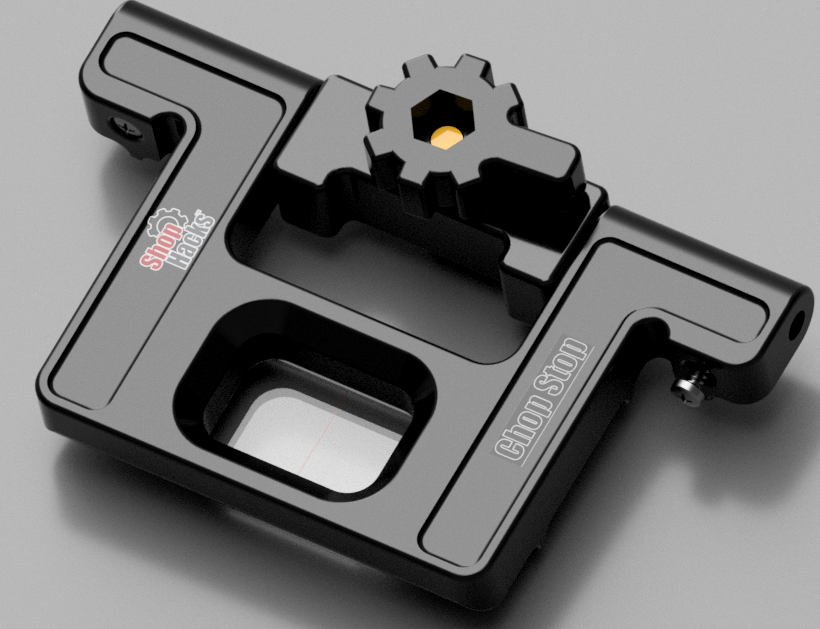
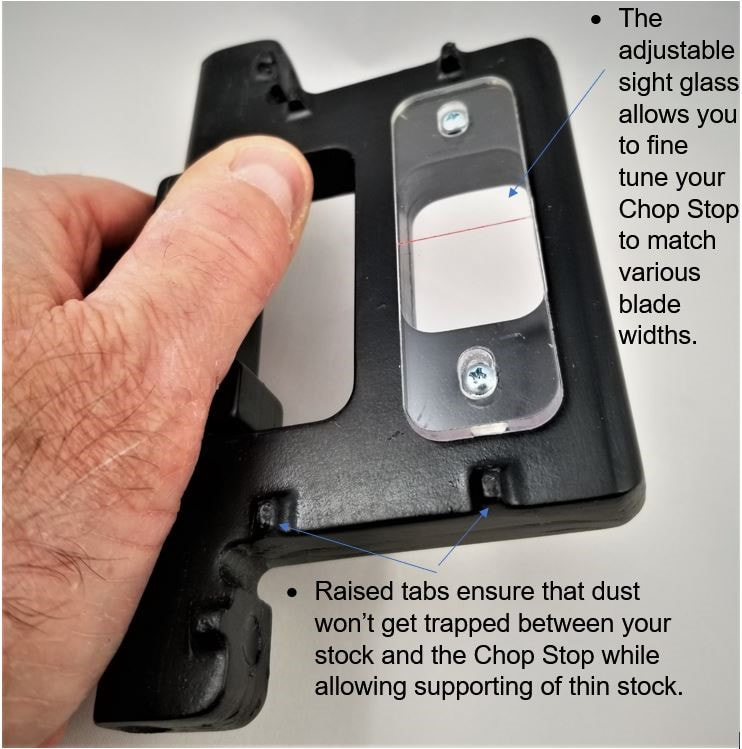
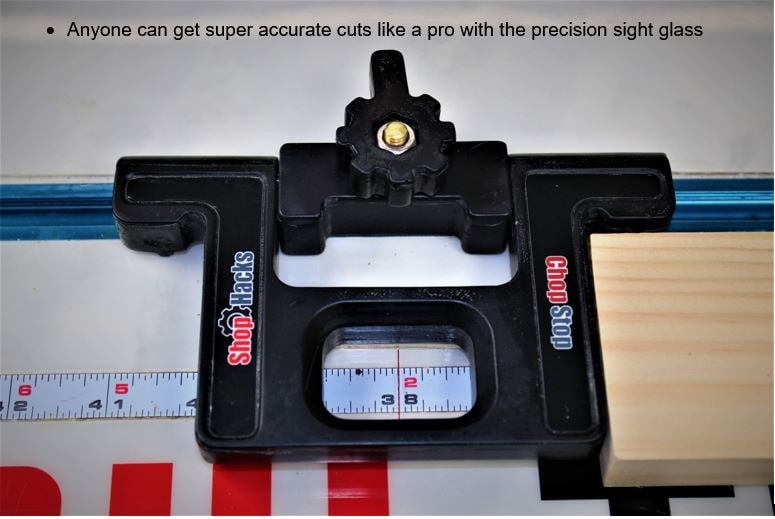
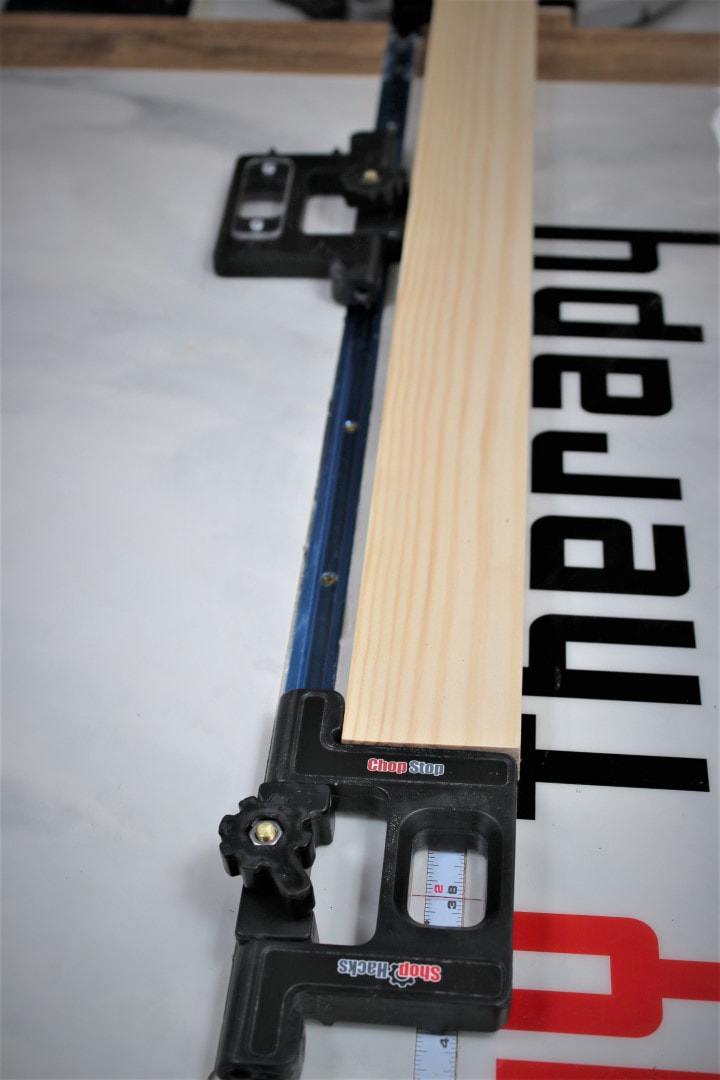
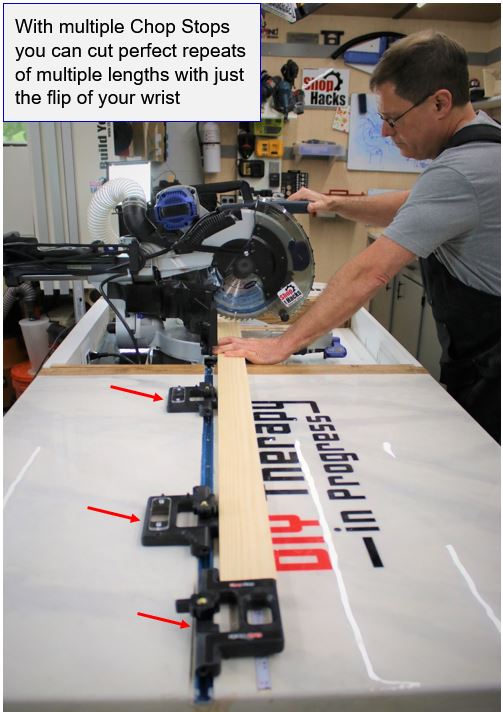
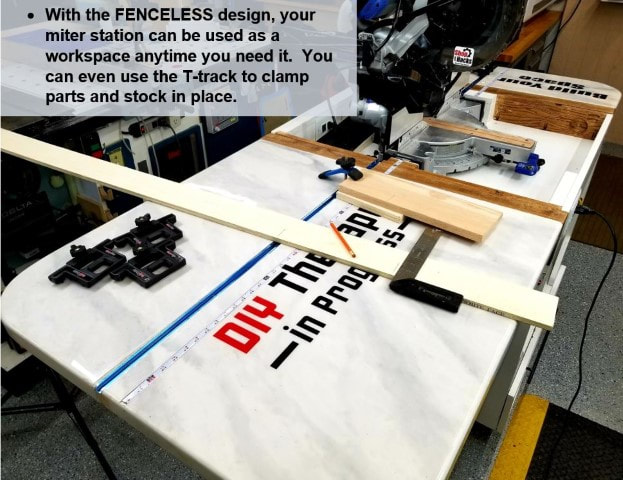
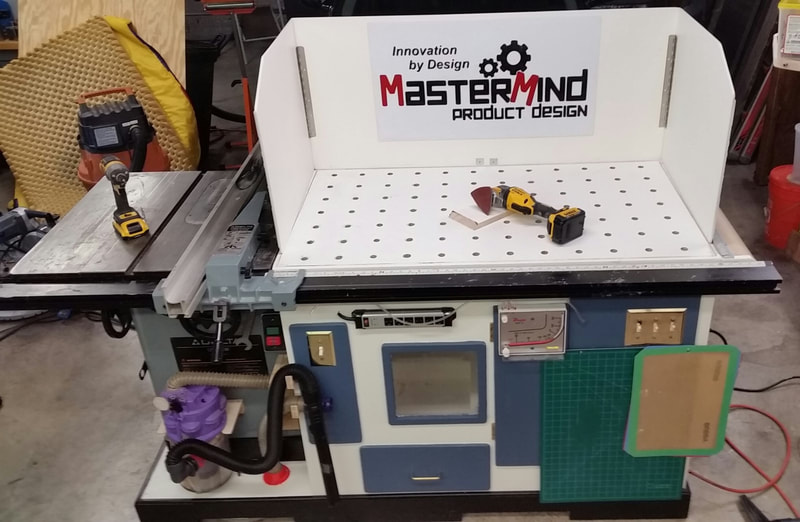
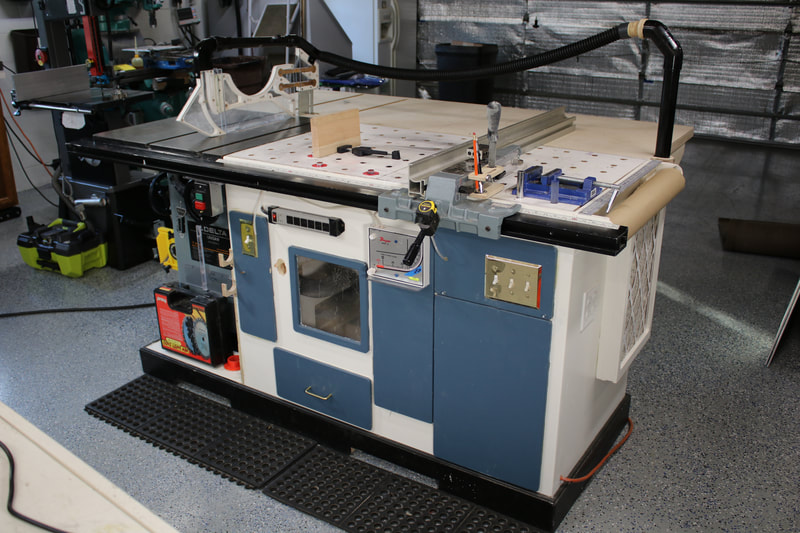
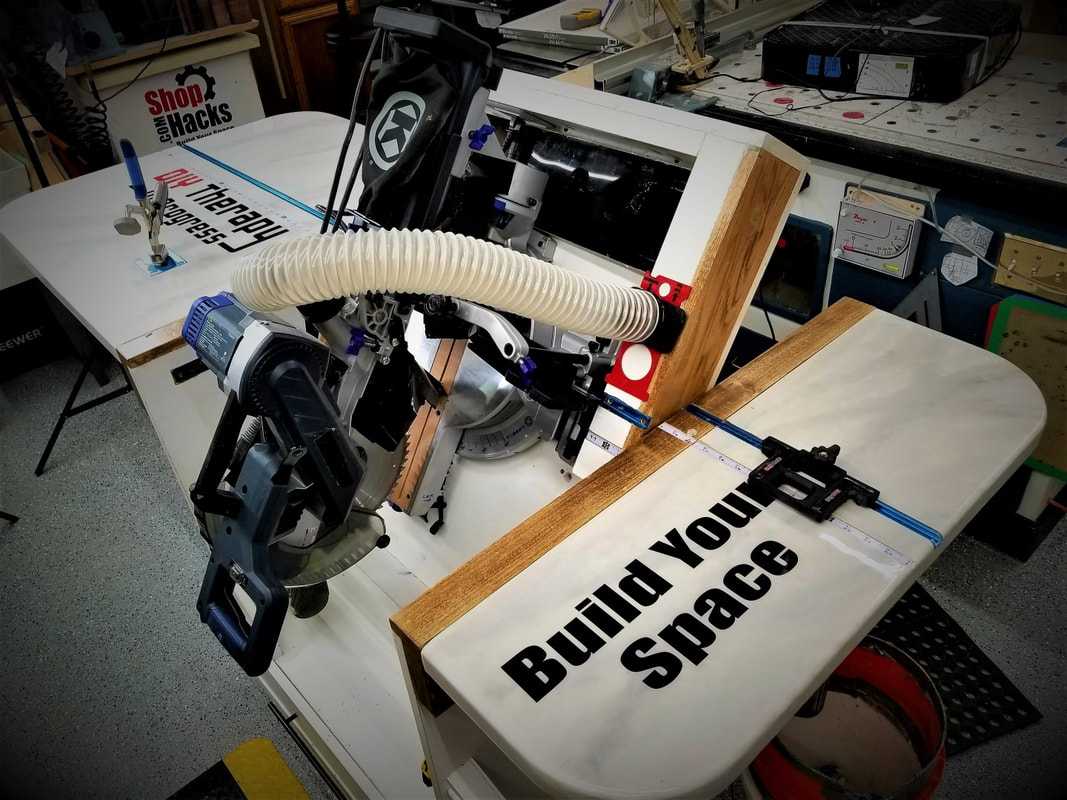
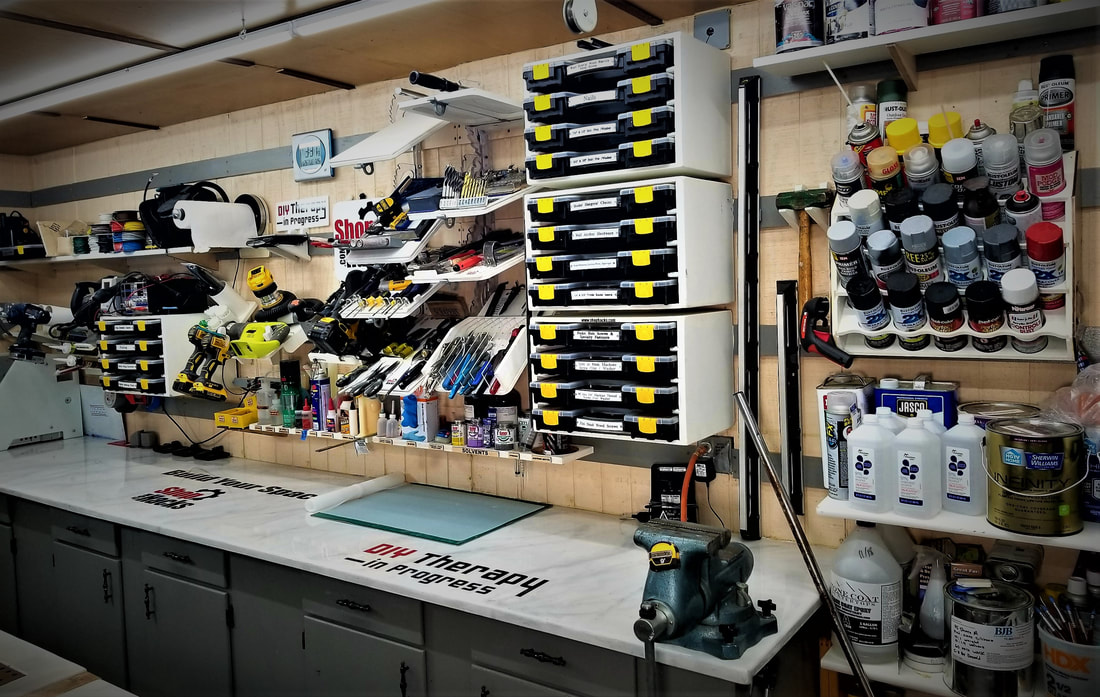
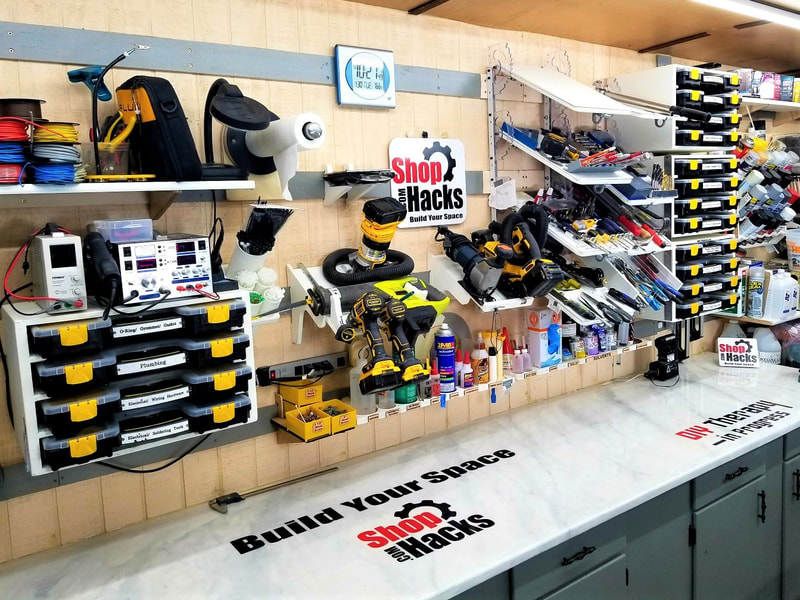
My workbench may not be what you are looking for but I would venture to say that the way it makes me feel is something that you are looking for. The original workbench top was a dark stained plywood. I later covered in floor tiles (see picture inset above). The floor tiles looked good for a while but quickly started looking terrible... bad choice. I saw a few videos from Mike Quist at Stonecoatcountertops YouTube channel where they have hundreds of videos showing step by step instructions showing how to perform epoxy countertop restorations. I decided to see if I could make something of my mess. The photo below shows the before and after results. Full disclosure... Stonecoatcountertops.com provided the materials for the epoxy countertop restoration in exchange for a "how-to" video. I'll post a link to that video in a future article. There are other epoxy companies but I will say that SCC products were super easy to use and I chose them because they have more video resources and tech support than any other company I could find. For these reasons, I didn't approach any other companies. Below are close up pictures to give you a better feel for what you can do with less than $5 per square foot and one day (or less) of labor... I have been using this workbench for almost a year now and it still looks great. I have melamine top workbench that I use for any heavy duty pounding and sawing but I use this bench and the Shop Hacks Ultimate Flip Top Workbench the most. Other than scratches my epoxy coated benches still look like new. You can hit them with a hammer without damage. If they ever start to look bad I'll just sand the tops and pour another skim coat of epoxy and it will look brand new again with just an hour of work and less than $20 of epoxy. If you've never given much thought to improving the "feel" of your shop, it may be worth a little effort. Creating a destination has many rewards. After coating my floors, installing a LOT of LED lighting, getting dust collection and air filtration completely under control and updating the look of my workbench, my shop feels like a completely different place. It really is a destination... a place to crank out new products or just to hang out and soak in the feel of a great looking space where there are not expectations other than my own. This is what the Shop Hacks motto, "Build YOUR Space" is all about. Side note... I cut all of the vinyl graphics you see in these photos. If you are interested in learning more about vinyl cutters you can find more information on the website HERE. Common build/restoration options and costs Without going into too many details let's just look at what some of the most common options and how much they cost. Price often dictates the materials used for a project. To help you quickly determine which options are feasible for your workbench just multiply the length x width to determine the number of square feet then multiply that number by the cost per square foot for the materials that are listed below. I’ve also included the cost to make a typical 2’x8’ bench top using each option. The table below lists options from least expensive to most expensive. Links to materials are provided for reference. Use this as a reference to decide what materials and coatings are right for you. Links to sites where prices were derived are provided below... Workbench Top Material options... $19.54 2 Layers of 3/4" Particle board $25.67 2 Layers of 3/4" MDF $27.00 2 Layers of 3/4" melamine $36.48 2 Layers of sanded 3/4" sanded plywood $53.00 2 Layers of 3/4" birch plywood Workbench Top Finishing/Coating options... $1.06 1 coat of Polyurethane (covers 500 ft2) $2.22 Bonding primer $2.30 1 coat of stain (covers 250 ft2) $6.37 3/16" hardboard $11.88 1 restoration coat of clear epoxy (1 oz/ft2) $26.00 Cheap Formica (This is likely available much cheaper at specialty stores) $35.68 1 coat of clear epoxy (3 oz/ft2) $43.04 1 coat of epoxy with color tint (3 oz/ft2) $96.00 High price Hardwood flooring ...More details about each of the options... 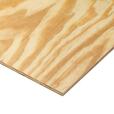 Plywood, Melamine, MDF and Particle Board Base Materials Two sheets of ¾” melamine, MDF or particle board will provide a very functional surface that can last a long time. They are certainly one of the cheapest options available. Add a coat of paint and/or polyurethane and you have a functional, durable work surface that is inexpensive and that will last a long time for under $2 per square foot. Because it is very smooth, flat and easy to work with, MDF is an ideal base for an epoxy countertop finish. You can choose to use melamine with no extra finish. Melamine provides a fairly durable surface that is easy to clean. If you wax the melamine then glue will not stick to it. Plywood is also a good base material that comes in at $2.28 to $3.31 per square foot for a 1.5” thick bench top.  Paint and/or Polyurethane If you already have a workbench or countertop then you can sand it down, add a coat of bonding primer, some paint and a coat of polyurethane and you will have a nice looking surface for under $0.25 per square foot. Throw in some low cost vinyl graphics under the polyurethane and you will have a unique custom work surface for just a few dollars. 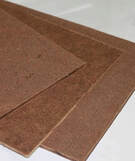 Tempered Hardboard Tempered hardboard on top of workbenches and counters is a great option for a very durable surface that is easily restored if you use it often for gluing, fastening, cutting, drilling and painting on the surface. A coat of paste wax to seal the hardboard and make glue less likely to stick to it. If you don’t like the dark color of hardboard you can paint it and put a coat of polyurethane over the paint to seal it up then some paste wax to keep glue from sticking. 3/16” hardboard comes in at a low 40 cents per square foot which makes it a very popular option. 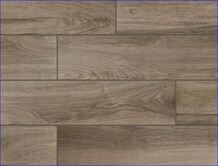 Tile and Hardwood Flooring Depending on how you use your workbench or countertop, you might also consider covering it in tile or hardwood flooring. Ceramic and composite tiles can be a durable option that provide latitude in terms of patterns and colors. Ceramic tiles certainly are not good for operations that involve a lot of impact or cutting but are very suitable for things such as potting or food service. They are also offered in woodgrain patterns that look very realistic yet offer very high durability. Tile costs range from about $1 per square foot to over $5. Hardwood flooring is another option that offers a very durable and unique looking surface for just about any operations. It is very quick and easy to install. Hardwood flooring ranges from $1 per square foot to over $6. If you search around you may even be able to get enough offcuts to cover your workbench for almost no cost. Check with your local flooring distributors to see what they have available.  Epoxy Coating As you can see, epoxy coating your countertop or work surface can yield amazing results. I chose to use epoxy because of the high end look it provides for a relatively low $5 per square foot price tag. It also doesn’t require any special skills or artistic talent to obtain an amazing look. I also wanted to embed my company graphics into the workbench and epoxy coatings make this very easy to do with a very professional looking final result. While epoxy coating is on the higher end of your options in terms of cost, it is also without a doubt yields some of the most spectacular results. As mentioned earlier, epoxy resin is great for many applications but it is not ideal for every application. Below is a list of strengths and weaknesses of epoxy coatings: Why I used epoxy resin for 2 of my workbenches: • I do a lot of assembly and electrical work on this bench. I have 3 other benches that get most of the cutting, sawing, pounding and gluing so I’m not worried about destroying this one. • It looks amazing. You can obtain a gloss or matte finish that looks stunning. It also allows me to add branding graphics under the final flood clear coat which look very professional. • Versatile. You can create many different looks. Your imagination is the limit. You can coat just about any surface with epoxy. A wide range of colors, tints and metallic additives are available. • Self-leveling. It will create a very smooth and flat surface on any level surface even if the surface contains cracks or imperfections. • Easy to use. Anyone can use it to get amazing results. • SCC’s epoxy resins have no VOC’s so you don’t have a strong smell while applying it. • SCC’s epoxy resins have UV inhibitors included to make them suitable for use outside in indirect sunlight. • Epoxy resins are very resistant to chemicals and solvents • Heat resistant. SCC’s countertop resins are heat resistant up to several hundred degrees. They will soften with extended exposure to high temperatures but they will not scorch easily. • Epoxy resins are easily repaired. Just sand and polish scratches out or lightly sand and apply another flood coat to make the surface looks as good as new. Situations where you might not want to use epoxy resins: • Due to the cost and time required to rework an epoxy countertop it may not make sense to use epoxy in areas that see a high level of abuse such as drilling, cutting or very high temperatures such as grinding, milling or welding areas. In those areas a cheaper material like tempered hardboard that is easily replaced or a very durable material like steel may be more appropriate. Workbench Ideas Flip Top Workbenches Flip top workbenches allow you to pack more tools in less space. Mobile flip top workbenches are the ultimate in space and workflow efficiency. I frequently use two other workbenches besides the one I showed you earlier. I got very tired of dragging my mitersaw out of storage every time I needed to make a simple miter cut or two. So, I designed the Shop Hacks Ultimate Flip Top Workbench. This is a mobile flip top workbench which allows 3-second access to my mitersaw when I need it but allows me to use it as a workbench the other 99% of the time. It includes a concealed electro-hydraulic lifting mobile base. I use it as an assembly and sanding table 99% of the time. It has 8 built-in power outlets powered by a single cord so I always have a power outlet close at hand. It also has a very innovative integrated dust collection which powers a blast gated port on one side for a tool such as a miter saw, planer or a sander. The other side has an integrated 5" x 24" high air velocity downdraft table that is very effective at capturing sanding dust. It also makes clean-up a breeze. Just one swipe of your hand and all of the dust on the table is sucked into the downdraft port. A single vacuum connection on the side of the cabinet supplies both sides of the flip table. I.E. the tool on one side and the downdraft table on the other. I installed the Chop Stop (coming soon) miter-stop fenceless system. With the Chop Stop I never have to measure or mark my stock. Just set it and forget it. The T-track for this system can also be used to clamp stock in place while using the workbench side of the table. Multi-function Workbenches For heavy duty pounding and work holding I use this melamine top workbench attached to my cabinet saw shown in the photos below. Please excuse the obscene use of color on this system. It not the looks that count... it's what's on the inside, right? :-) This workbench has the following features...
I hope this article gave you some ideas to Build YOUR Space. If you have some ideas to share feel free to post them in the comments below. You can also reach me at [email protected] if you have any questions or if you just want to suggest topics for future articles. Be sure to join us at the Shop Hacks Facebook group where you will find great workshop improvement ideas posted every day. Check out popular Shop Hacks Newsletters... Promotional... Build YOUR Space... and begin transforming your workshop into a destination starting with one of these Shop Hacks products...
1 Comment
It has finally arrived... the Shop Hacks Ultimate DIY Air Filtration System build article. You can design your system with the information in this article or buy the plans to get all the exact dimensions to speed up the process. I've spent many weeks building and testing many systems and this air filtration system blows them all away. If you are interested in a deep dive into previous articles that cover all of the testing and findings you can find them here... Air Filtration System Shootout Article - Deep Dive Please consider supporting more Shop Hacks content by purchasing the Plans and/or Hardware. They are both discounted 10% for Newsletter subscribers until 8/25/19 . Plans Include
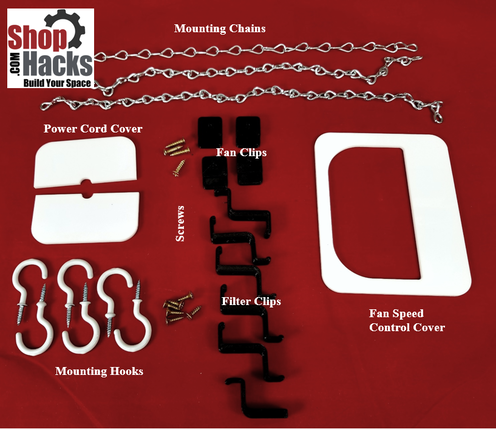
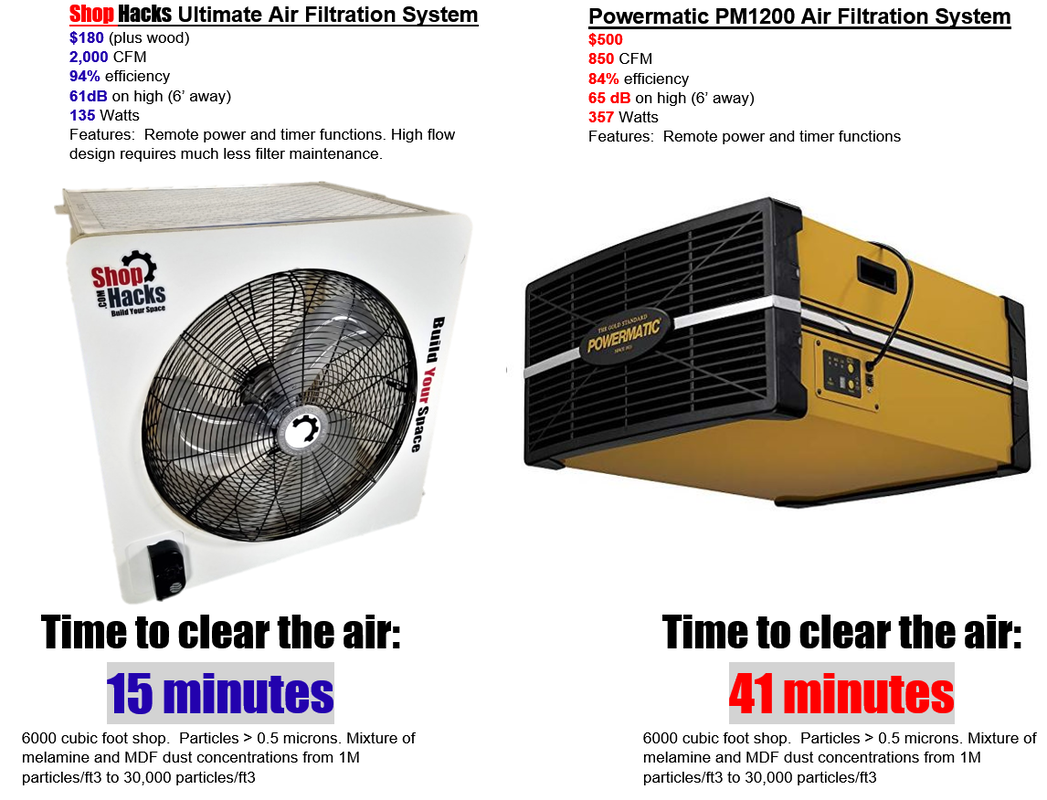
 The following summarizes why this system is worth building. You can build it for under $100 if you only use one filter now and for under $200 if you use all five filters to get the max performance and a virtually maintenance free system. Even using only one filter it will still outperform the Powermatic PM1200 but flow will drop off sharply as the filter gets dirty. The more filters you use the less the flow will drop over time. With 5 filters you may be able to run the system for many years without any filter maintenance. Let's jump straight into the build... Overview and Supporting Notes Depending on your level of experience, this build should take between 3 and 6 hours to complete for a first-time build. Every part is detailed in the drawings throughout these plans. Don’t forget to purchase the remote control timer that allows you to keep the system running for 30 minutes, 1,2 or 4 hours after you leave your shop. You can find it at this affiliate link… https://amzn.to/2ZsvcyA A note about affiliate links… Affiliate links help Shop Hacks offer quality content to you for free via the Shop Hacks Newsletter and Shop Hacks Facebook group. When you purchase anything from Amazon within 24 hours of clicking on an affiliate link Amazon gives Shop Hacks a small commission. Using the link doesn’t affect the price you pay at all but it does help Shop Hacks help you Build Your Space. Thank you for using affiliate links! Required tools: Circular saw or table saw Router Jig saw Drill, bits and a 1.25” spade bit, Forstner bit or hole saw. Pencil Straight edge Optional tools: Pin nailer Caulking gun Here's a copy of the parts list with the part number followed by the part name... 1 20" 2264QM High Velocity Fan (affiliate link) 2 Filter (affiliate link) 3 Front Panel 4 Horizontal Panel 5 Vertical Panel 6 Rear Panel 7 Cord Cover 8 Speed Control Cover 9 Filter Clip 10 Filter Clip2 11 Hanger Block 12 Hook 13 Fan Clip 14 Chain 15 #6 x 5/8" long flat head wood screw 16 #6 x 3/8" long flat head wood screw 17 Caulk 18 Wood glue 19 Construction adhesive A detailed parts list with hyperlinks to all of the hardware used in this build is included in the plans. You can also see the hardware used in the photo earlier in the article.
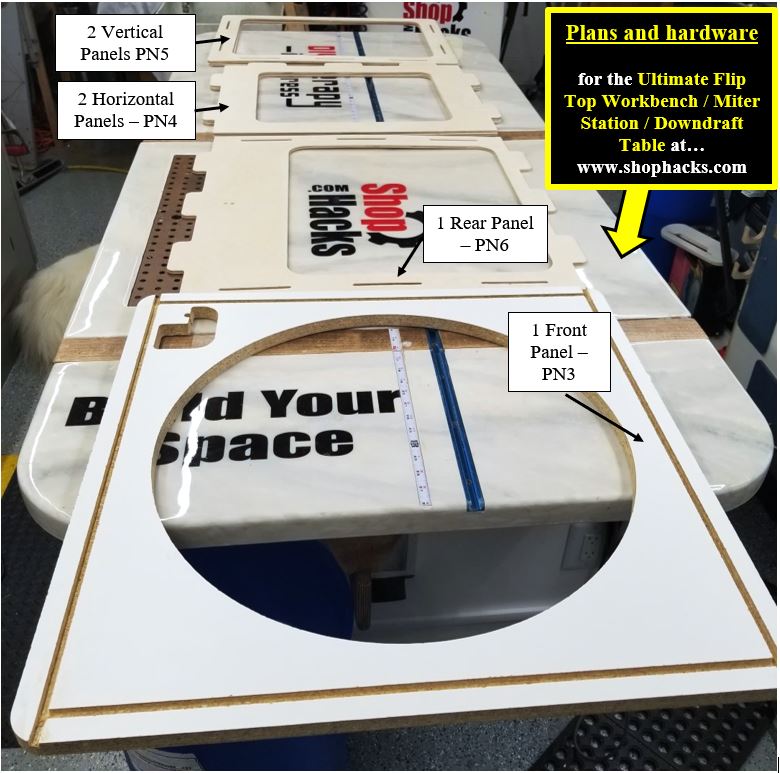
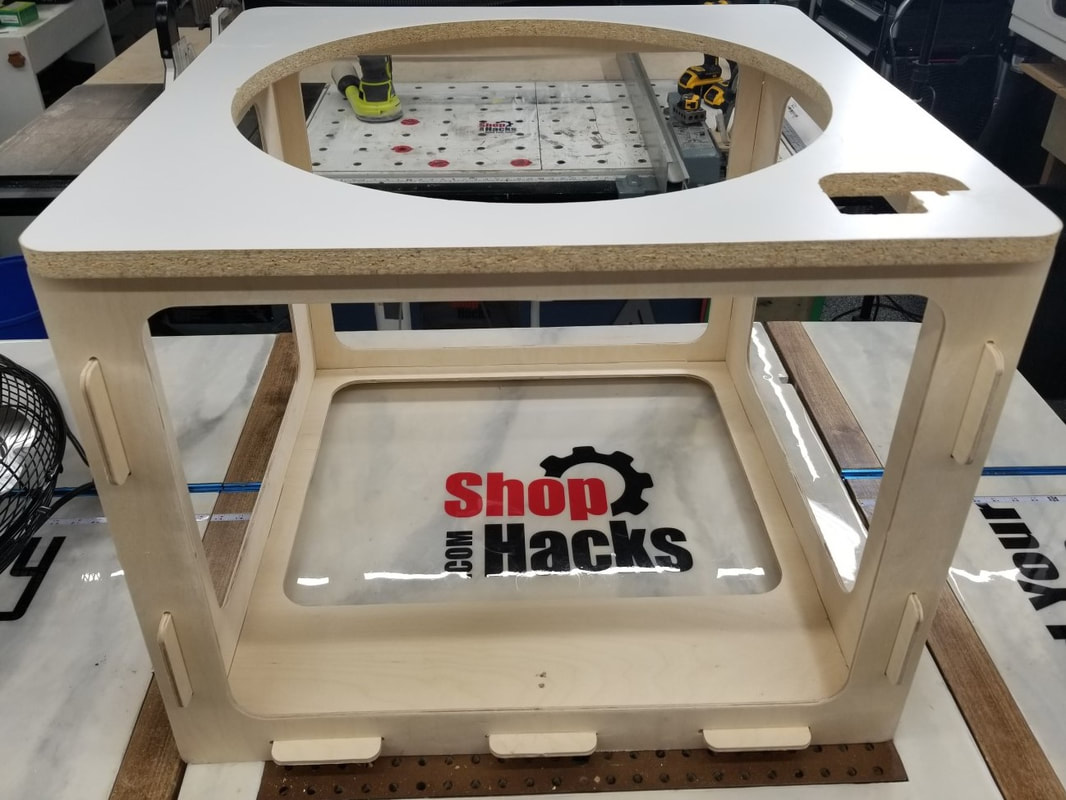
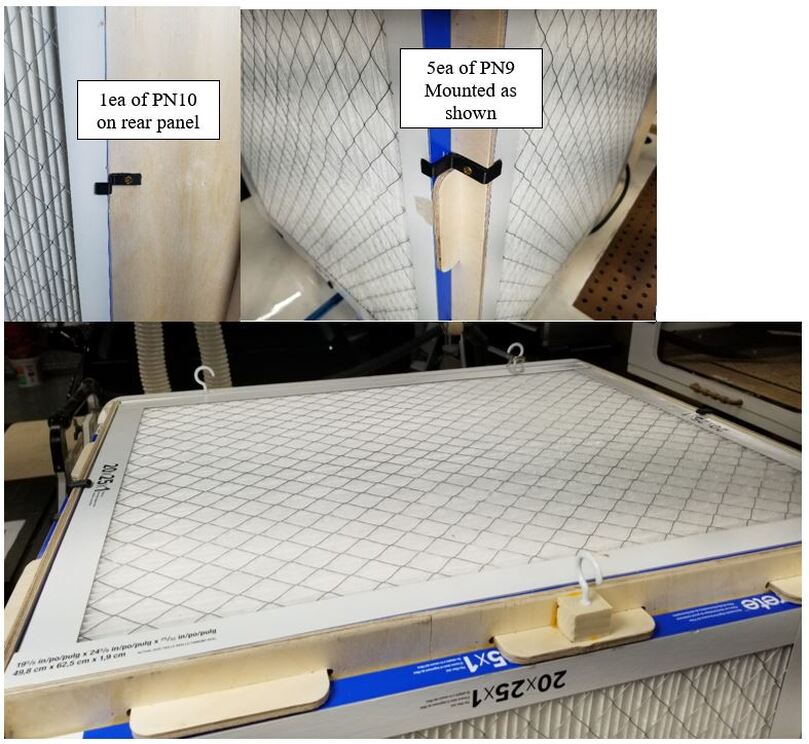
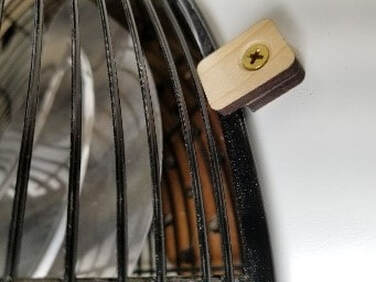
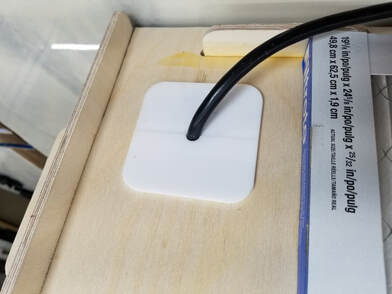
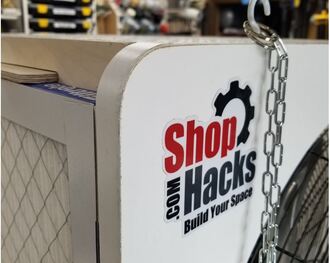
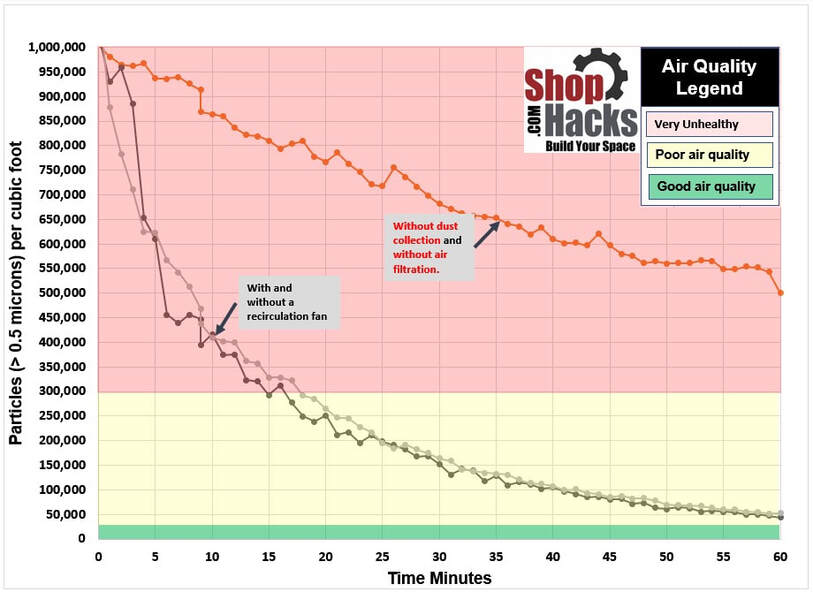
When you are finished your parts should look something like this… 5. Next, dry fit all of the parts to ensure they fit together as required. Don’t worry about gaps here or there. Note: Be careful to place the Rear Panel in the orientation shown relative to the speed control cutout on the Front Panel. This will allow proper placement of the power cord through the Rear Panel. Gaps will be filled with caulk from the inside in a later step. The assembly should look something like ,the following photo… Once you are happy with the dry fit it is helpful but not necessary to pin nail panels in place after you glue and reassemble them. I just pin nailed everything together dry then added glue along the inside joints after it was assembled. This provides more than enough strength to hold the assembly together. I bought a Metabo (formerly Hitachi) pin nailer for this project. It came highly recommended on by a lot of people in the Shop Hacks Facebook Group and I’m super pleased with how it performs. It sets the pins at the right depth regardless of the material type that I’ve used it on. Here’s an affiliate link to the pin nailer the group recommended and that I used… https://amzn.to/31X1qzD Apply construction adhesive along the slots on the back side of the Front Panel (PN3) then clamp it to the frame. Next, insert the fan through the hole in the Front Plate from the back side and install the 4 Fan Clips (PN13) using 4 #6x5/8” flat head wood screws (PN15). It helps to predrill the holes for the clips before installing the screws. If you used melamine, sand or chip off the area that will be under the Speed Control Cover (PN8). This will give something for the glue to adhere to when you attach it. Slip the fan speed controller through the hole in the Front Panel and install the bolt that came with it to secure it to the Front Panel. Use glue or construction adhesive to attach the Speed Control Cover to the Front Panel over the fan speed control assembly. Place the plug through the hole drilled in the Rear Panel (PN6) then attach the Cord Cover (PN7) with glue or construction adhesive to seal up the hole. I cut the Cord Cover into two pieces to attach it. If you use thin plastic or a flexible material you can just cut a single slit from the hole to the outside. I added a zip tie to the cord to act as a strain relief. Sand down any sharp edges that could damage the cord. Apply caulk over all of the seams and any areas where unfiltered air might enter the housing. You want all of the air to be forced through the filters to get the maximum filtration efficiency. Now you can install the Filters (PN2). They should be a snug fit if your dimensions are just right but you can add small blocks or press in small wedges to hold them in place if they are loose. You should be able to use these filters for years before they need to be replaced so you don’t need install a quick release mechanism unless you just prefer to do so. If you purchased the Shop Hacks hardware kit for this build you can install the optional Filter Clips (PN9 5ea and PN10 1 ea), Hanger Block (PN11) and Hooks (PN12). PN10 attaches to the rear panel only. Iron-on edge banding adds a finishing touch but is certainly optional. Don’t forget to add the remote-control power switch with timer functions https://amzn.to/2ZsvcyA . This will allow you to turn the system on when you need it and leave it running for 30 minutes to 4 hours after you leave your shop to make sure the fine dust is removed before it settles all over your tools and projects. Does positioning or orientation matter? I ran a test with a smaller air filtration system to see if adding an extra fan in the shop to circulate more air would make any difference in terms of the effectiveness of the air filtration system. As you can see from the figure below, adding a recirculation fan in the shop made no measurable difference. The finest and most dangerous particles act more like gasses and disperse evenly throughout the entire space. This means that as long as your system is placed in the same room as where you are creating the dust the placement and orientation won’t matter. You can place it under a bench or in a loft or wherever you want. However, temperature differences between the floor and 8’ up can vary as much as 20F so the placement of your system may matter in terms of how hot your shop feels. If you are in a very hot climate then it would be best to draw the air into the system as low as practical. If you live in a very cold climate then try to draw air from up high but try to not allow the air cause much circulation where you work or it will feel like a constant cold breeze.
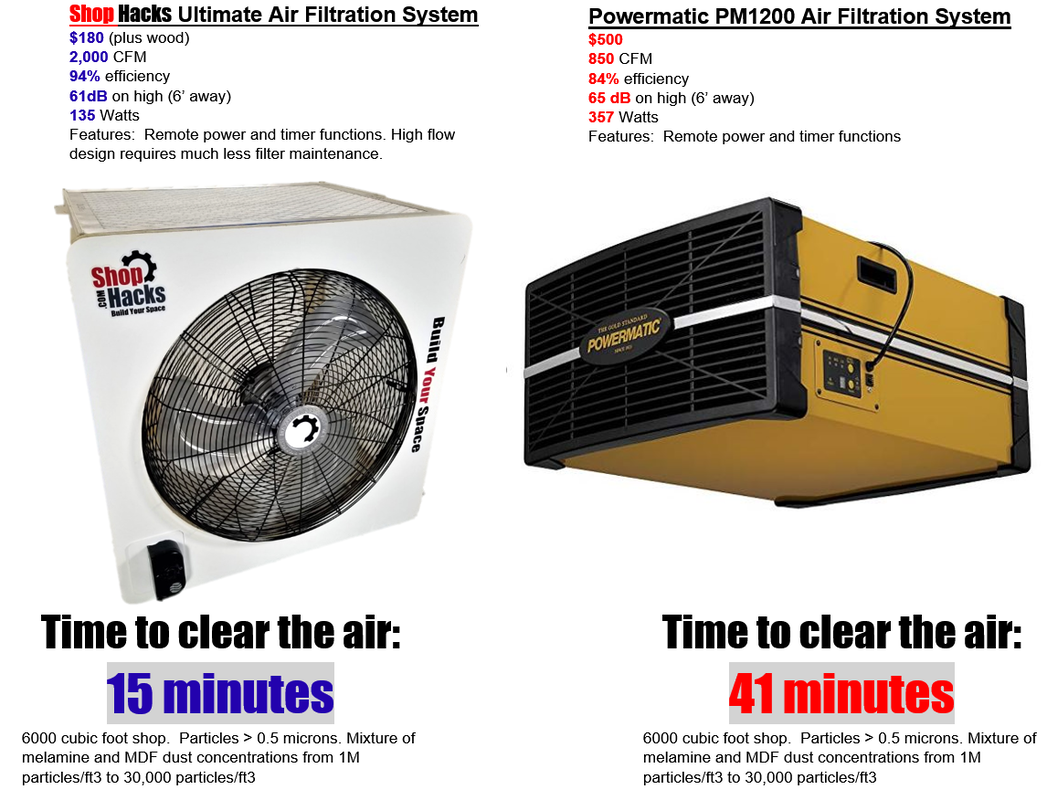
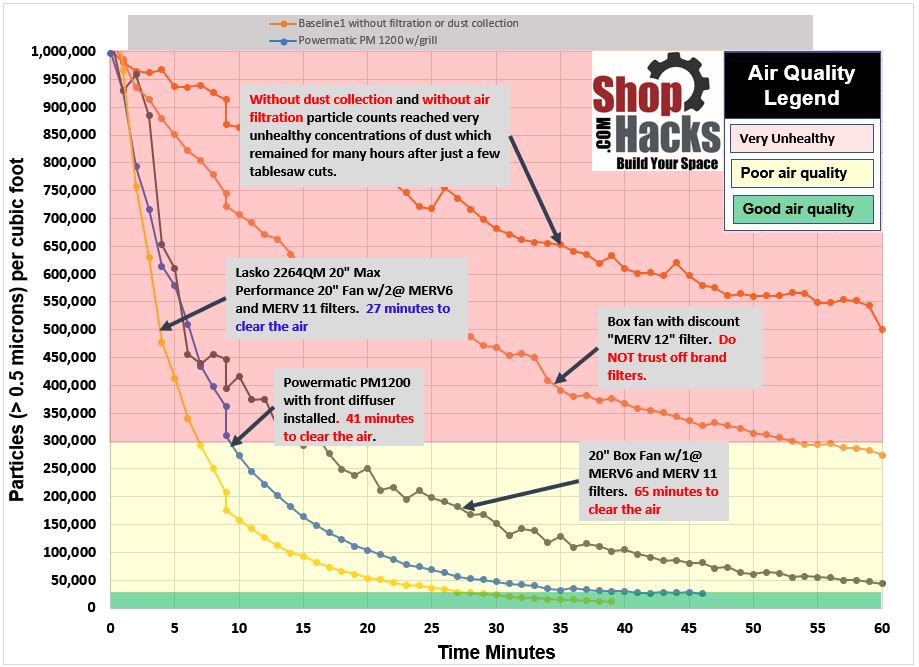
I don’t have any long term tests on the filters that I recommend for this system, however, I do have a similar system with similar filters that has been running for 3 years now 24/7. I’ve swept the filters a few times but they are caked with dust and still perform very well. They are still 80% efficient at removing particles 0.5 microns and larger and the flow rate hasn’t dropped noticeably. How many filters do you need to use? This system will perform better than the Powermatic PM1200 even if you only install one filter. However, over time the flow rate will drop faster than the PM1200 because the filter area is lower. With two filters you can go longer between cleaning the filters. With five filters you should be able to use it indefinitely without having to clean the filters. I don’t have any tests to see how it performs under heavy dust conditions over long periods so I can’t make any promises but I am confident that it will always outperform the PM1200 system when used under the same conditions. I hope you enjoy your Shop Hacks Ultimate DIY Air Filtration System! It will be a great add to your shop and your lungs and heart will thank you for many years to come. Several weeks ago I presented the test results from tests of 10 different air filtration systems. The results were amazing and a $100 DIY system beat the $500 Powermatic PM1200 air filtration system by a pretty wide margin. You can read that article HERE. Below is a summary of some of the performance results from that article. Particle counts were logged using a laser particle counter. All tests were performed by cutting about 12 ft of ½” MDF and 12 ft of ¾” melamine on a table saw with the blade elevated 2” above the stock (to create more dust). For reference, the green band at the bottom of the graph is where you want your shop air to be for a healthy environment. Anything above that band is unhealthy. I learned a great deal during the air filtration system testing and I'll distill the most important findings in this article. I learned enough to design a system that you can build yourself that will outperform the equivalent of two $500 Powermatic systems! Next week I'll present the Shop Hacks Ultimate Air Filtration System in a "How-To" article. This article is laid out as follows:
How many filters are ideal and why? The surface area of your filtration material matters. It matters a lot. Each time you double the filter material area you cut the flow resistance at any given flow rate down by 4x. If you increase the filter area by 4x you decrease the resistance 16x. Increasing the filter area by 10x decreases the resistance by 100x. You get the point... put mathematically, the flow resistance at any flow rate decreases as the square of the filter area. What does this mean in practical terms? For a 20" box fan the flow using 1, 2 and 4 @ 20"x20"x1" new (clean) filters is...
For the Lasko High Velocity Fan
As you can see, the benefits of adding more filters drops off after two filters. However, dirty filter will have about 2x the resistance of a clean filter. This means
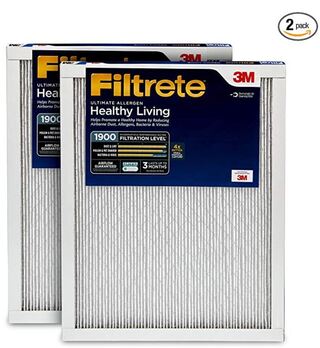
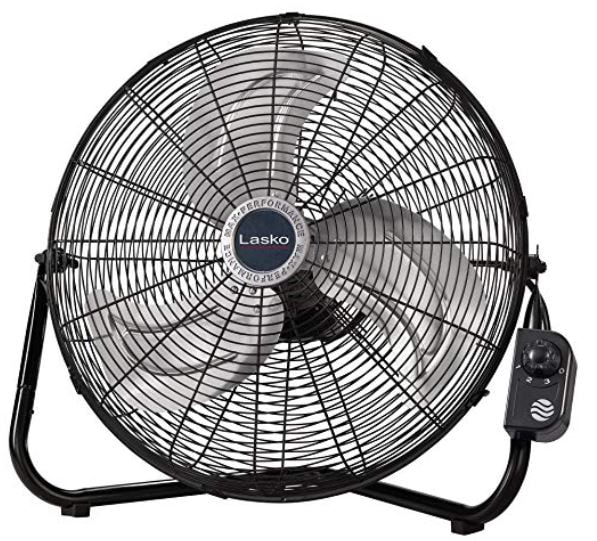
So, a 4 filter system with dirty filters will perform 35% better than a 2 filter system with dirty filters. I have a 3 year old, 4 filter system in my shop and I've only swept the filters a few times and it still performs very well. It is nearly a no-maintenance system. For this reason, the Shop Hacks Ultimate Air Filtration System will be modular. You can use 2,3, 4 or 5 filters with it depending on your budget preferences. That will allow those who want to save some $$ to use just two filters and those who want the least amount of maintenance and the highest performance to use 3, 4 or 5 filters. What Fan and Filters Should You Buy? After running the Air Filtration Shootout Tests I realized that lower MERV ratings do not mean that filters will have lower resistance to flow. In fact, THIS filter, when clean, has a lower flow resistance than ANY filter I've tested, including cheap fiberglass filters. I found this test data to back up this notion... So, the stacked MERV 8 and MERV 11 filter configuration that I used in the Air Filtration System Shootout was both more restrictive and filtered fewer particles than a system using THIS filter alone. I'll link to the fan that I'll design the Shop Hacks Ultimate Air Filtration System around below also.
I look forward to presenting the Shop Hacks Ultimate Air Filtration System design and a link to the plans to you in next week's article. If you have any questions in the meantime, please leave them in the comments section below this article! I'll be happy to help you out.
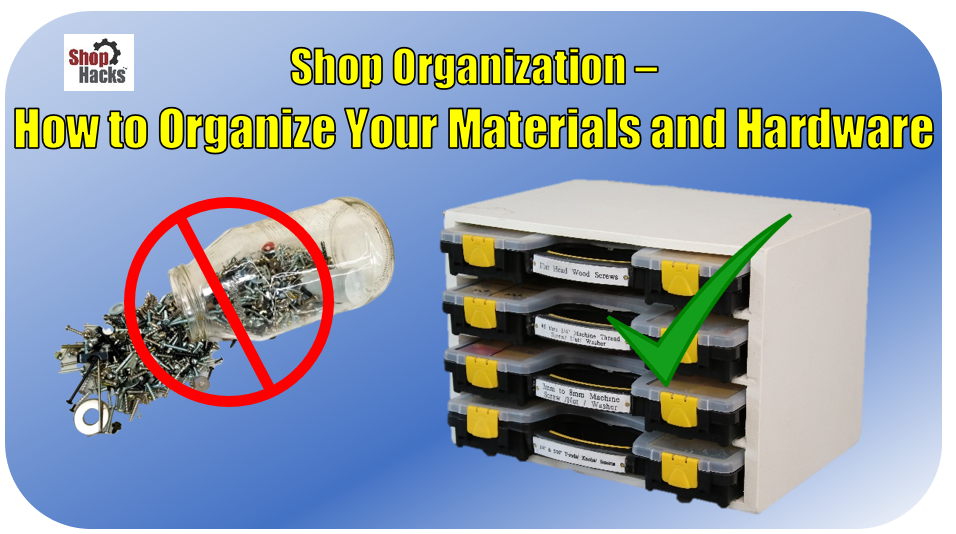
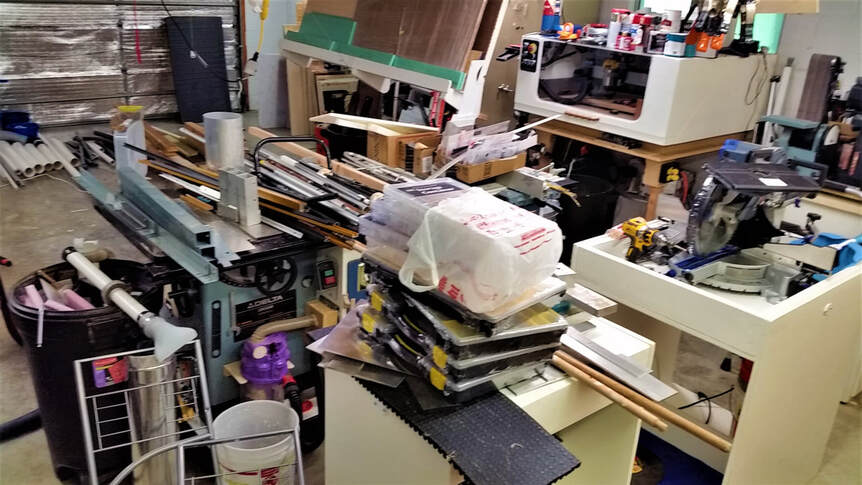
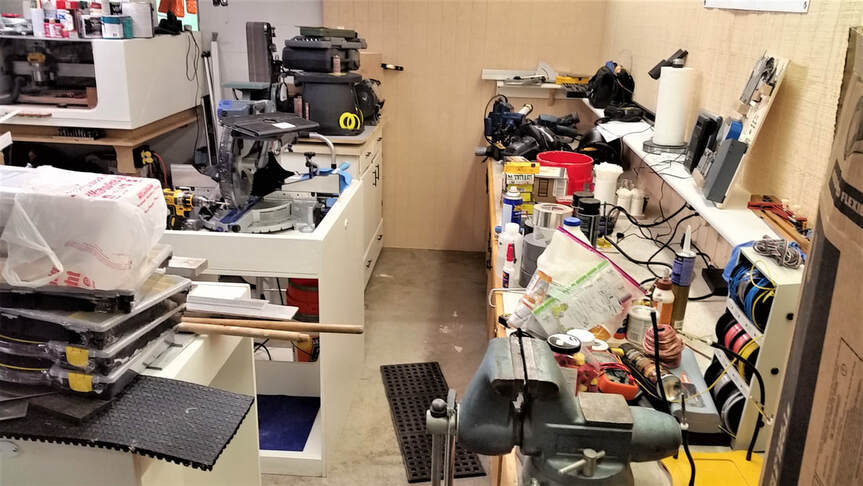
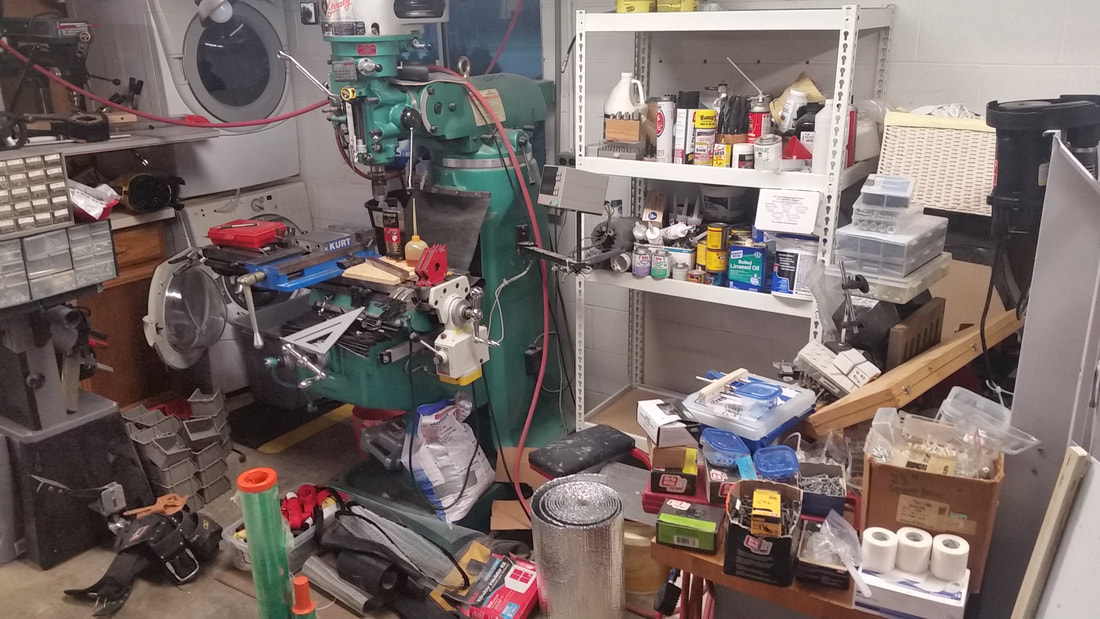
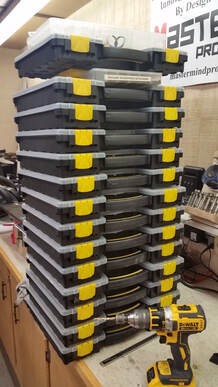
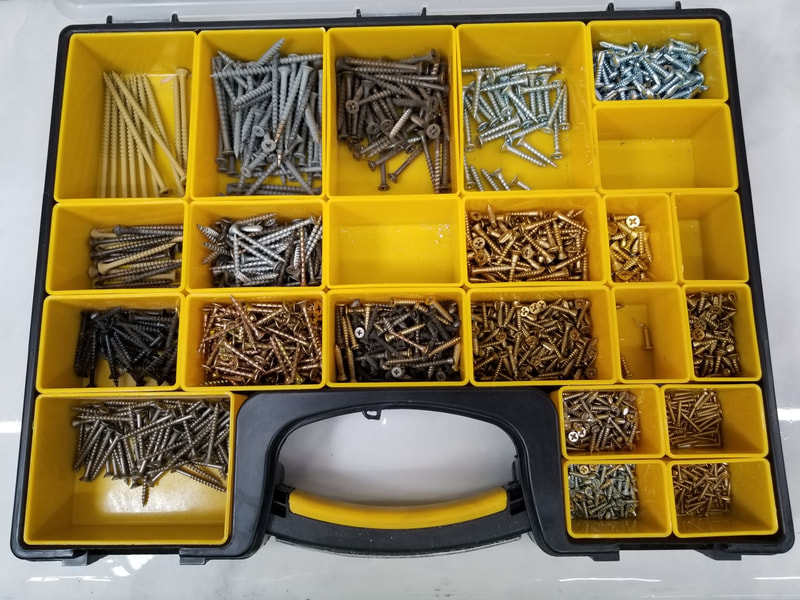
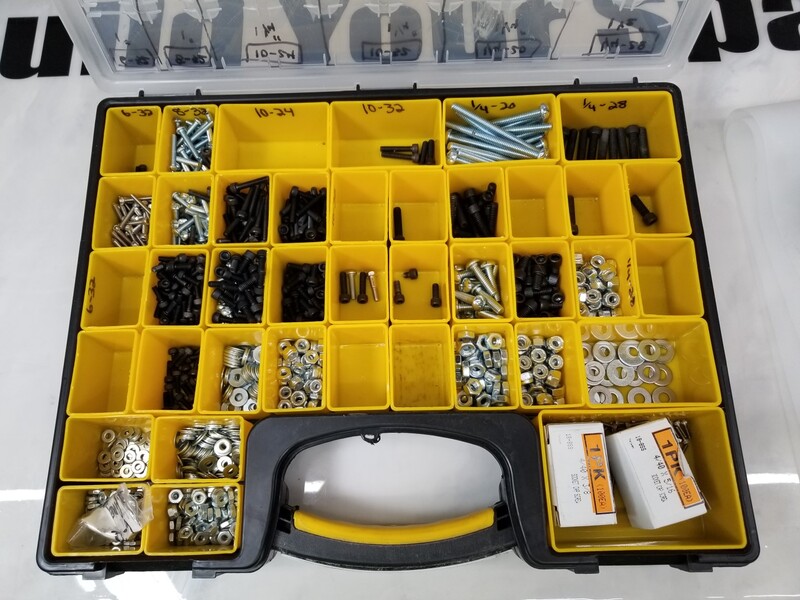
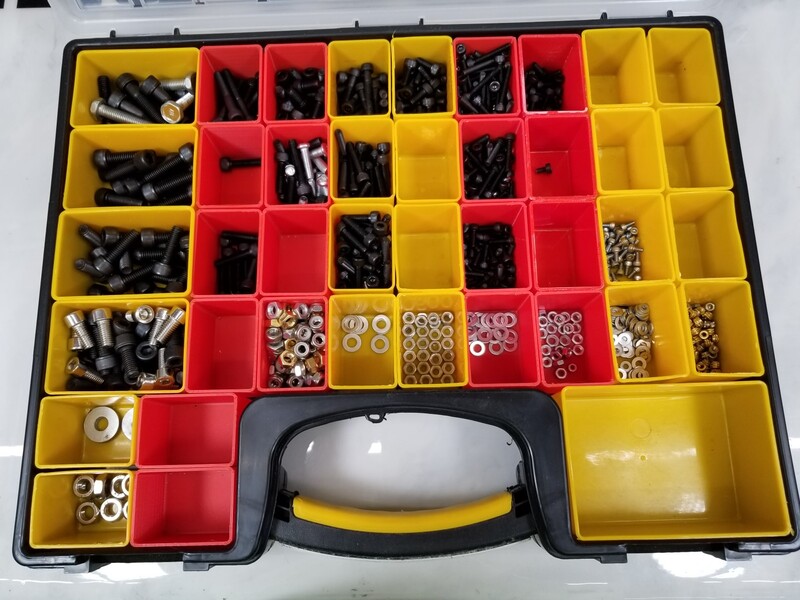
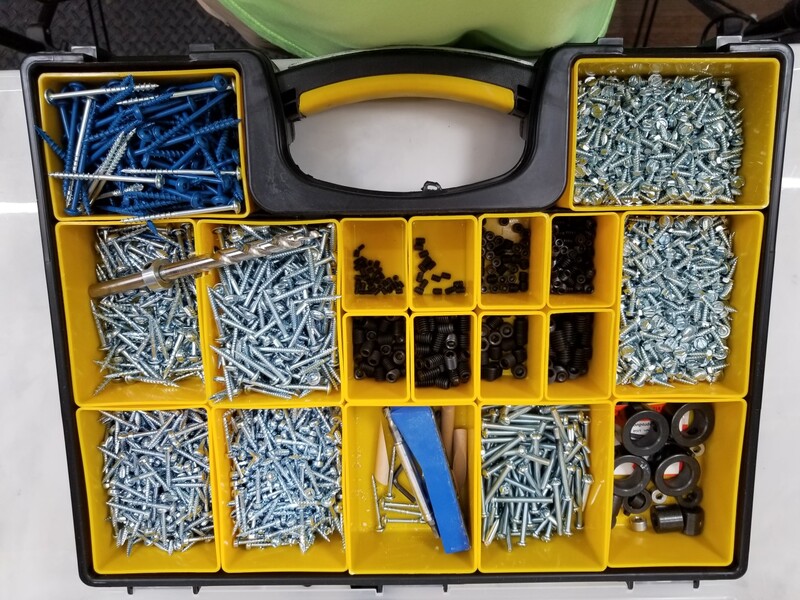
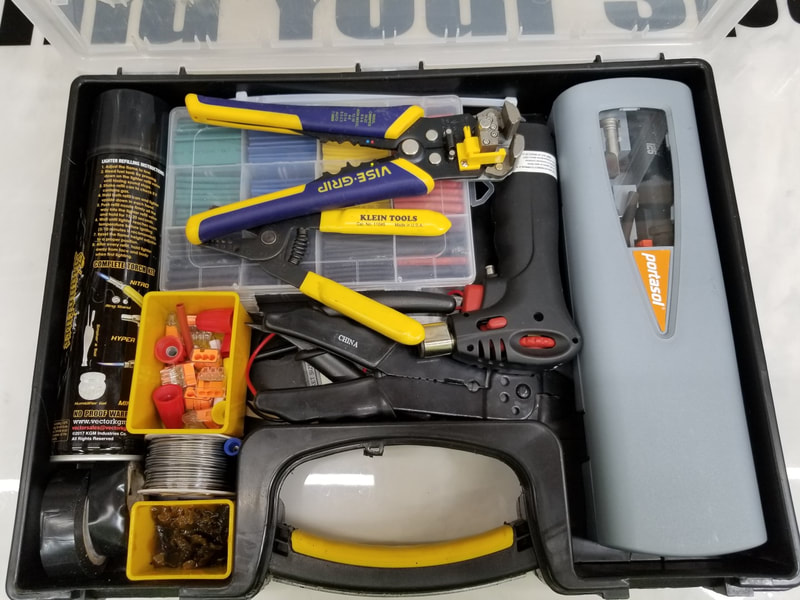
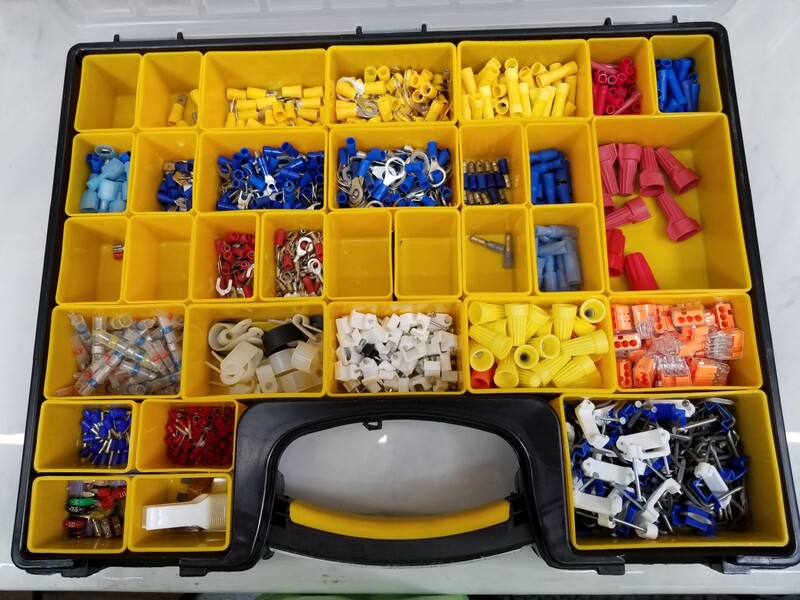
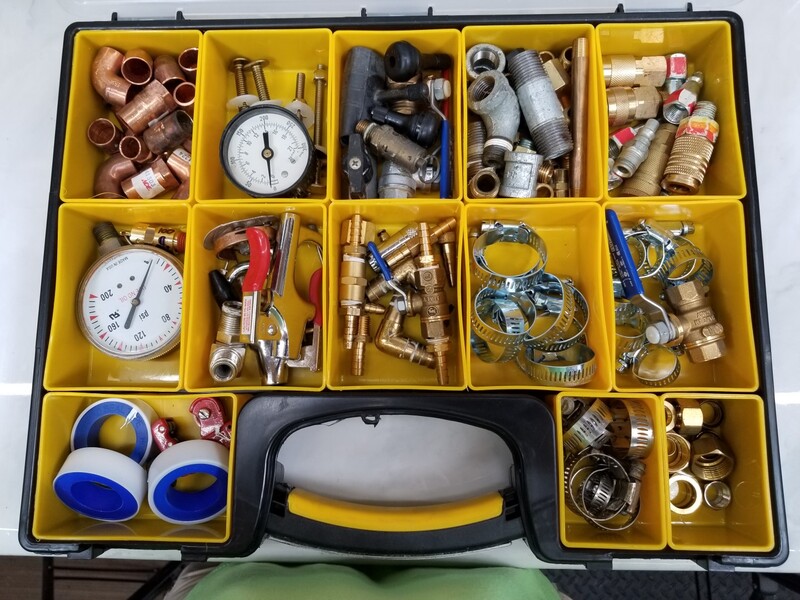
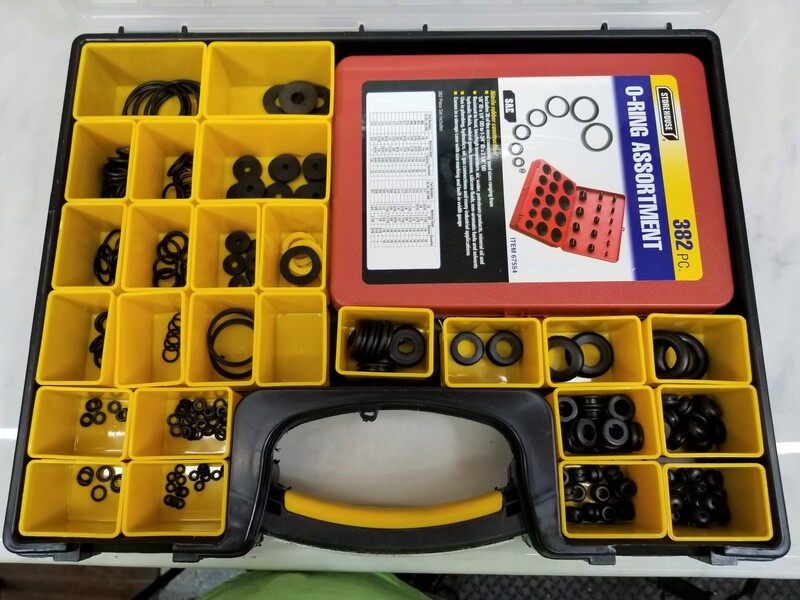
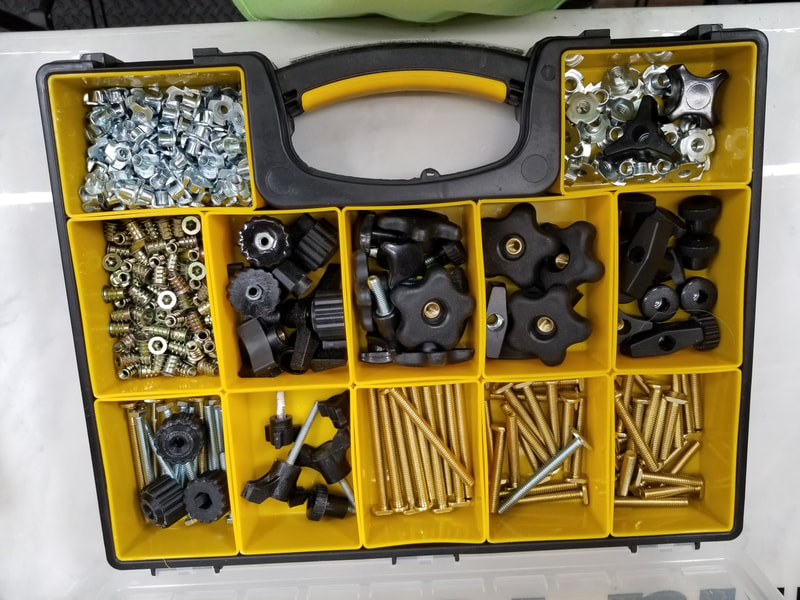
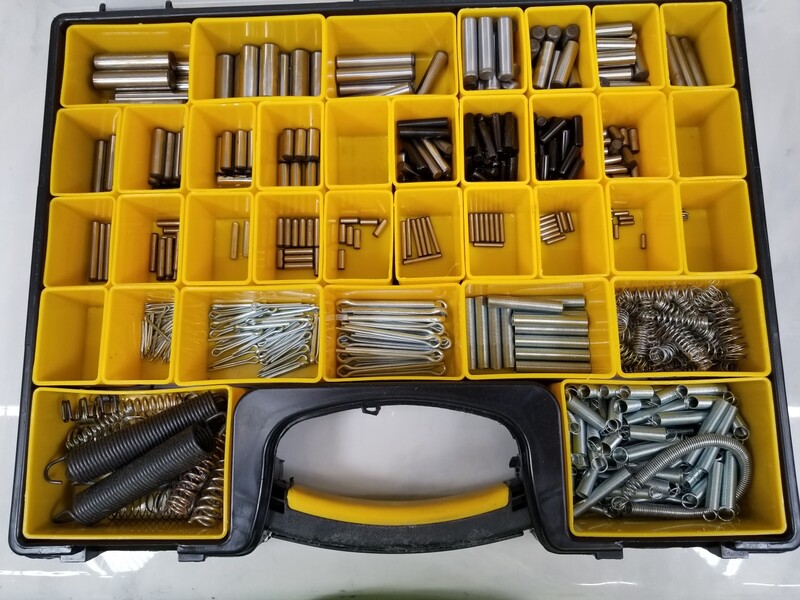
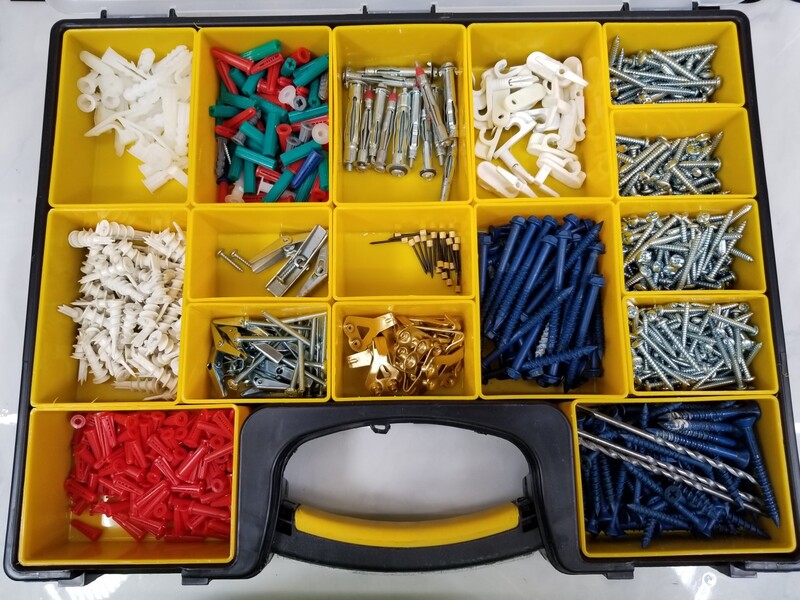
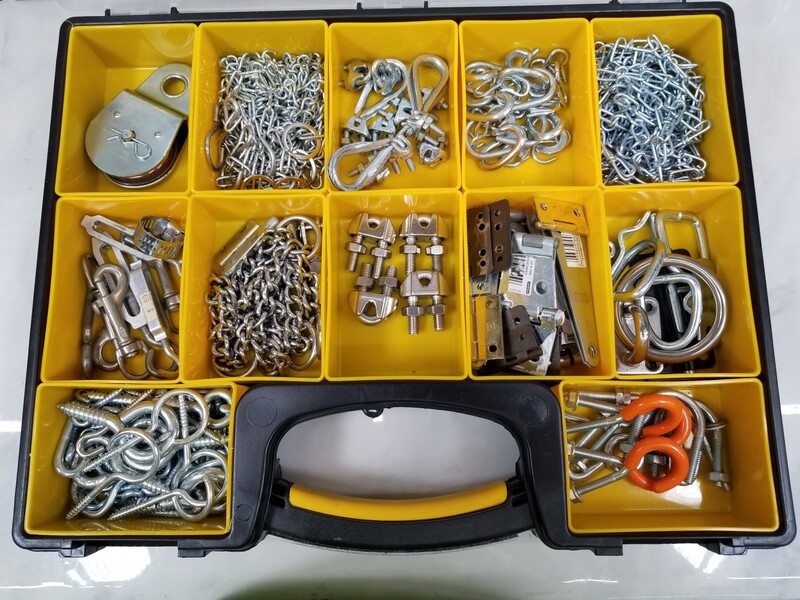
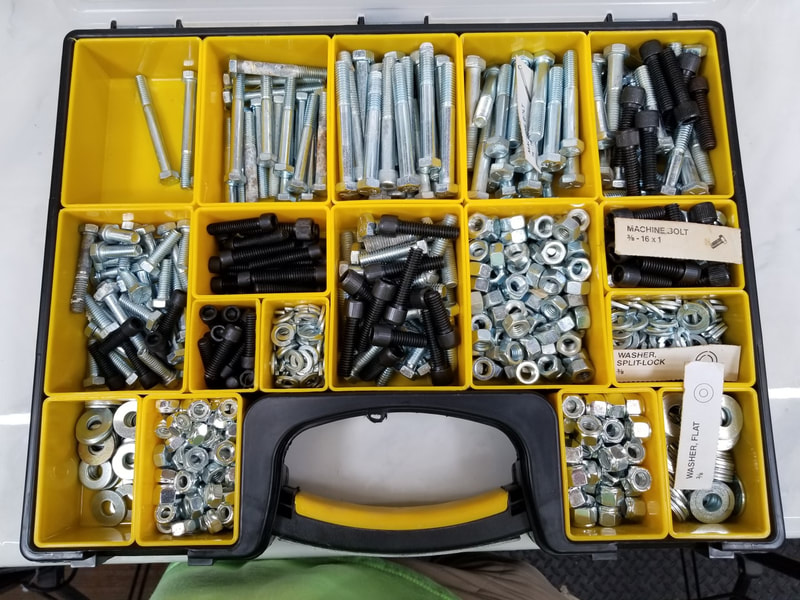
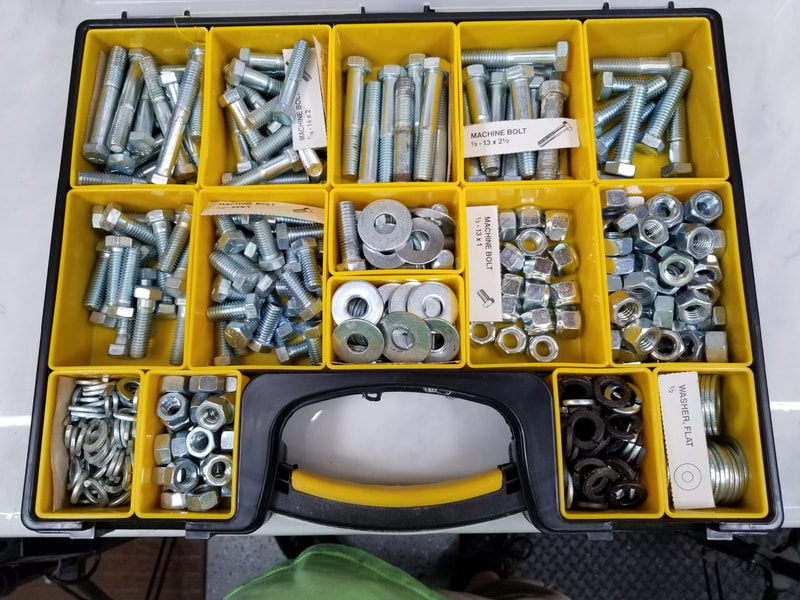
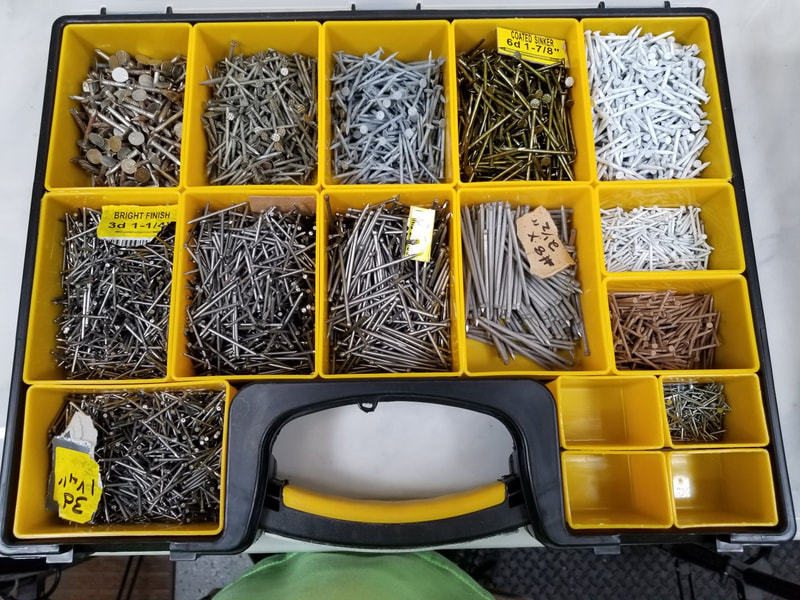
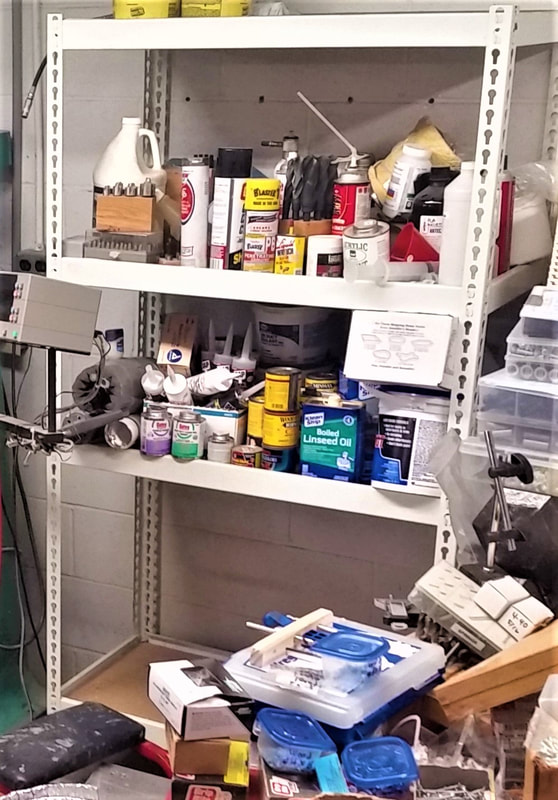
If you haven't subscribed to the Shop Hacks Newsletter then just click the link below to opt-in. This Newsletter comes out each Friday afternoon and contains tips that will help you Build Your Space! Workshop Organization - How to Organize Your Materials and Hardware Without Feeling Overwhelmed8/2/2019 If you aren't already subscribed and enjoy this type of content, you can subscribe to the weekly Shop Hacks Newsletter below. A sad but far too common shop related quote ... "I refuse to throw anything away, and never put anything back away. Eventually it gets so bad I don't even want to go in my shop." Does that sound familiar to you? We can all use some help organizing our workshop materials and hardware. Do you have a jar of screws that you just keep adding to thinking that one day you it will save your life? How about a scrap bin full of 20 years worth of off cuts that you are sure you will need one day? Have you ever started to organize that jar of screws or your many bins full of various hardware only to give up because there were just too many ways to sort them and it wasn't obvious at all which way you should choose? In today's article I'll show you how to organize common workshop materials and hardware. This article can help you get over the hump. I'll show you how I organized my hardware including pictures of several ways to store hardware and materials. Your workflow will likely dictate very different solutions than mine, but these ideas can be a starting point. Hopefully they will offer some extra encouragement to help you Build Your Space! The idea of getting organized is very exciting. The act of organizing is certainly not a fun task. Why would anyone go through the work needed to organize materials and hardware? Three years ago my shop was a disaster area. I reached a breaking point after tripping over some sheet goods for the thousandth time. They were stored in the path from the door to my main work area. The frustration of not changing finally exceeded the dread of making a commitment to change. I had no idea at the time how these changes would totally transform how much I enjoy my shop time. Check out the before and after pics below. These pictures will give you a feel for the difference a concerted effort can make and I hope they encourage you to take those first steps forward. You can do this too. I'll show you where to start and how to go about the decision making process and I'll share about the specific organizers that I use that transformed my shop. BEFORE: Piles of Materials EVERYWHERE BEFORE: Every Horizontal Surface is Covered up BEFORE: Paints, Solvents, Hardware in Disarray AFTER: Neatly Organized AFTER: FREEDOM!! Workbenches Free and Clear and my most used tools and materials are within arms reach All Materials and Hardware are in Labeled Locations and my shop stays like this all the time now that it's so easy to put everything away. Why Get Organized?? When I look at these 3 year old pictures of my shop, I realize that I've already forgotten how I worked for almost 30 years. I would NEVER consider working like that now that I've experienced a whole new level of workshop enjoyment. In the past my shop would get very disorganized. I would cover every horizontal surface with tools and materials again. Then, occasionally, I would spend a couple hours rearranging junk so it felt more organized (but nothing like it is now). I was always fighting for working space and wasting time. How much time does it cost to be disorganized? One of the most common sayings I hear all the time is, "My shop is a mess but I know where everything is.". That may be true but you are still wasting a lot of time if you are keeping unused items in your active work areas and if the items you use 80% of the time are not within arms reach. Think about how many times an hour you have to walk to get a tool or a piece of hardware. Let's just assume that you walk 10 ft to get a tool or some piece of hardware or material at least 15x per hour that you work in your shop. That's probably a low estimate for most of us. Assuming it takes 20 seconds to get what you are looking for that's close to 5 minutes per hour wasted on motion and hunting for things. Let's just say 10% for an even number. If you look at the photo above you will see that I have pared my tools and materials down so that the items I use 80% of the time are within arms reach. Compared to my previous setup I now get to spend 10% more time making, building and fixing things vs. cleaning, sorting and hunting. I spend around 2,000 hours a year in my workshop so that adds up to around 200 hours (5 full weeks) that I get to spend on projects vs wasting time hunting. Let's say you spend 10 hours a week in your shop. Using the same numbers as above... Organizing your tools and materials can allow you to spend over 50 more hours each year doing what you love vs. walking around, hunting and sorting! What would you make in your shop if you had an extra 50 hours per year to spend without taking time away from anything else? What Should You Do First? As I mentioned earlier I had several false starts when I tried to organize my shop. If you try to organize everything you will fail. Work on one work area at a time. The more organized I get the more I realize that less is best. This is why it is imperative that you only try to organize what you physically touch over 10 sessions or so in any particular work area. If you haven't touched tools, hardware or materials in that work area in the last 10 sessions in your shop then trust me, it needs to go into a storage area or out of your shop. Save room for the tools, materials and hardware that you use 80% of the time in each work area and mount them all within arms reach. I previously wrote an article about How to Organize Your Tools Without Feeling Overwhelmed. In that article I show you how to pare down the tools to increase your efficiency and buy back as much as a full week per year of extra project time without taking that time from anything else. Click on the link to get more details about how this principle makes everything about organizing your shop much easier and more efficient, including hardware and materials. Organizing Your Hardware The first organizing task that I completed was to organize my screws and other small hardware pieces. If you want to succeed you will have to make some uncomfortable decisions to get everything you don't touch on a regular basis out of your work areas. You got where you are with comfortable decisions. If you want to spend more time doing what you love and less time hunting and sorting then you will eventually have to do this anyway... empty your junk drawers, jars, etc... into the garbage. If you just can't bring yourself to do that then put them away in a storage area that doesn't use valuable space but get everything out of your work area to start with. Unless you have expensive hardware that you already have slated for a specific project you are better off starting with a clean slate. You can buy hardware relatively cheaply at Harbor Freight or Tractor Supply so don't hang on to your random assorted hardware. Put together hardware bins and organizers It is easier to show you what I did than to try to explain it. I'll show you what I ended up with for every organizer.
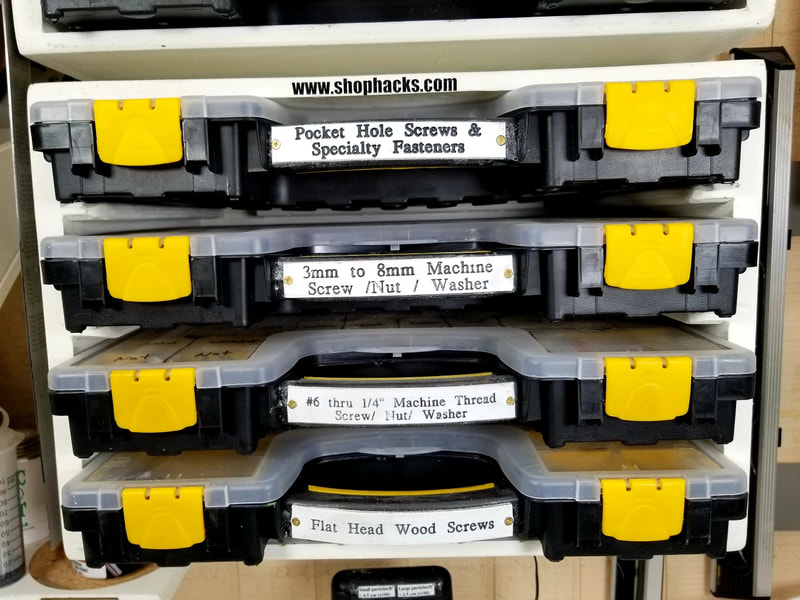
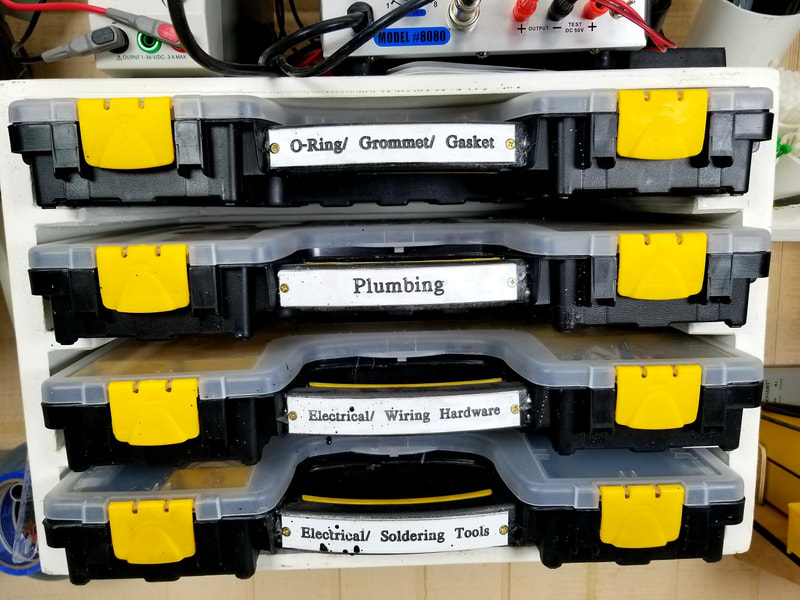
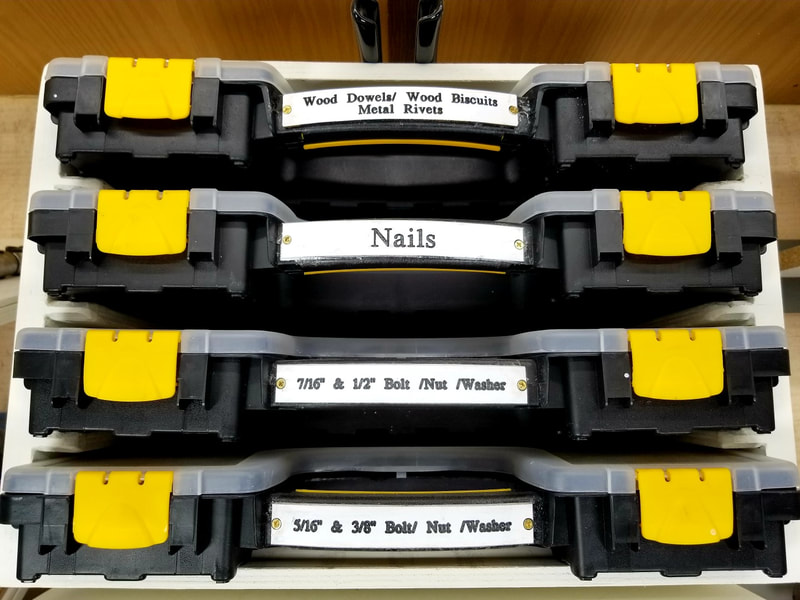
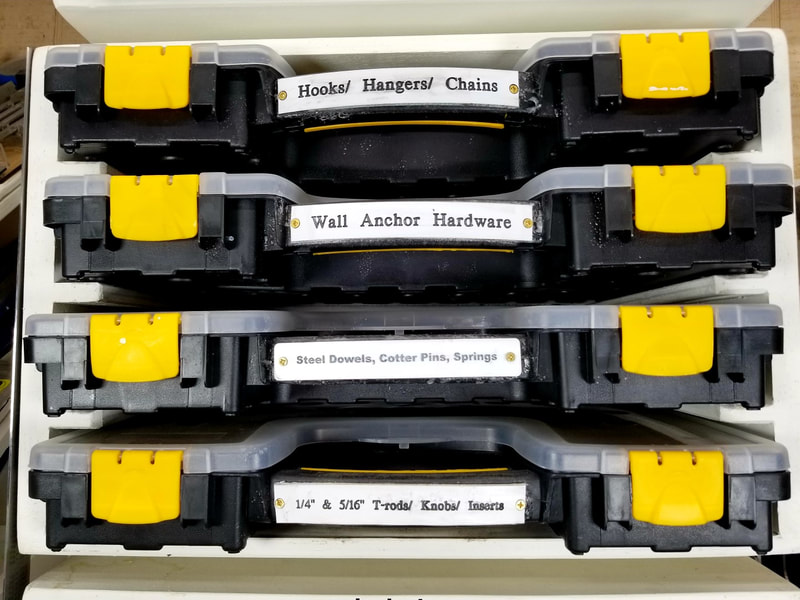
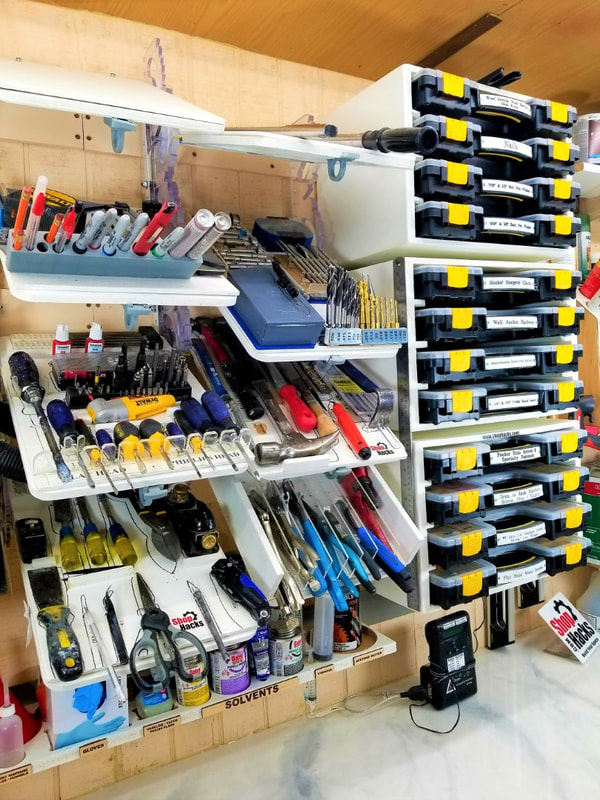
4. I labeled every bin and placed them with the ones I use the most frequently closest to me. Below are 4 sets of 4 organizers that I felt were worth keeping in my active work area within arms reach. I stored everything else away from my work area. Organizer bin labels I created: Bin #1
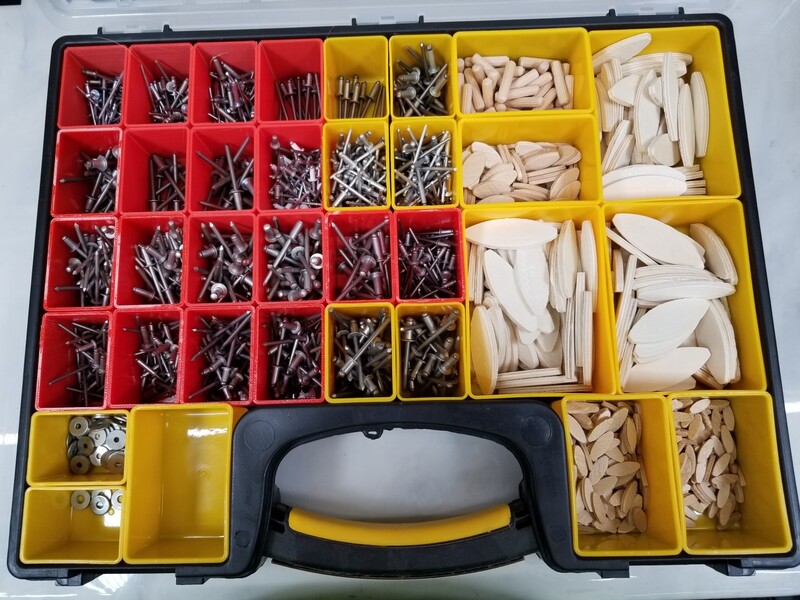
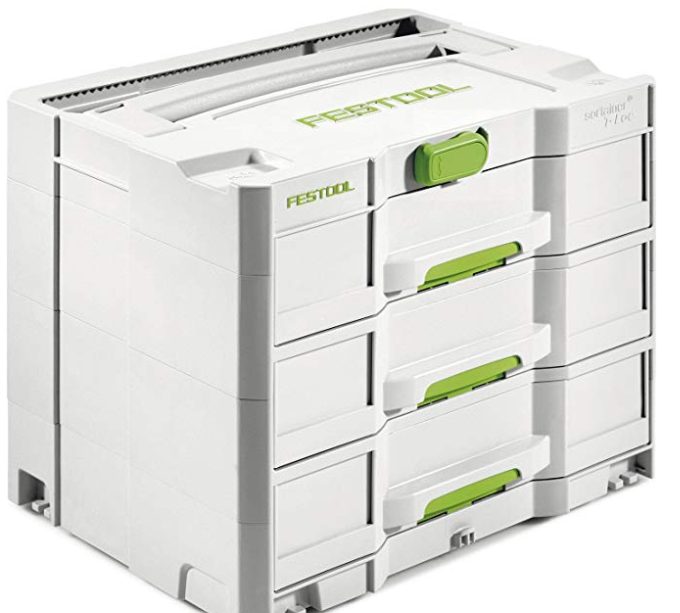
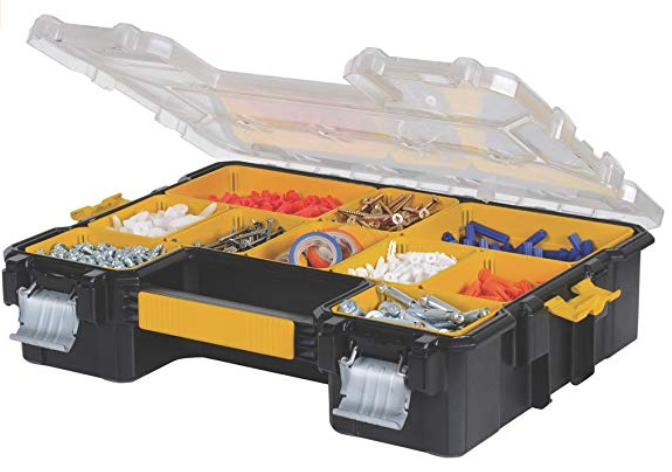
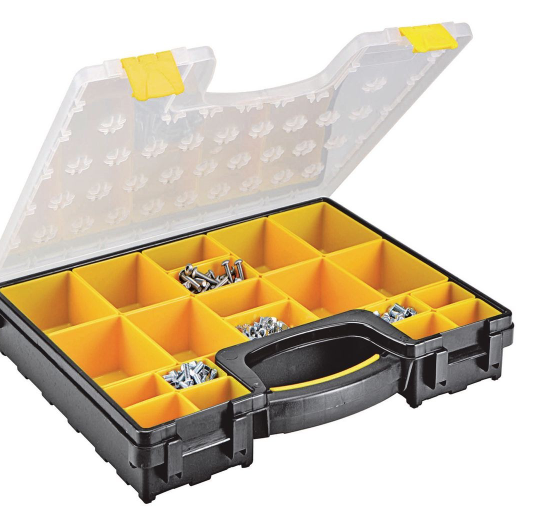
Pictures of the contents in each hardware organizer: I should reiterate that your setup will most likely look totally different than mine. I ended up using about half of these on a frequent basis so I could have saved some time and just put the rest in storage. It doesn't hurt to have to walk to a storage area for something you only use occasionally. However, it saves a lot of time to have everything you use frequently within arms reach. Organize only the items that you actually touch and store or purge the rest. I store refills for frequently used hardware in a storage area. I used the Harbor Freight hardware organizers. They have held up very well and I can recommend them for in shop use if you have a Harbor Freight store in your area. If you don't have a Harbor Freight store near you or if you want something more durable for rough use then you might be interested in one of the higher end sets listed below. Disclosure: The products listed are affiliate links. By using these links you won't pay any extra but Shop Hacks will receive a small commission on each purchase. Thank you for your support that enables me to continue creating these articles to help you Build Your Space! If money is no object then you might consider investing in the Festool Sortainer system
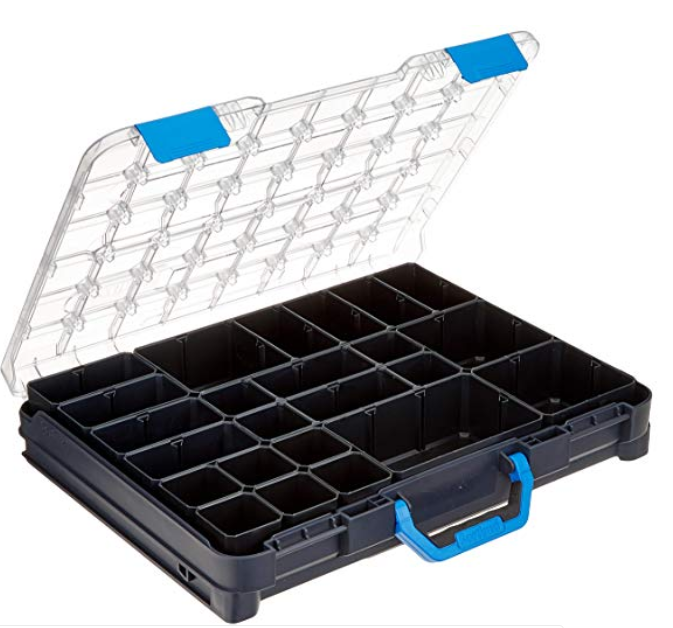
If you are content with a very good and durable system but don't want to spend 3x as much for it then the Sortimo T-BOXX G was highly recommended in the Shop Hacks Facebook group.
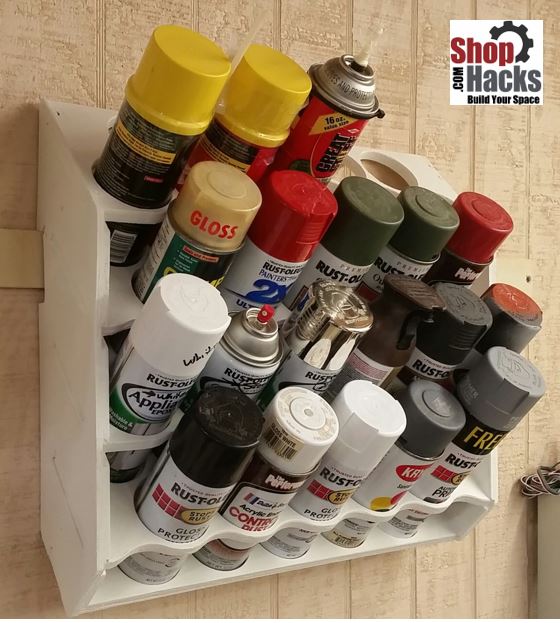
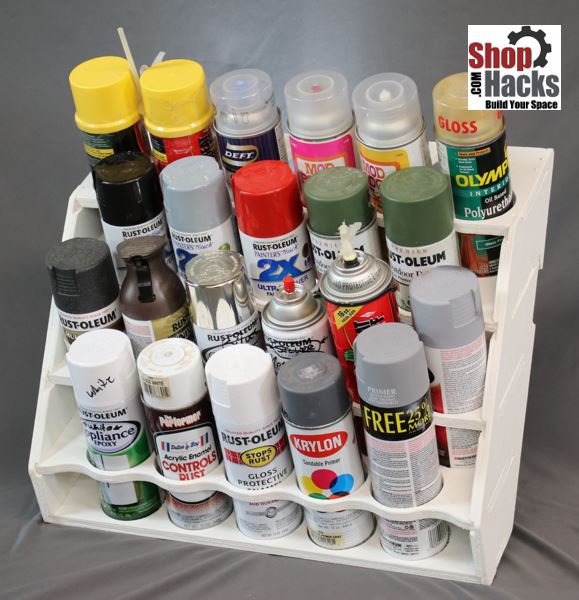
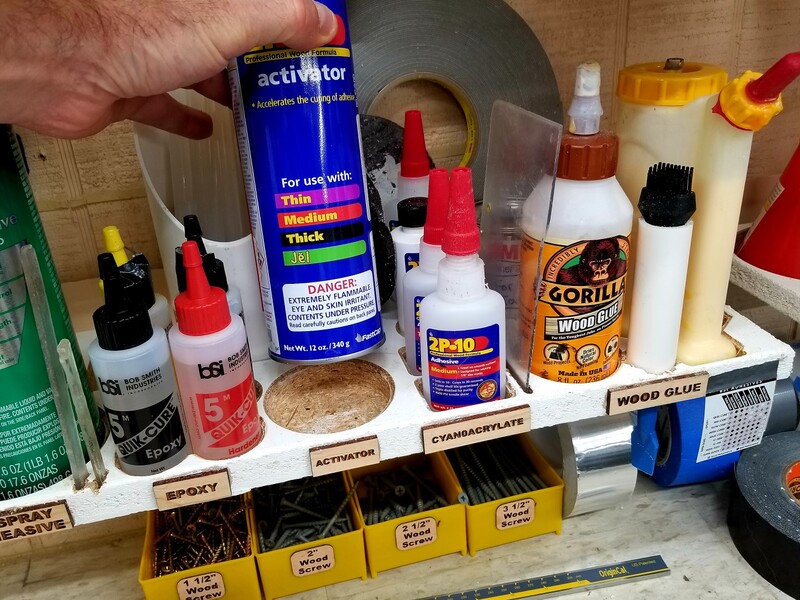
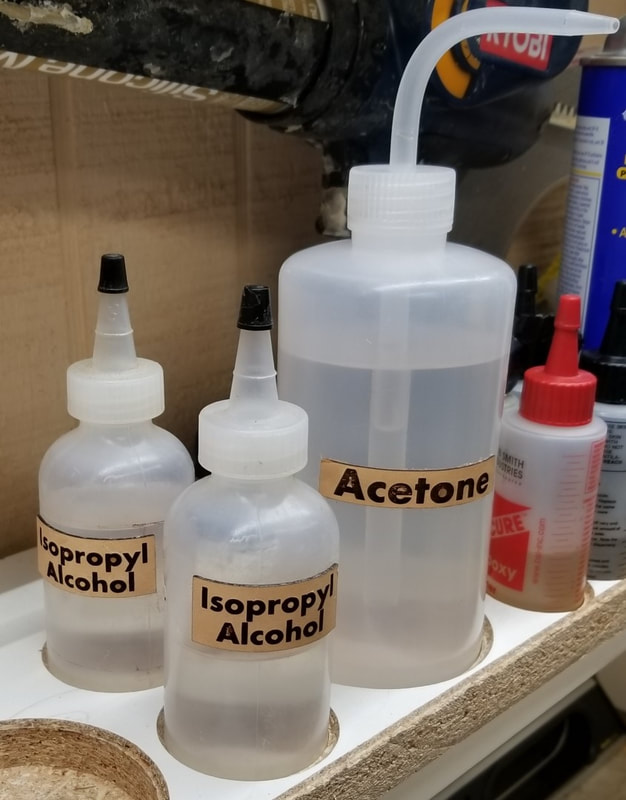
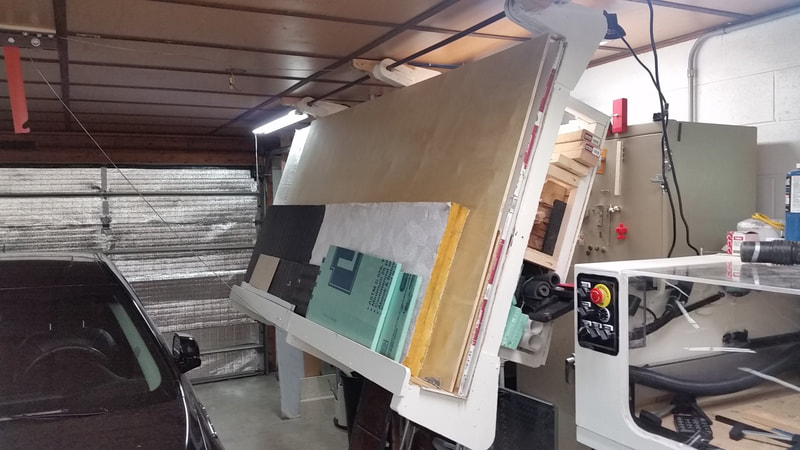
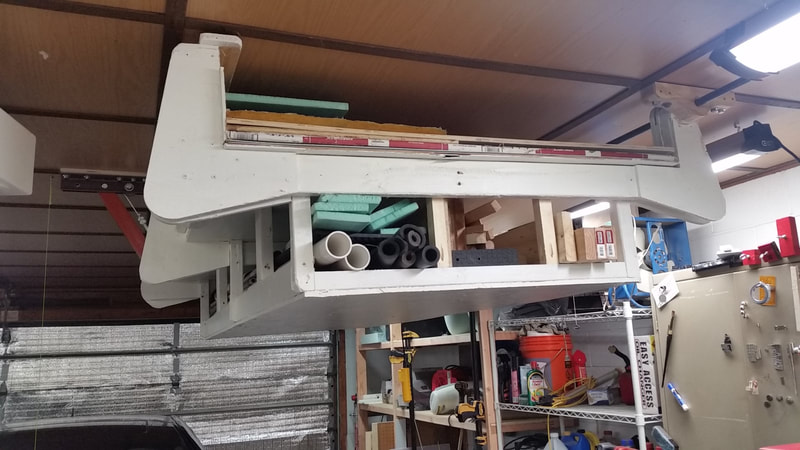
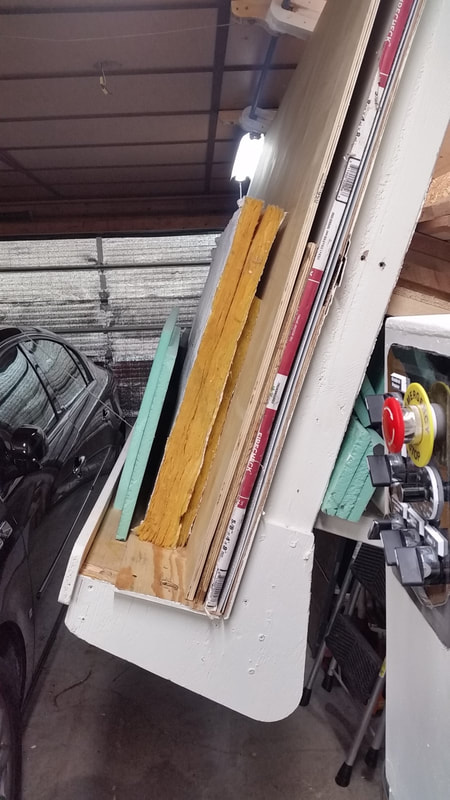
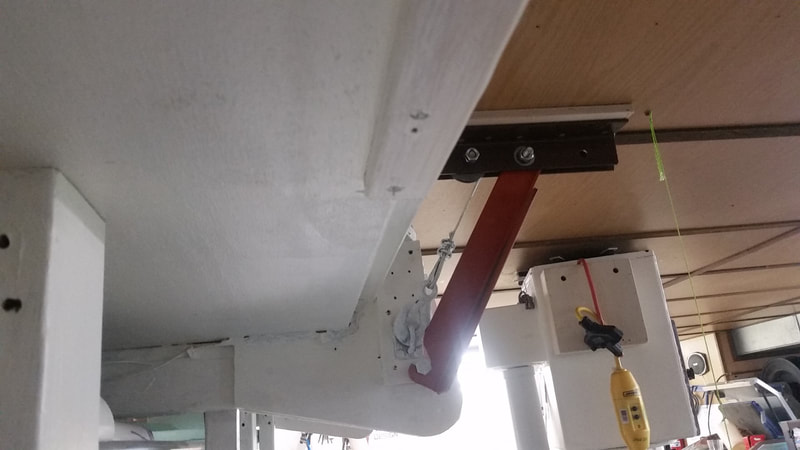
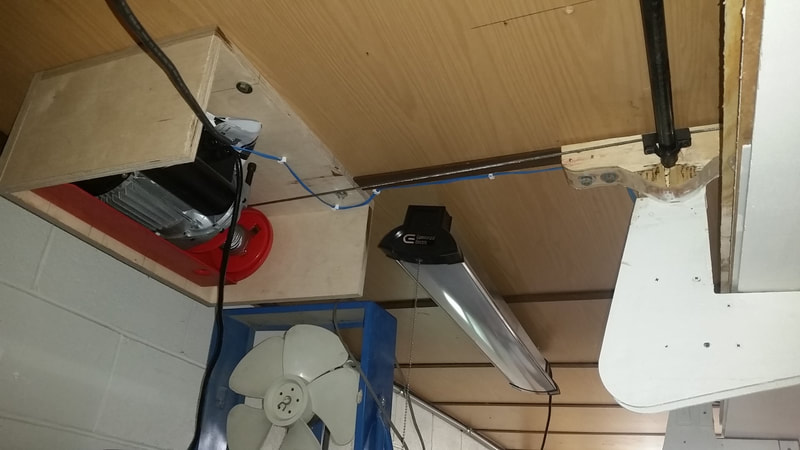
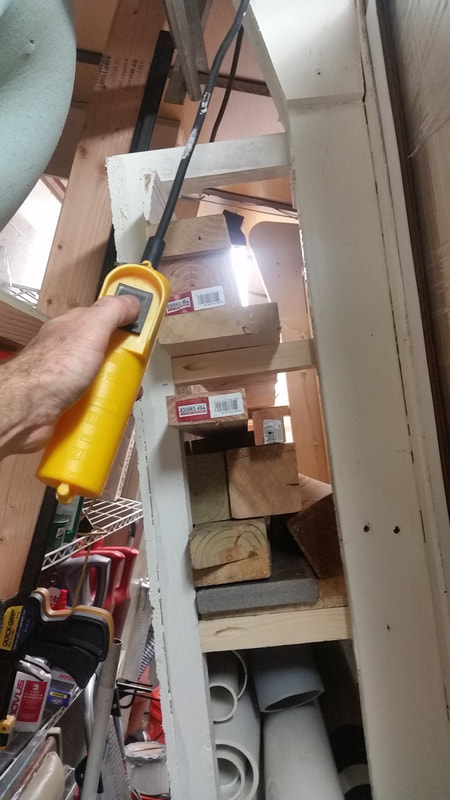
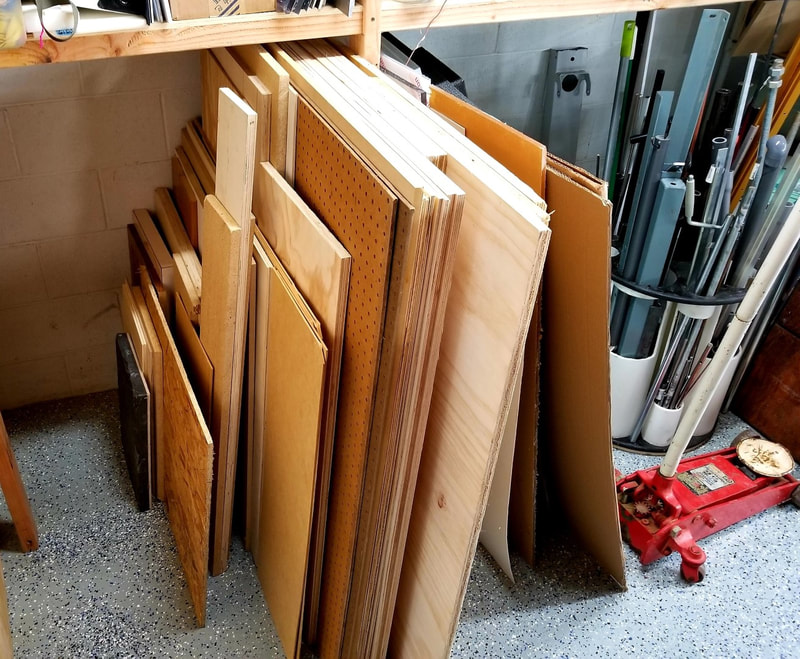
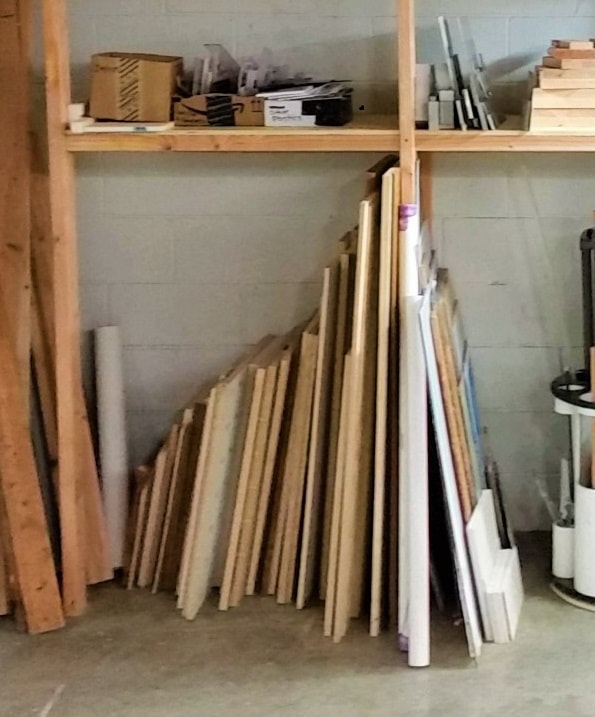
Spray Paint Can Storage... I used to keep my spray cans in an old refrigerator but I found that I didn't like having to bend over and move the cans in front to see what I had in stock behind them. I designed the rack to pack the cans as closely together as I could. It hangs on a French cleat which makes it easy to relocate. I've relocated it a couple times already. Some people would prefer to store volatile compounds in a flame rated cabinet and I can see their point, but I prefer this method. Adhesives and Solvent Storage... I originally stored my paints, adhesives and solvents on shelves. I had to walk half way across the shop just to use them. I paid attention to which ones I used the most often and made simple routed pockets in melamine boards for them. Every location is labeled so I know what is missing. Without labels most of these organizing systems fall apart so don't skip this step. This may seem like an inconsequential change but it has saved me many hours in just a couple of years now. I haven't had to change any of the boards to accommodate different shaped containers yet but, if I do, I can easily modify the CNC file and cut another one out in 10 minutes. Before and after pics below... Sheet Goods Storage... Unfortunately I don't have any pictures to show the "Before" chaos in my shop. I tried three different methods to store my sheet goods.
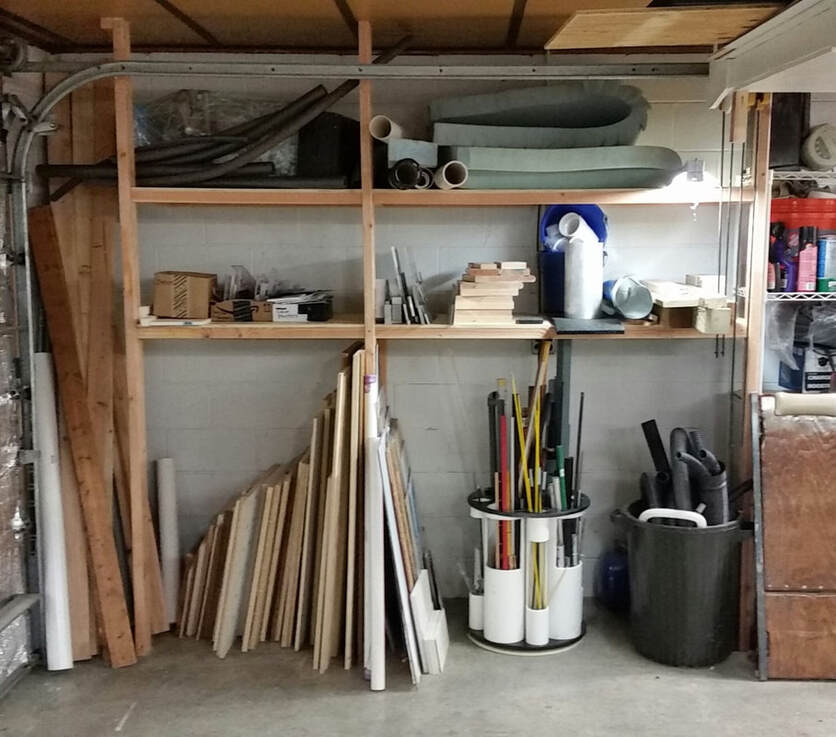
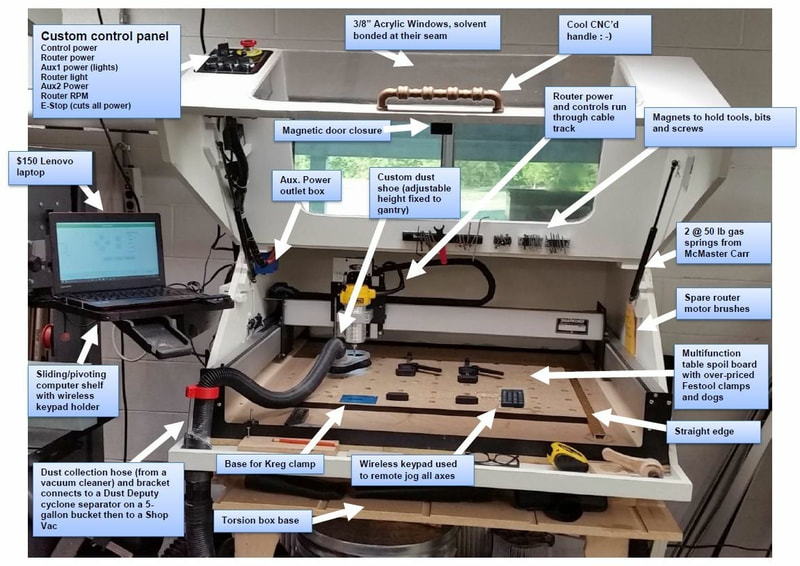
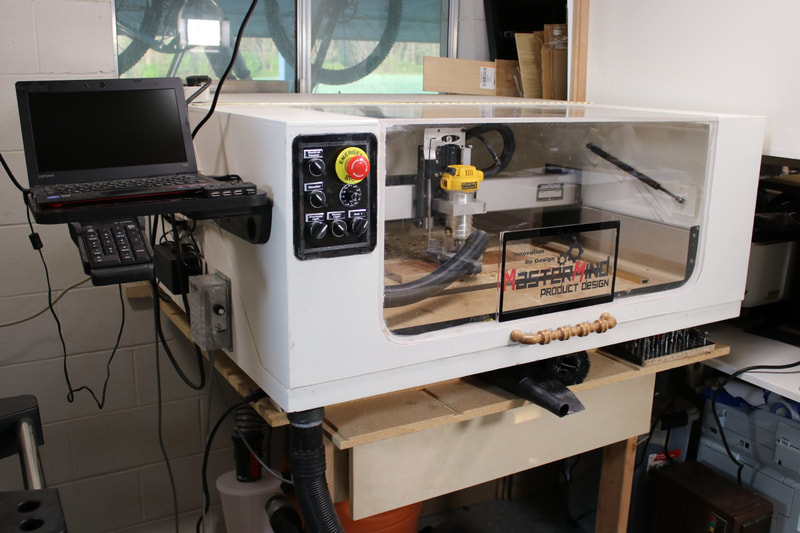
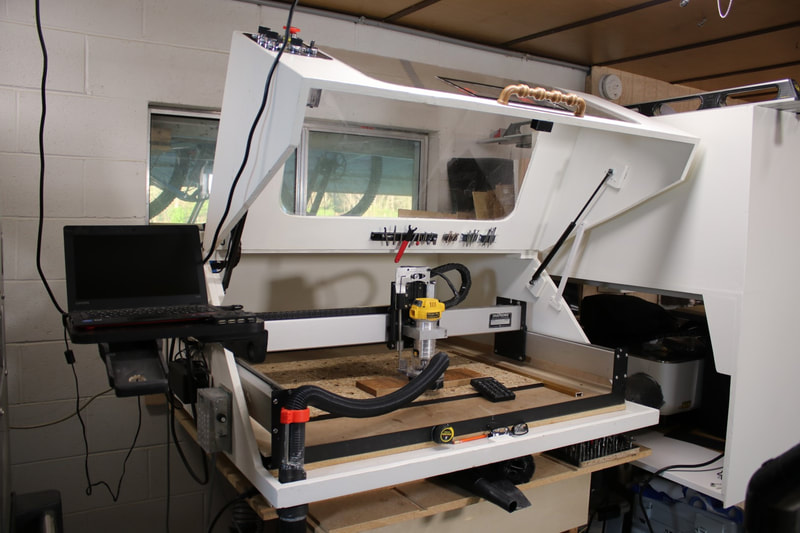
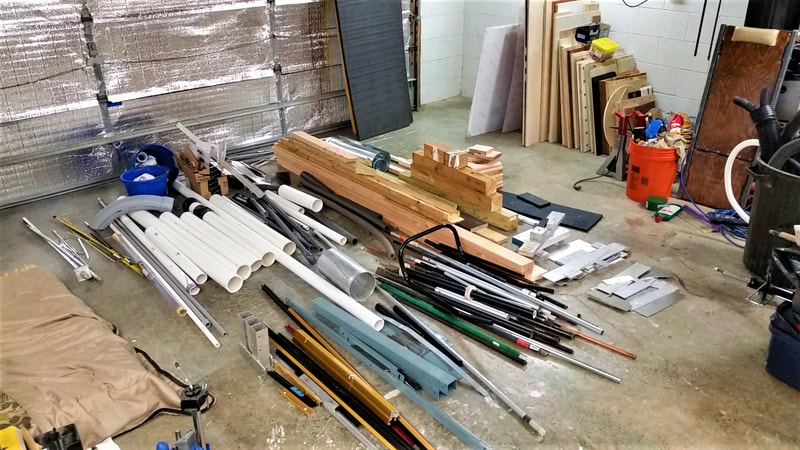
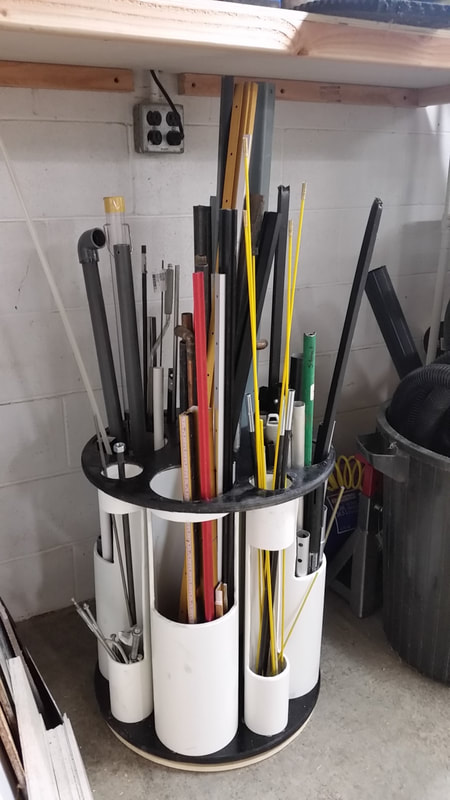
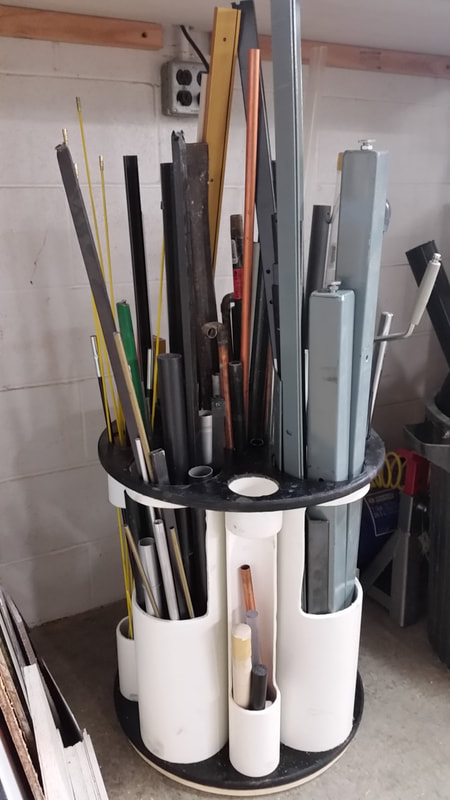
I didn't like having to lower the rack and move things just to get to something in the rear. I found that I often would forget about stock that was stored here because it wasn't easy to see everything at a glance. Cool innovation but unfortunately it wasn't very practical for my work flow. The sheet goods storage method I like the best so far... Sometimes the simplest way ends up being the best way. I can easily pull out any sheet I want without moving or lifting around another sheet and I can easily see everything I have available to use with a single glance. CNC Router Work Area... I use my CNC router a lot so I didn't want to have to walk to another area to get anything that I used for CNC tasks. Except for a drill and driver I have everything I need within arms reach of my CNC. I almost always screw my stock to the waste board so I have various length screws mounted on magnets in the lid. Various fixtures and hardware are stored in a drawer just below the CNC. Bars, Rods and Tubing Storage... I don't use bars, rods and tubing very frequently but just frequently enough to justify storing them in my shop. Below are some before and after pictures. The organizer is on a lazy Susan bearing so I can rotate it to access any of the stock I need without reaching around anything. I have quite a few other organizing systems in place but this should get you started with plenty of ideas. Start with one small set of hardware and work your way out. I can guarantee you that you will enjoy working in your shop more than ever once you follow the simple methods that I've laid out in this article as well as in the How to Organize Your Tools Without Feeling Overwhelmed article.
If you enjoyed this article and want to receive weekly tips like this via email, you can subscribe to the the Shop Hacks Newsletter . If you want to see new shop hacks every day then join the Shop Hacks Facebook group! |
Categories
All
NewsletterShop Hacks exists to help you Build Your Space! Archives |
- Home
-
Improve your Workspace
-
Dust Collection and Air Filtration
>
- Table Saw Dust Collection
- All About Cyclone Separators
- Dust Deputy and Dustopper Review and Comprehensive Scientific Testing
- Dust Sheriff Cyclone Separator
- Dust Collection System Options
- Air Filtration System Options
- Why clean air matters
- Is your shop air safe???
- How to maintain healthy air in your shop
- Dust Collection Resources and Links
- Why I became obsessed with dust collection and air filtration
- Storage, Organization, Efficiency >
- Improve your workshop floors and lighting >
-
Dust Collection and Air Filtration
>
-
Improve Your Tools
- Shop
- Contact
Get weekly blog articles and early bird discounts for new products
through the Shop Hacks Newsletter. Every Friday at 3:30 Eastern Time.
SUBSCRIBE to the weekly Shop Hacks Newsletter
through the Shop Hacks Newsletter. Every Friday at 3:30 Eastern Time.
SUBSCRIBE to the weekly Shop Hacks Newsletter
Site Map
© Copyright, Shop Hacks 2019



 RSS Feed