|
Please comment in the area below this article if you find something that you like, have a tip to share, or if you have any questions. Comments are a great way to share knowledge and they let me know what you care about the most for future content. 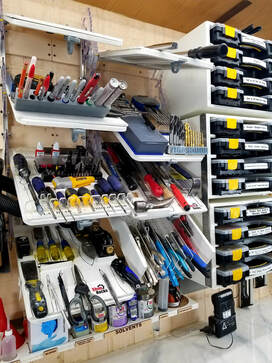 Do you love to spend time in your shop, garage, or work space? We value every second that we get to spend in "our space" even if it is a mess. It's a place where we can just relax and enjoy time away from everything else with no expectations other than our own. Would you like to have someone show you a way to organize your tools that is easy to understand and implement? Would you like to get 25 extra hours to work on your projects every year without taking time from anything else? Would you like to enjoy working in your shop even more than you do now? In this article I'll show you how do just that. Next week's article will cover organizing your hardware and materials. If you have missed previous Shop Hacks articles, you can find them through the links below. If you aren't already subscribed to the Shop Hacks Newsletter, just click the button below to get weekly Shop Hacks sent to your email. You can opt out at any time. Do you feel frustrated that your shop is a mess and you are always walking around things and have to sift through piles of tools and materials on every horizontal surface? Have you ever tried to tackle tool organization in your workshop only to give up in short order because you felt overwhelmed just trying to decide what to organize, where to put it and how to hold it? You certainly aren't alone. The photo below shows the chaos that was my shop when I finally reached my breaking point and made the decision to put my head down and get it organized, do or die. I was tired of walking around things and wasting so much time hunting for tools and materials and seeing every horizontal surface stacked with piles of "stuff". I had a may false starts and several failed attempts. In this article I hope to save you a lot of time and avoid the headaches that almost made me give up before I finally succeeded. Using the 10 step method in this article, you can complete the process without feeling overwhelmed. I'll show you how to estimate how much time you can buy back through organization as well as how to implement the plan. Your solutions will be completely different than mine but this process will work with any work flow and with any organization system that you choose to use. 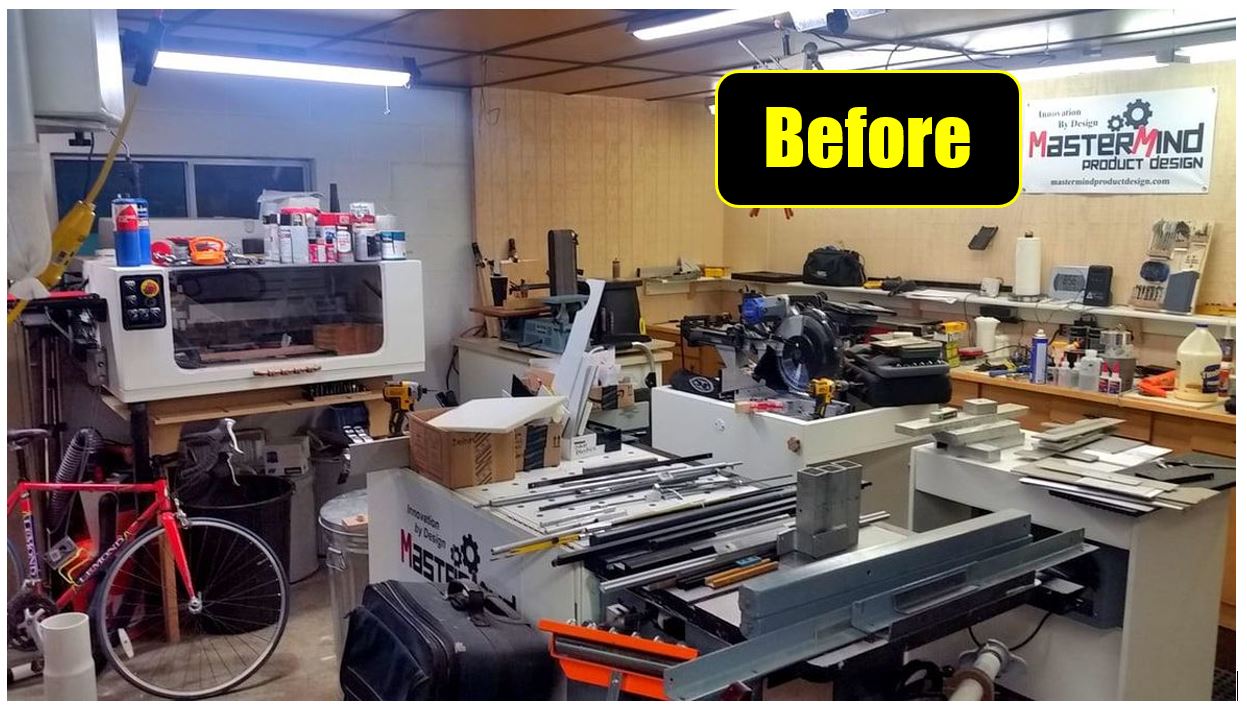 An Important Note I think it may have been Adam Savage who said, "drawers and cabinets are where tools go to die". There's truth in that statement because what is out of sight is often out of mind. I chose to use an open storage system for my tools. This saves the time of opening a drawer or door every time I want to use a tool and put it away. This works in my shop because I have modified my dust collection systems to the point that the air in my shop stays cleaner than the air outside. That allows open storage without dust building up on everything. If you don't have effective dust collection and air filtration in your shop then you may want to consider using cabinets and tool boxes to keep the dust at bay until you get a chance to get your dust under control. I'll shared how I did so in my shop in future articles. The Shop Hacks 10 step system will work regardless of how you plan to store your tools. The principles and method are the same regardless of how you implement them. I worked on organizing my tools and materials one group at a time until all of my active work areas were well organized and every tool in each of those areas had a marked location. The secret to establishing order was to pair down the tools and materials to those that I touch on a regular basis and to put everything else out of my work areas and into storage. LESS is MORE in this case. The key maintaining this order for almost two years now is that every tool and all materials have marked locations. 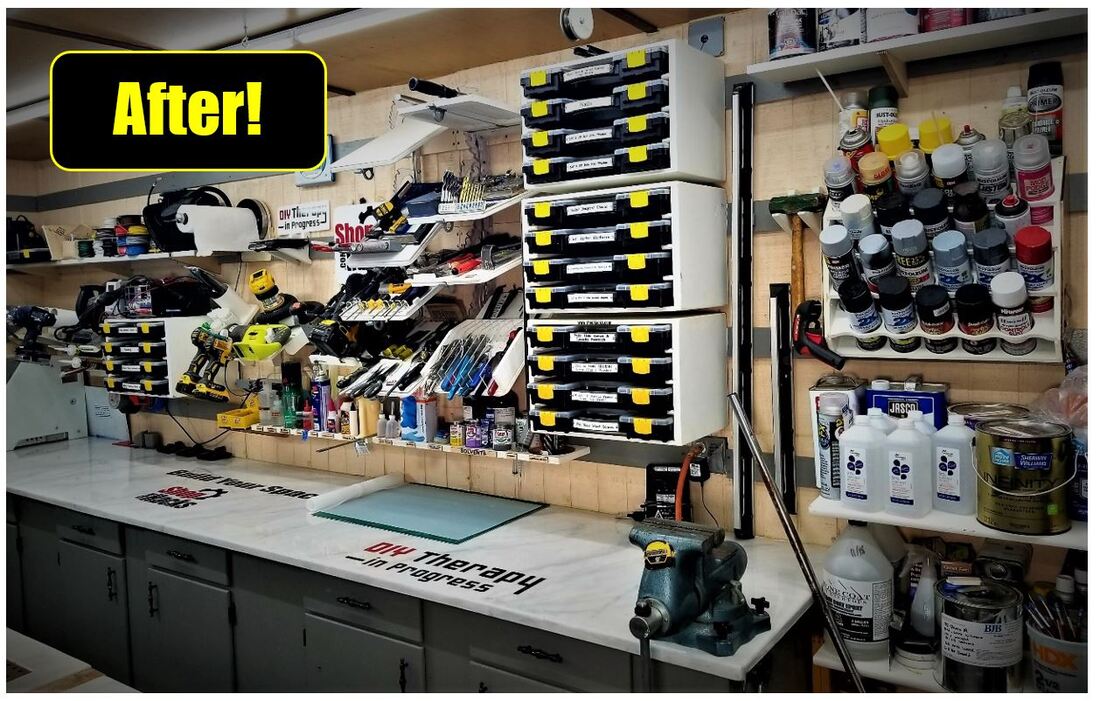 I could not have imagined how much more I was going to enjoy working in my shop after I made these changes. The difference is tremendous. I work more efficiently but, more importantly, I enjoy using my shop more now. It's like the difference between using an old worn out tool that you have to stop and fix all the time and using a quality new tool that does the job just the way you want every time. We love our shop time because it's our time, so why not make the most of it? I have everything I need for each task close at hand. I can grab most tools now without even having to look at them. It is also much easier to keep my work spaces clear of piles of tools and materials now that a simple lap around the shop with an arm load of tools at the end of the day, filling in open tool slots, is all it takes to put everything back like it was when I started. That's something I could never do before. Moving from chaos to order is not easy, but it is extremely rewarding. It is worth the work and it pays dividends for life. Try to work on one area at a time so you can build small victories that you will need to carry momentum through this process. This is a big job. Look at it as a process that takes time and iteration. To prevent burnout, expect changes and don't aim for perfection right away. The following quote by Mark Twain sums this up very well... "Continuous improvement is better than delayed perfection" Mark TwainHere is a summary of 10 steps that will allow you to organize your tools and transform your workspace without feeling overwhelmed. I'll cover each step in more detail in the following sections. I encourage you to print out several copies of the checklist below and place one in each work area that you frequently use. When you are ready to start organizing that work area fill in the start date and start working through the list one step at a time, not skipping any steps. When you finish one of your work areas, fill in the finish date and post a copy in the Shop Hacks Facebook group with before and after pictures. We would all be so encouraged to see hundreds of these posted over the next year!! Tool Organization - The Shop Hacks 10-Step Program (details provided in each of the following sections) Work Area _____________________ Start date: __________ Finish date:_________
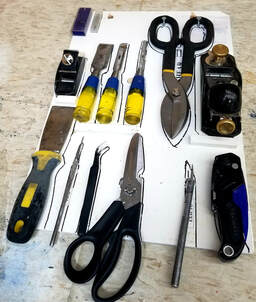
Step 1: Clear off a horizontal surface large enough to hold every portable tool that you will use in the next 10 sessions in one of your work areas. Make sure this area is separated from adjacent areas and make sure it is a space that you won't need for anything else. Consider this your tool box over the next 10 work sessions. It helped me to mark this area off with masking tape to designate the area exclusively for this purpose. Ideally you will block this area off for at least 10 work sessions so pick an area that you can spare for that long and make sure it is large enough to hold a pile of all of the portable tools that you will use during this time. 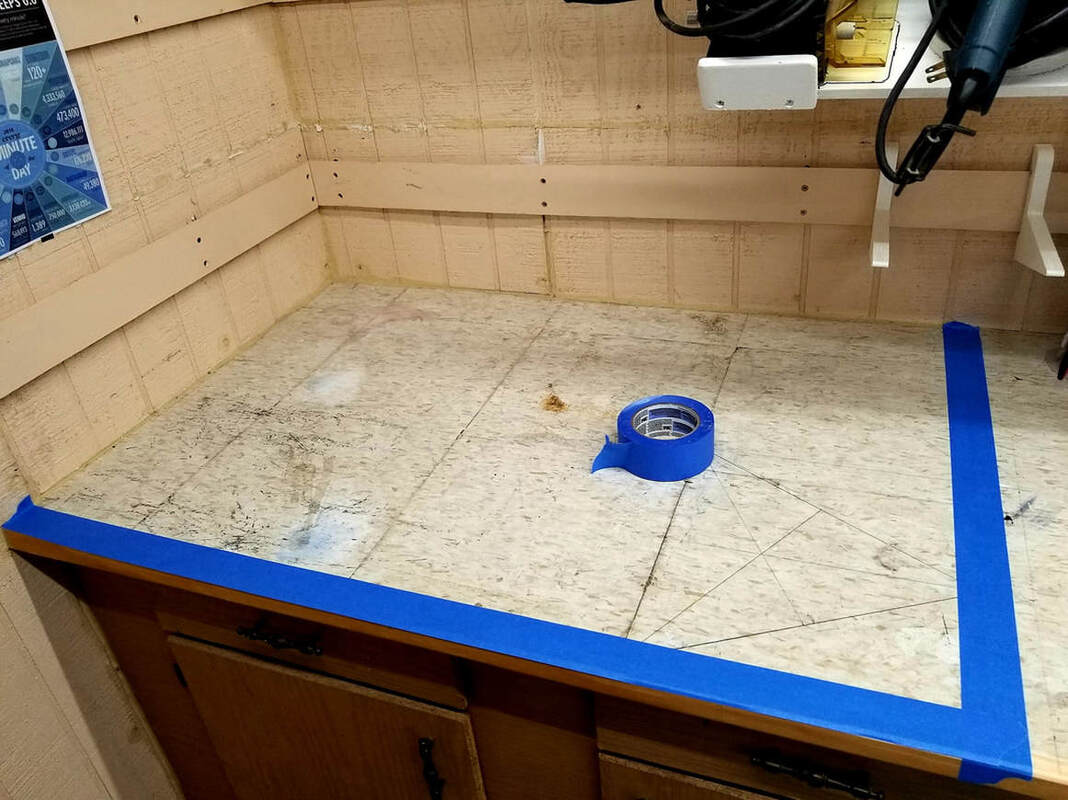 Step 2: Store EVERY portable tool that you use over a period of 10 work sessions (and nothing else) in this designated area. The ultimate goal for each active work area is to place ONLY the tools that you use 80% of the time within arms reach and put EVERY other tool that was in that area outside of that area in a storage location. I use a utility room, shelves and a large toolbox to store the items that don't make the cut. This buys back days of work time per year. I can't emphasis enough how much better it is to store as few tools as possible in your active work areas. This frees up your tool wall as well as your mind. Less is more. It's okay to store the remaining 20% away from your active work areas. Walking 15' to retrieve them doesn't cost much time overall because you don't have to do so very often. 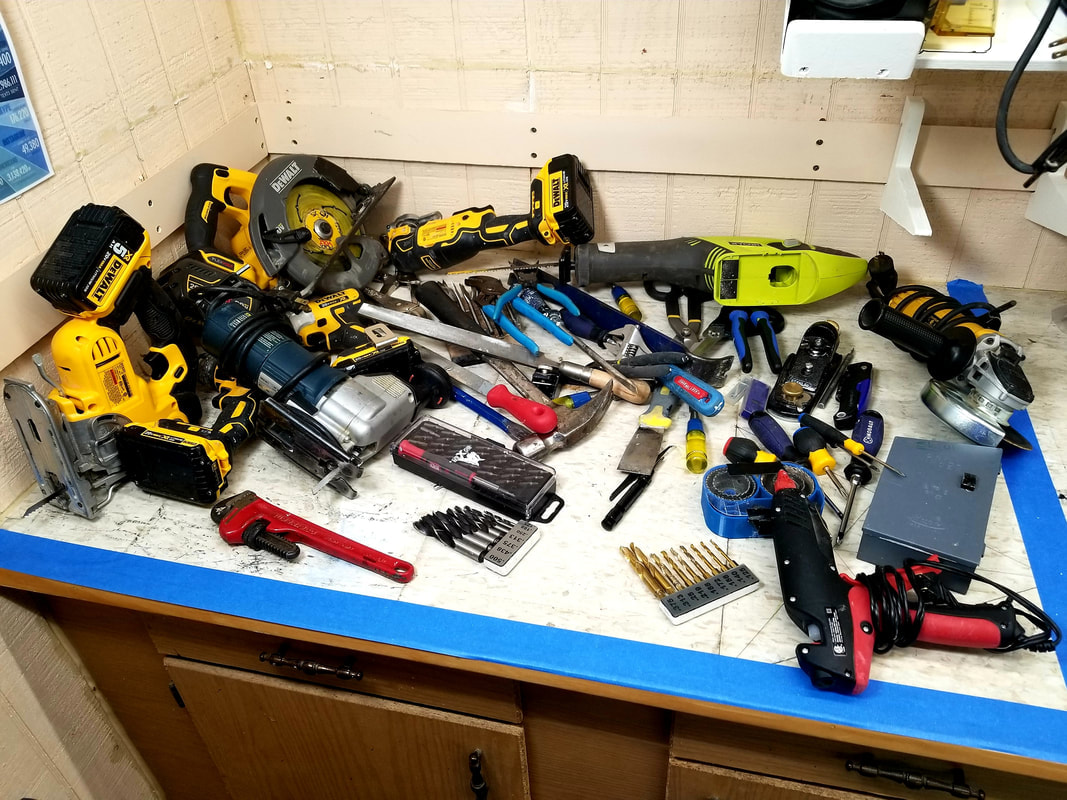 Here's an example to objectively demonstrate how simple, organized, open storage can buy 25 more hours per year doing what you love: Let's say you use 5 different sets of pliers 80% of the time and 10 other types of pliers the other 20% of the time.j Scenario 1 = organized open tool storage of those 5 sets (ONLY) at arms reach Scenario 2 = Toolbox or drawer storage 10' away from where you are working Time to retrieve = Scenario 1: 1 second if they are at arms reach Scenario 2: 10 seconds if you have to walk to a toolbox, open a drawer and walk back. Use the pliers 500 uses over 50 work sessions Time wasted in each scenario: Scenario 1: (500 uses * 1 sec/use) = 500 seconds or 8.3 minutes of wasted time Scenario 2: 50 sessions * 20 seconds (retrieve and put back) + 500 uses * 1 sec/use) = 1500 seconds or 25 minutes of wasted time. You can save over 15 minutes per year for every tool that you place within arms reach vs. walking to a toolbox to retrieve it. Multiply this by 100 tools and you gain around 25 hours/year doing what you love vs. walking and hunting in your shop every decade with one simple change.  Let's get started and buy some time!! During your next 10 sessions in a work area place every tool or set of tools that you physically touch into the area that you designated in Step 1. It doesn't matter what kind of tool, if you touch it then put it in this area. Consider this your toolbox for the next 10 sessions in your shop. The picture above shows the tools I used during that time. The type and number of tools will be completely different for everyone so your pile will most likely look nothing like mine. Do NOT put any tools there unless you actually used them. This objective approach will make it easier to separate what you "feel" like you need to organize and what you really "need" to organize to save time which is our primary goal. Don't worry about missing something during this step. You will have a chance to evolve and adjust this system in later steps before you spend a lot of time making or buying tool holders. In general, don't store ANY tools (or sets of tools) in an active work area that you don't physically touch at least once in every 10 work sessions. Trust what you actually touch and use and not what you think you will use. This step is essential to objectively decide vs. making subjective decisions which inevitably lead to wasted time. Start small so you can get a feel for this process and build up some confidence. Do not try to organize your biggest work area or you will probably get frustrated and give up. Small victories will build momentum. Maybe you just try this for a sanding area to start with to get the hang then try an assembly area next and then work your way around the shop applying the 10-steps to each area. What is an active work area? An active work area is any place that you spend a significant amount of time performing any activity. The following are just a few examples...
Don't worry that you may leave something essential out. The following steps leave plenty of opportunities to add more tools as you work through a variety of projects. Your goal here is to build a pile of tools that represent what you actually use 80% of the time in your shop without being subject to your subconscious tricking you into believing you need more. Don't put a tool in this pile if you did not actually use it. Trust me. Step 3: (this is probably the hardest step to do, but it is one of the the most important) Put ALL of the tools that you did NOT use in a storage area separated from your main work area This step may go against every fiber of your being. We are hardwired to put every tool we own on display. But if you want to spend more time creating, building and fixing and less time hunting and sorting then don't give into the lie that having more tools on your tool wall is better. Less is more! Now that you have a pile of tools that you used in a particular active work area, put every other tool away in storage or give it away or throw it away if it isn't useful to anyone. If you can't bring yourself to do this then you aren't ready for the Shop Hacks 10-Step Program and we will be forced to exercise tough love and let you suffer in your disorganized mess until you are truly ready to change ;-) Seriously though, trust me and give this whole process a shot. If you don't like it you can always add more at the end. Your tools will still be seconds away. Step 4: Sort the tools that you used into functional groups This step was difficult for me. There are so many ways to group tools and I ended up trying several layouts before I was comfortable with what I had. Don't feel like you have to get this right the first time. In later steps I'll show you how you can try many different layouts without wasting much time. For instance, over a 1-year period I ended up sorting my tools into the following groups:
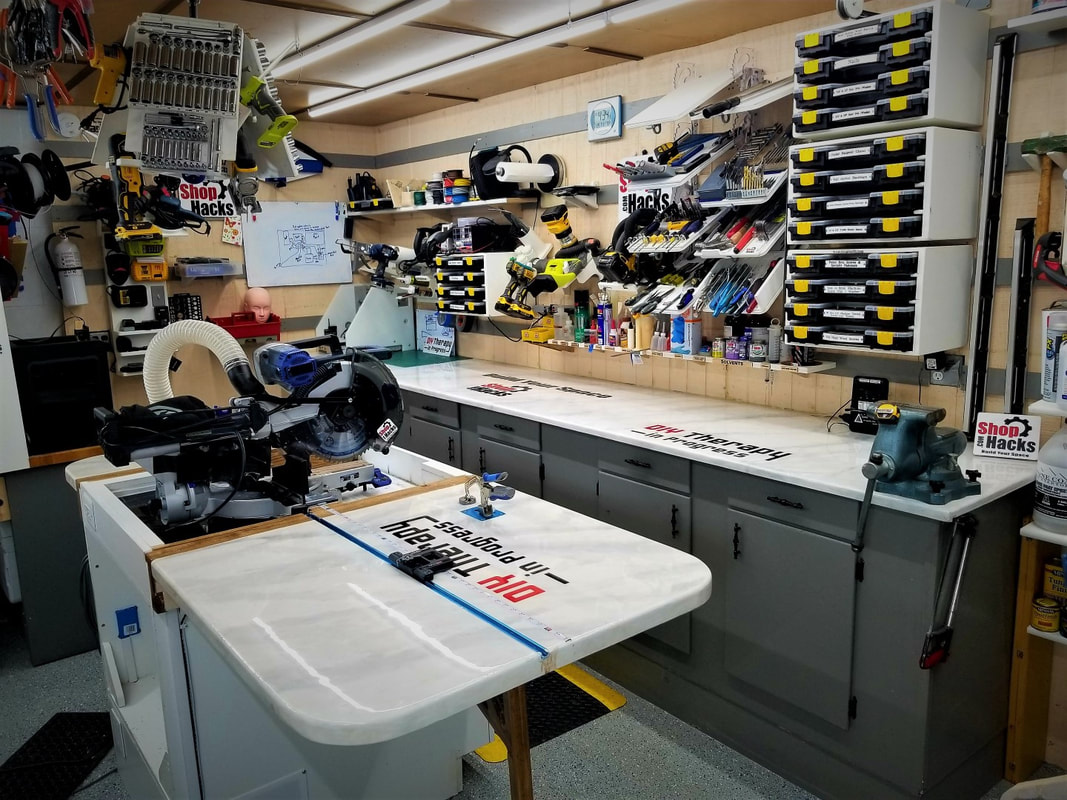
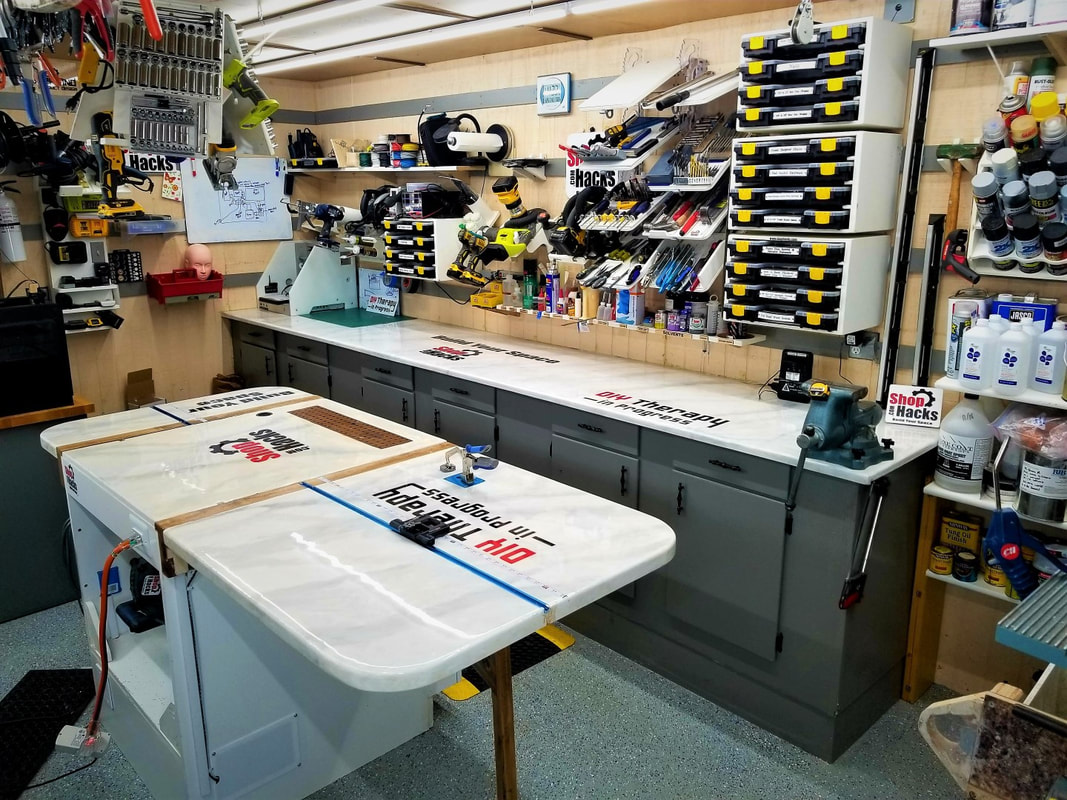
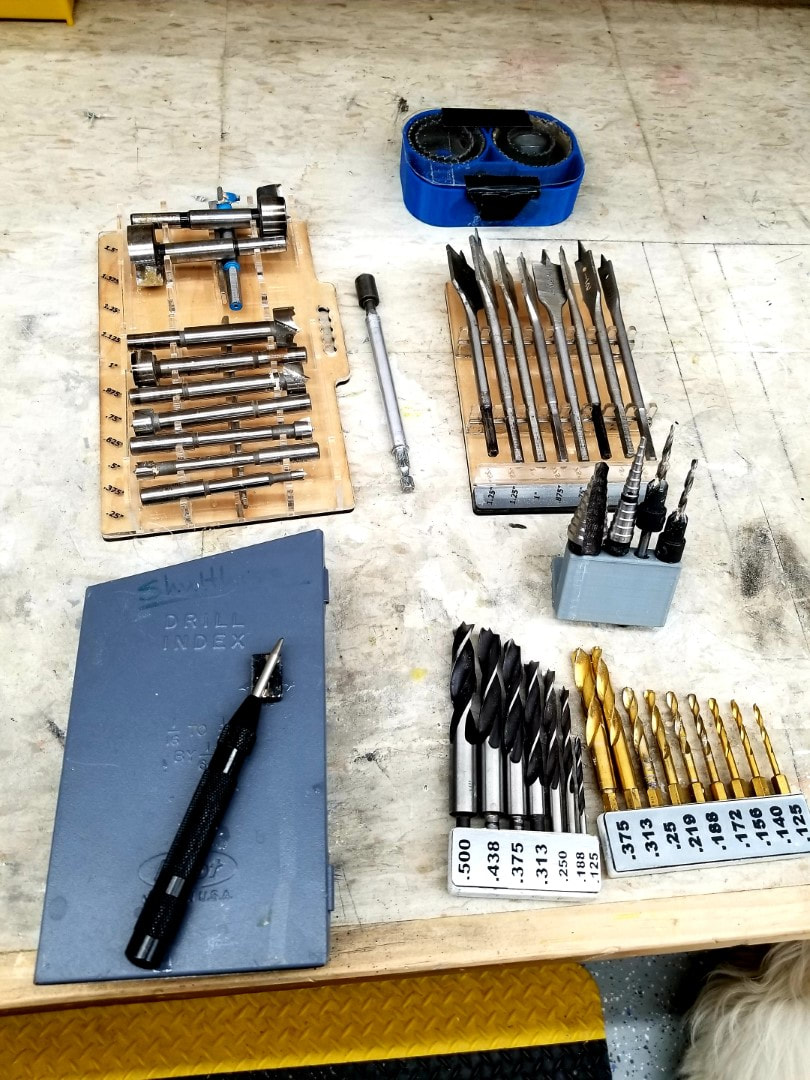
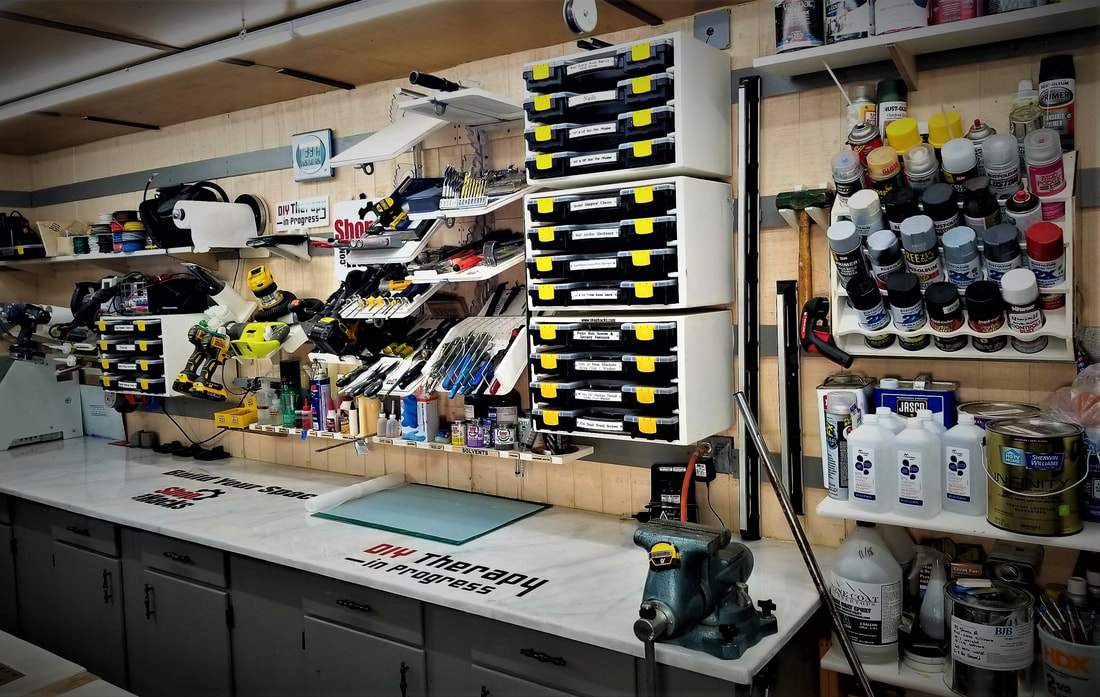 The group names and which tools go into each group will be completely custom to the way you use your tools and which tools you have at each active work area. You will get a chance to try out and adjust your tool groupings later so don't worry about getting them perfect on the first try. Pursuing perfection will cause paralysis, so just move forward and adjust anything that you don't care for in a later step. I'll cover how to sort your hardware and supplies in next week's article. You can see most of the tool groups that I ended up choosing in the picture below. This photo also shows the Shop Hacks Ultimate Flip Top Workbench which serves as a workbench, downdraft table and assembly table 95% of the time and flips to transform into a miter saw station with the Chop Stop fenceless miter stop system 5% of the time. This flip top workbench has been a great addition that adds convenience and efficiency to my workflow. The wings fold down and it has a electro-hydraulic lifting mobile base which makes it super easy to move around with just push of a button. Click on the link above to see options for plans, hardware and the Build With Confidence Support group.
The photo below shows my CNC router work area. I have everything I use 80% of the time within arms reach and the rest is in a drawer under the base of the router (drawer added after I took this picture). 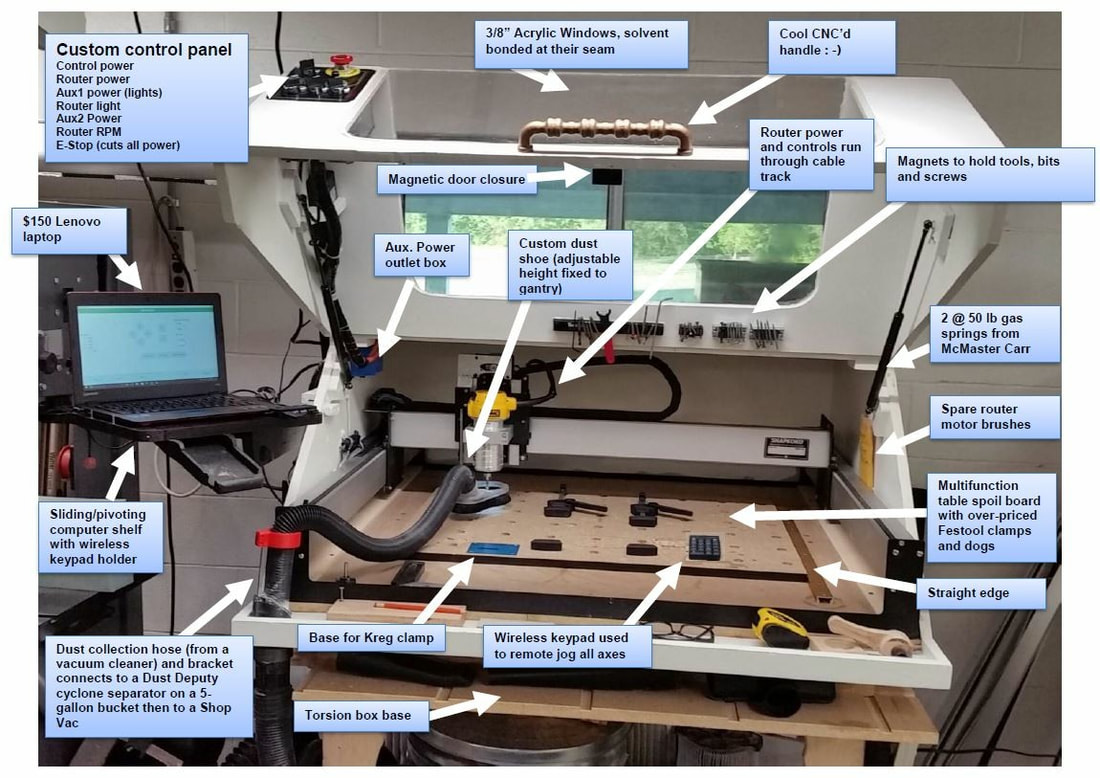 I also made holders for the handheld power tools that I use the most as shown below. Everything on my tool wall is hung on a French cleat. 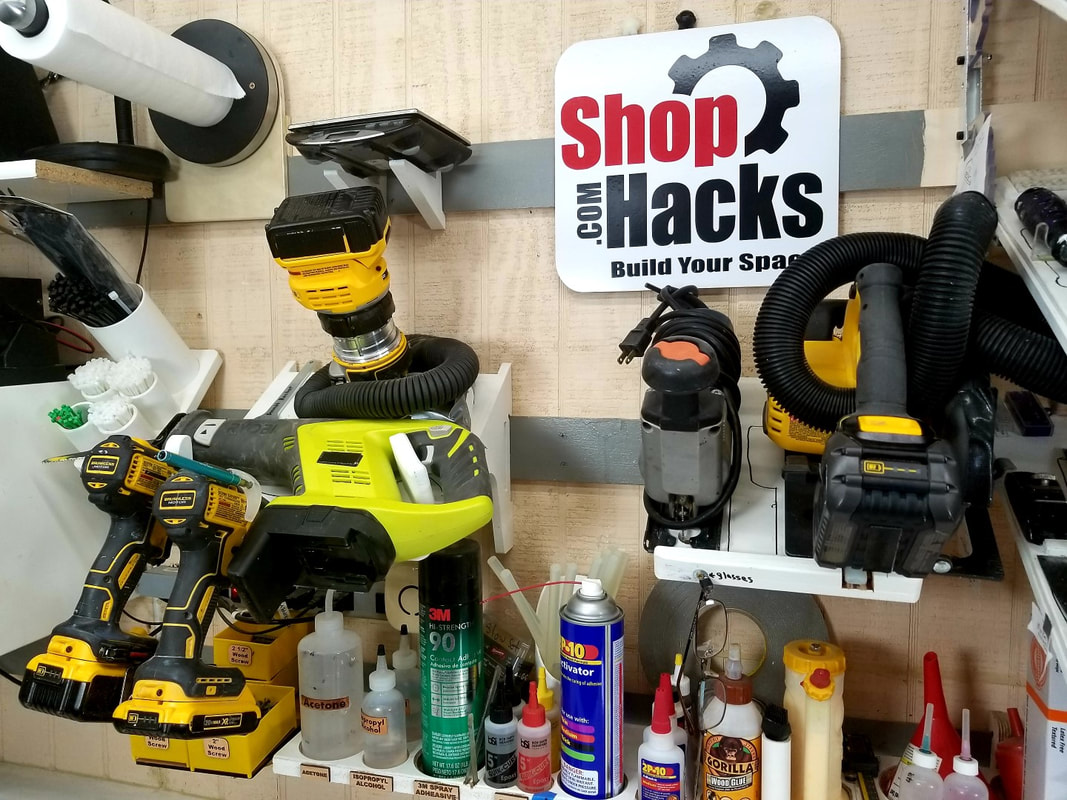 These are just a few examples. The key is pairing down to the tools you will actually touch frequently and sorting them into groups based on how you use them so you can keep tools as close to your active work areas as possible. Step 5: Cut multiple pieces of cardboard to serve as mock tool panels. This is the easiest step of the process. Determine how large you want each tool panel to be and cut pieces of cardboard to those sizes. I chose to make all of my panels 11"x17" because that allowed multiple tool panels to fit into any of my toolbox drawers. As it turns out, using this system I was able to mount ALL of them on my tool wall and I very rarely have to get anything from my toolbox anymore. Step 6: 1. Organize your tools on each mock tool panel. Use them for a while like this then iterate until you are happy with the layouts. This step is also very simple but may take some time. The idea is to try out your layouts before you commit a lot of time to building tool panels to mount your tools. 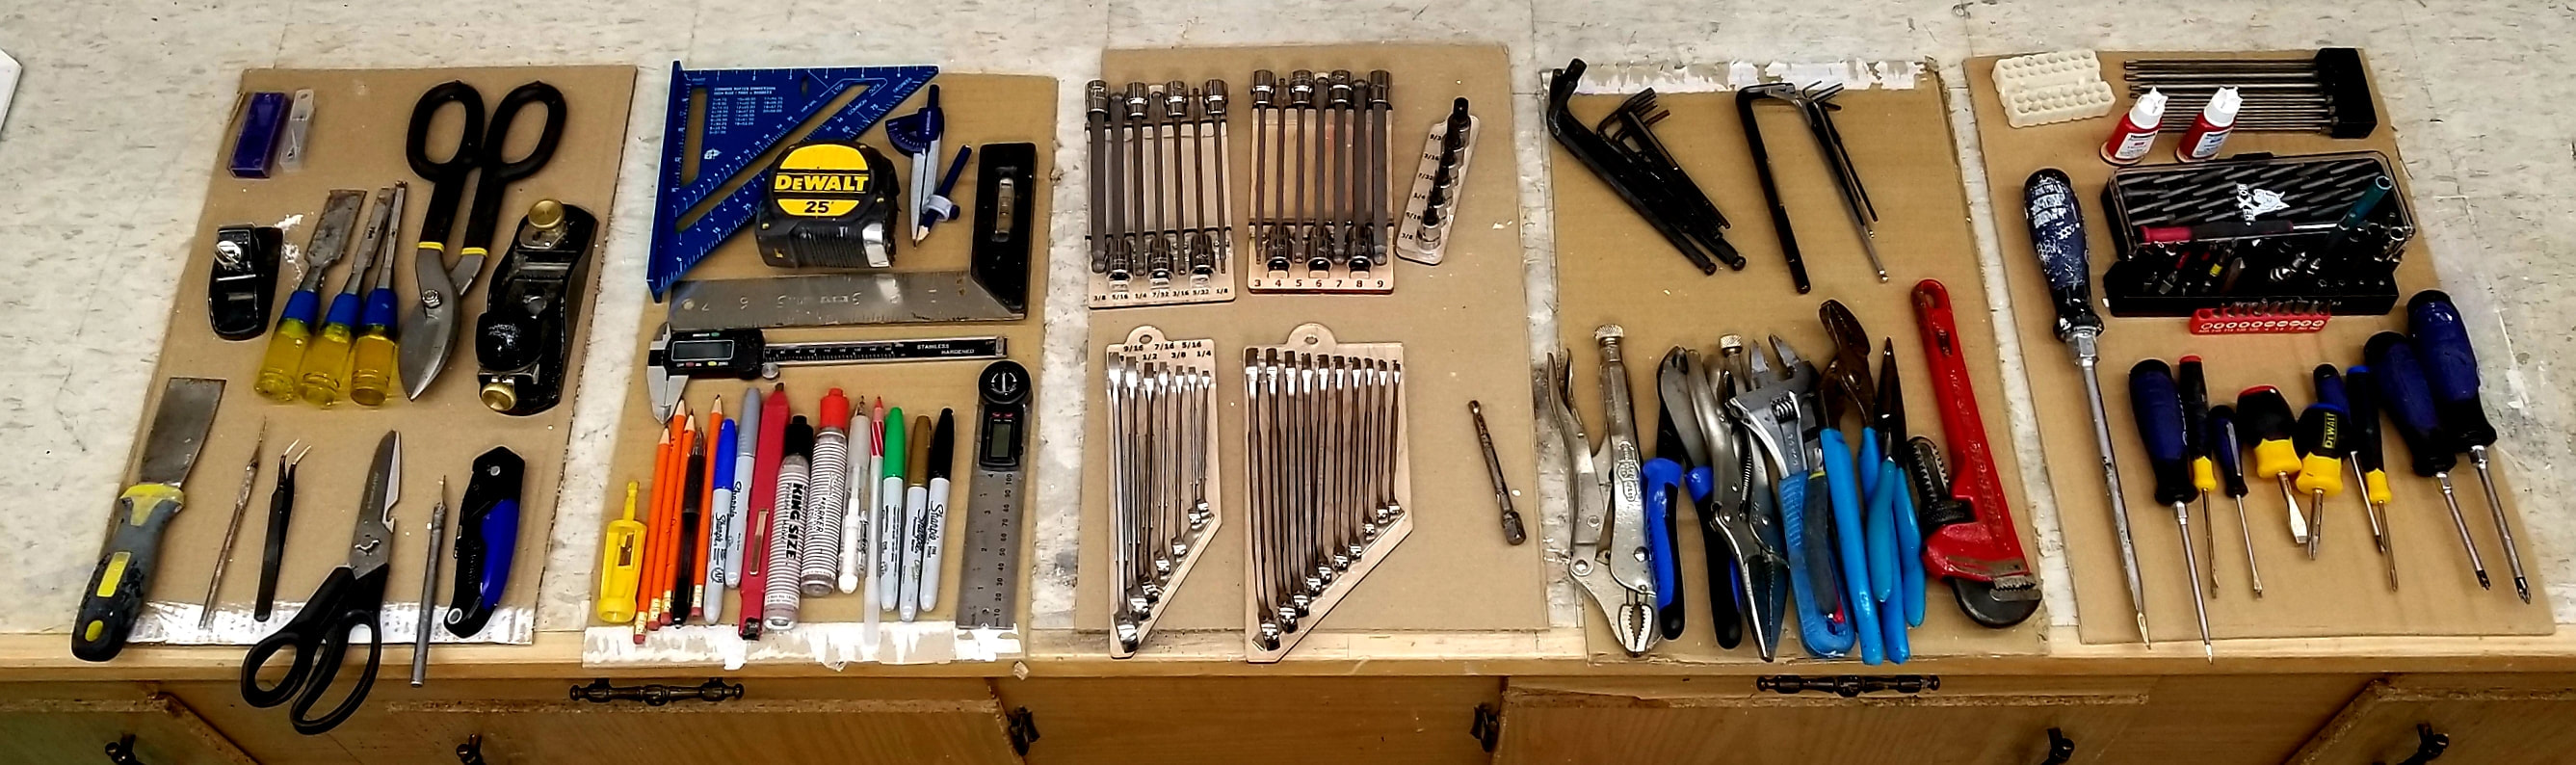 I kept my tools laying on these cardboard panels like this for a couple of months as I used them. I put the tools back on their designated panel after I finished using them each day. If I didn't like where or how a tool was placed I simply rearranged and regrouped them as I went. This let me test out my layout before spending a lot of time building the tool panels. I found that I had to add some tools that didn't make the cut during earlier steps and I also removed some tools that were not getting used. Once I was comfortable that I had my tools paired down to ONLY the ones I use 80% of the time, I moved on to the next step. I should note, even though I went through all of these steps I still ended up making some changes later on. However, the changes were minimal and didn't take nearly as much time as they would if I would have had I not tested my layouts before building the tool boards. Step 7 Buy or build permanent tool panels and mount your tools These are a couple of the tool holders that I made to hold my tools. These were built using 1/4" Baltic birch plywood panels and 3/4" cleats to connect to French cleat rails on my tool wall.
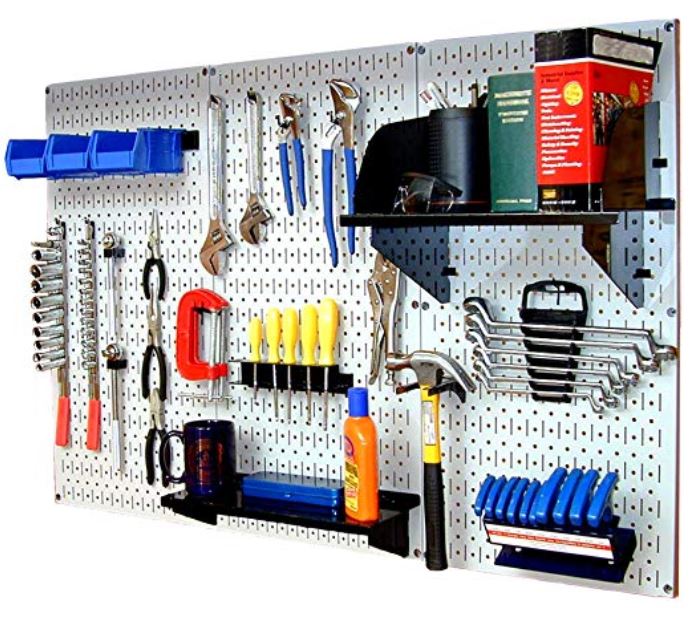
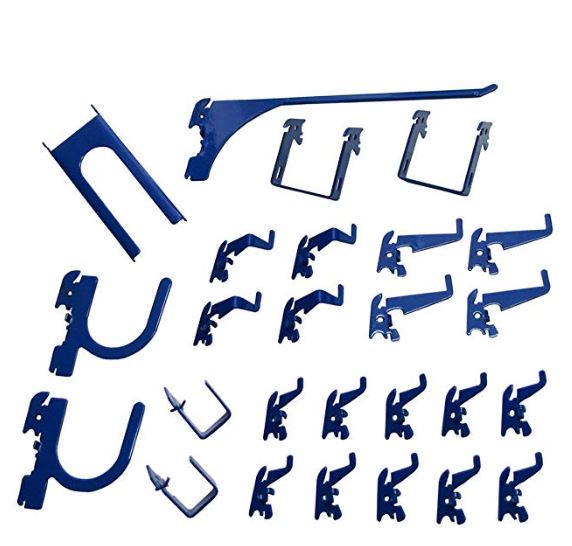
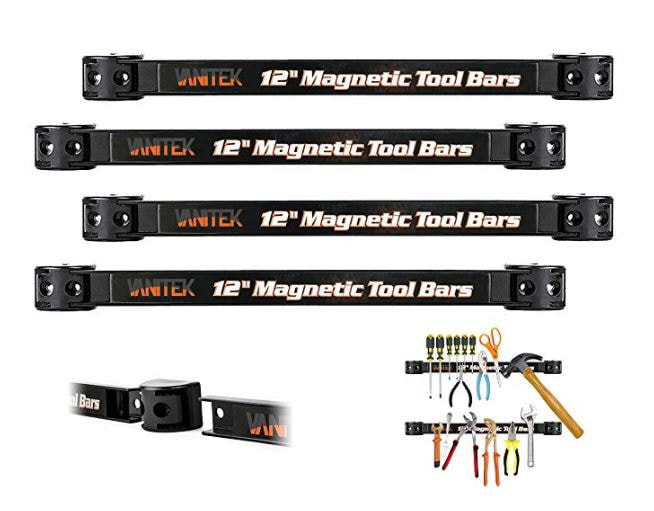
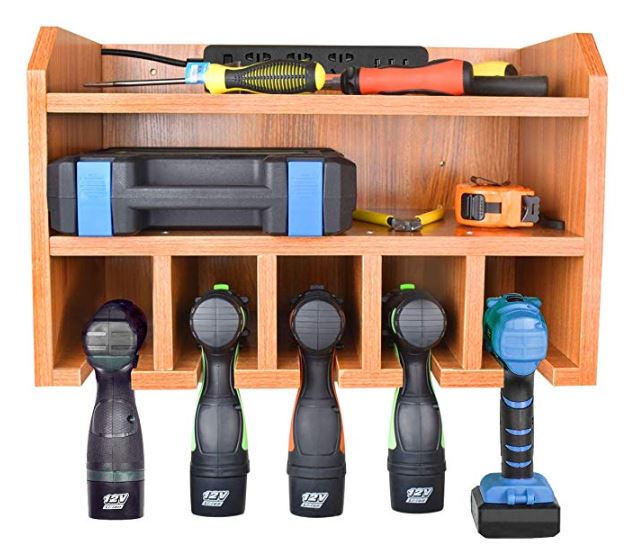
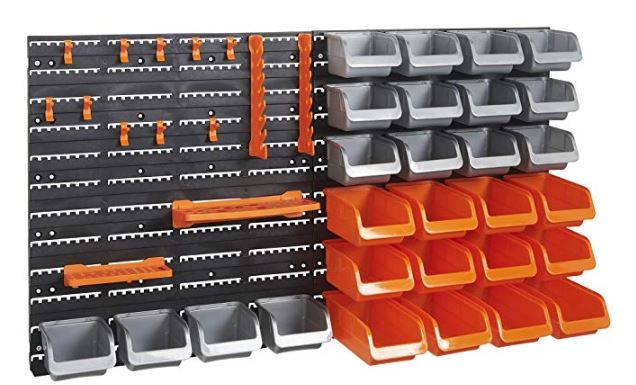
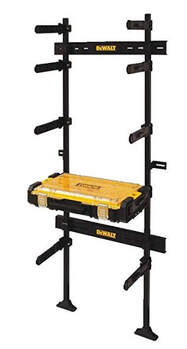
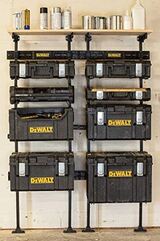
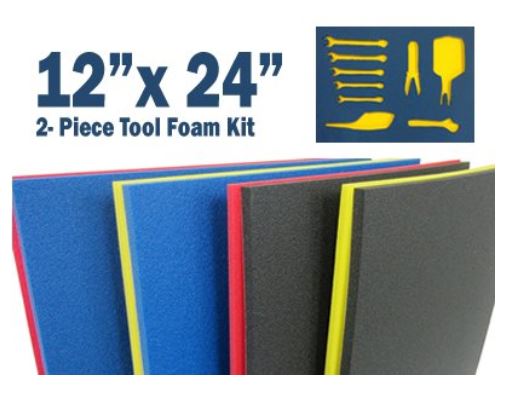
There are several very nice premade tool organizations systems available if you want to save some time by using a ready-made system. I'll include some options to consider below. The following products are affiliate links. When you use these links you pay the exact same price that you would otherwise pay but Shop Hacks receives a small commission for the purchase. Using these links is a great way to support more content like this in the future. Thank you for your support!
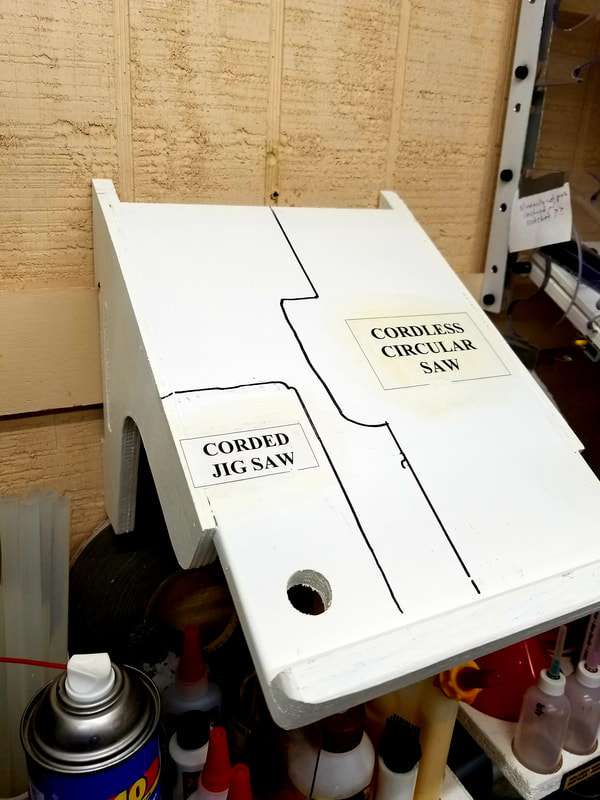
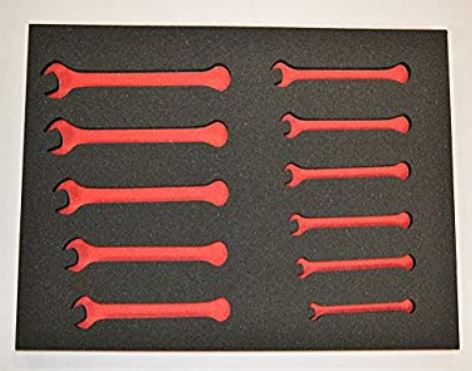
Step 8 Mark EVERY tool location. You may be tempted to skip this step but don't... It is a game changer. This is another very simple but very important step. I tried several methods. The easiest one was to simply mark an outline of each tool using a permanent marker. I intended to come back and make something more refined but this worked so well I never felt compelled to change it. These tools are held in place with neodymium magnets. Some of the larger items use mini stop blocks too.
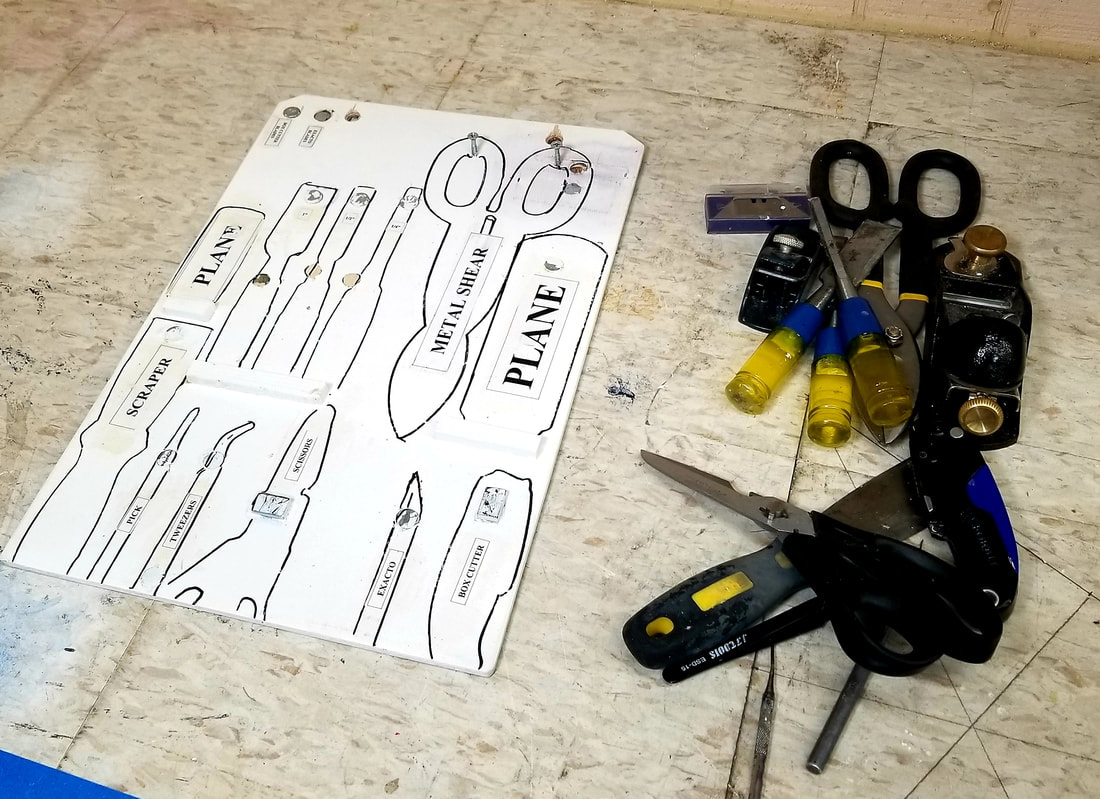
Another unique way to mark tool locations is to take a photograph of the tool board and glue the photos onto each tool location using a spray adhesive. This works great but it is time consuming.
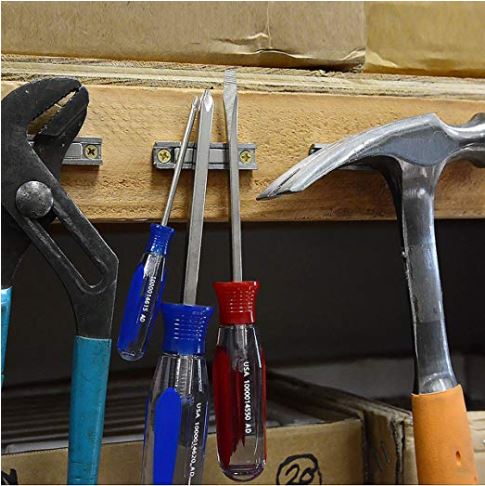
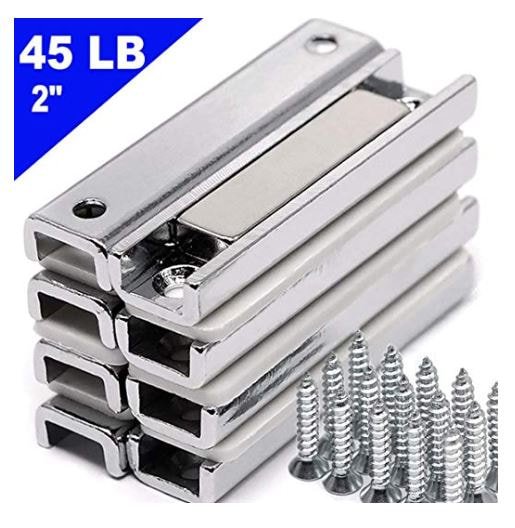
Using marked locations for tools is great at the end of the day when you just scoop up a handful of tools and take a lap around the shop filling in empty marked locations. There's something very satisfying about doing this. I rarely end a day anymore without putting all my tools away. Before I had a specific marked location for every tool I rarely put tools away and I ended up having to shuffle tools and materials around for 10 minutes just to get started the next morning. Not to mention the time wasted trying to remember where I put things. Neodynium magnets are great to have around anytime you want to build a tool organizer. Step 9 Store your tool panels near the locations the tools will be used. 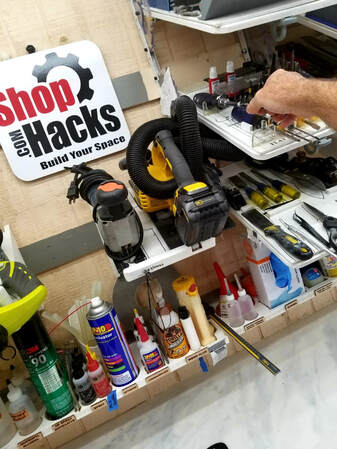 I can't overstate how important it is to keep 80% of the tools you use in any active work area within arms reach of where you use them most of the time. It saves a lot of time but another benefit is that it makes your work more enjoyable. You may be used to walking back and forth across your shop to get tools to make or fix something but once you get used to being able to reach almost everything you need without moving you will wonder how you ever worked any other way. Step 10 Repeat this process as needed until you've worked through all of your active work areas. Start with small organization tasks to build momentum. then work your way to the active work areas that you use the most and get those worked out. Keep going until you've organized all of the areas that you frequently use. After that you can keep going but you have diminishing returns. I still have quite a few areas of my shop that need to be organized but just having the areas I use 80% of the time worked out has made all the difference.
Have fun, enjoy the process and eat this elephant one bite at a time. Please leave comments below. I encourage you to ask questions, share your own organizing tips and share what you would like to see in future articles. Affiliate links may be used on this page. As an Amazon Associate I earn from qualifying purchases. Shop Hacks exists to help you Build YOUR Space!
7 Comments
Rollin Shultz
12/10/2019 07:13:16 am
Being a Pennsylvania resident, I used to have to winterize each year. That means taking in all aerosols, glues, batteries and anything which would be ruined by freezing. I now have a small cabinet for aerosols and a basement entryway for glues and stains. I keep my cordless tools indoors as well.
Jim
5/15/2020 03:57:01 pm
Thanks so much for your ideas! Love the pictures and will definitely use some of your suggestions.
Joseph A Sorrentino
3/1/2021 10:53:56 am
do you have plans for the paint can holder? 5/28/2021 11:05:56 pm
I've searched most of the website looking for the white organizer boxes you keep the hardware organizers in (4 in each white cabinet). Were those purchased or built? 7/4/2023 07:56:08 am
Nice blog you have here, thanks for sharing this Leave a Reply. |
Categories
All
NewsletterShop Hacks exists to help you Build Your Space! Archives |

- Home
-
Improve your Workspace
-
Dust Collection and Air Filtration
>
- Table Saw Dust Collection
- All About Cyclone Separators
- Dust Deputy and Dustopper Review and Comprehensive Scientific Testing
- Dust Sheriff Cyclone Separator
- Dust Collection System Options
- Air Filtration System Options
- Why clean air matters
- Is your shop air safe???
- How to maintain healthy air in your shop
- Dust Collection Resources and Links
- Why I became obsessed with dust collection and air filtration
- Storage, Organization, Efficiency >
- Improve your workshop floors and lighting >
-
Dust Collection and Air Filtration
>
-
Improve Your Tools
- Shop
- Contact

 RSS Feed
Get weekly blog articles and early bird discounts for new products
through the Shop Hacks Newsletter. Every Friday at 3:30 Eastern Time.
SUBSCRIBE to the weekly Shop Hacks Newsletter
through the Shop Hacks Newsletter. Every Friday at 3:30 Eastern Time.
SUBSCRIBE to the weekly Shop Hacks Newsletter
Site Map
© Copyright, Shop Hacks 2019