|
If you would like to receive FREE Shop Hacks like this every Friday at 3:30 Eastern Time... subscribe below... 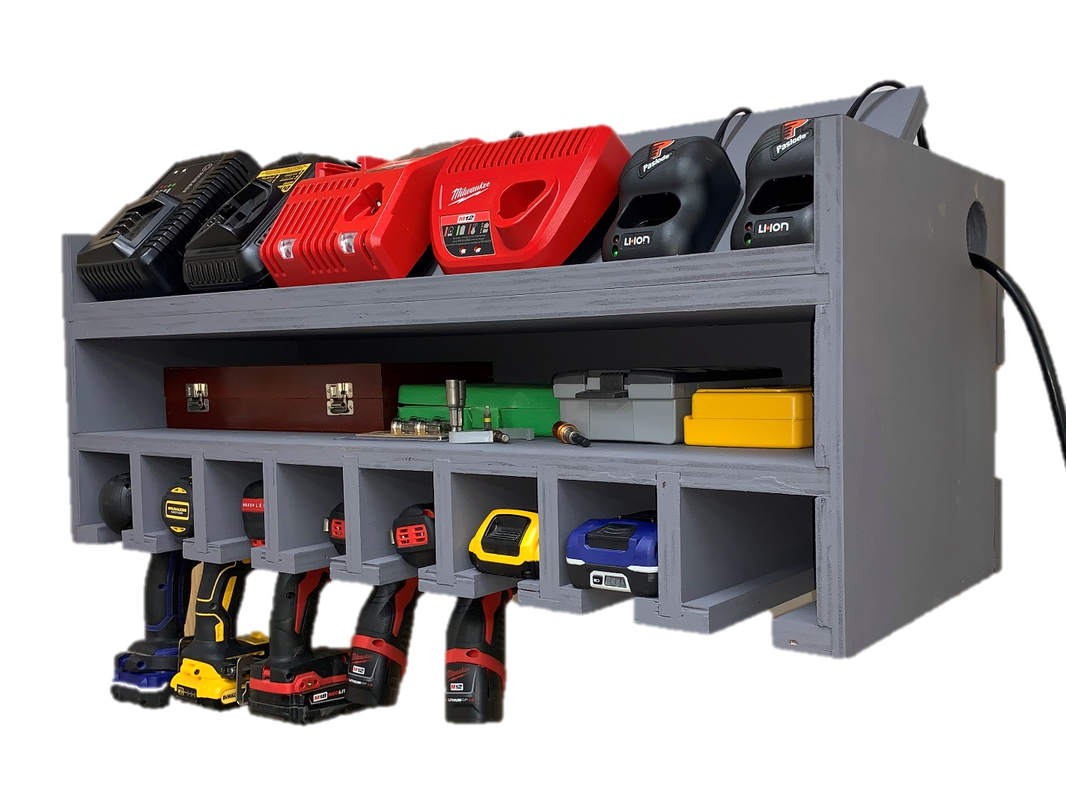 We've seen a number of drill/charger organizing stations over the past year on the Shop Hacks Facebook Group, but this one, designed by Shop Hacks member Tim Key, captured a lot of attention. It includes three useful features.
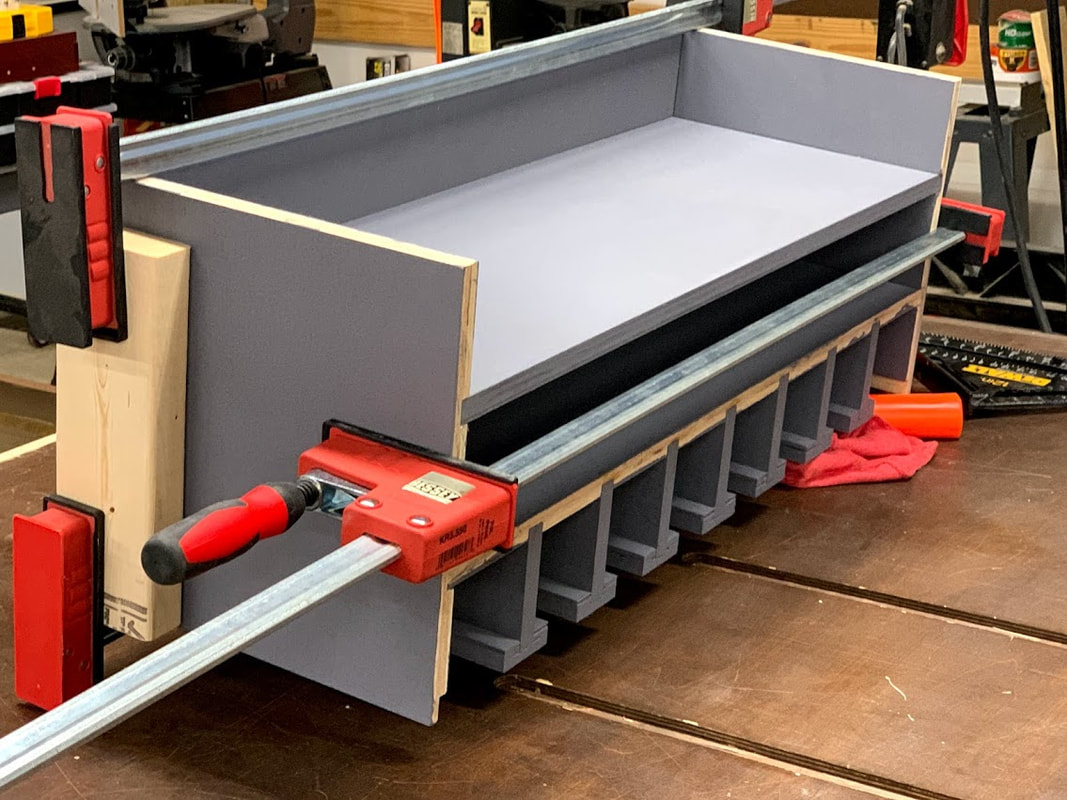
Let's Get Started Building YOUR Space! The first step is to break down your material per the following cut sheet. Order of cuts and specific dimensions are listed in the plans. Everything is based on 3/4" sheet stock. Tim used painted plywood and it turned out great. You can use any 3/4" sheet stock such as melamine, particle board, MDF or your preferred material. I like to use melamine. With edge banding it has a neat look and the light color has a way of making the shop much brighter once you start covering the walls with more and more white accessories. Baltic birch always looks great too no matter what you make with it. You can order 4x8x3/4 sheets of Baltic Birch through Menards if you have one local or your local lumber yard probably has it available. Note: Most sheet stock doesn't come in exactly 3/4" thickness. It can vary from 0.680" to 0.780" so make sure you measure the stock you use and adjust the dimensions outlined in the plans accordingly. If you would like to save time and make this build as simple as possible, you can support more content like this by purchasing plans for $4.95. The plans include the cut sheets, detailed dimensioned drawings, and tools and materials lists for this project. Shop Hacks is only sustainable through the generous support of those who purchase plans and hardware kits and through affiliate link income. 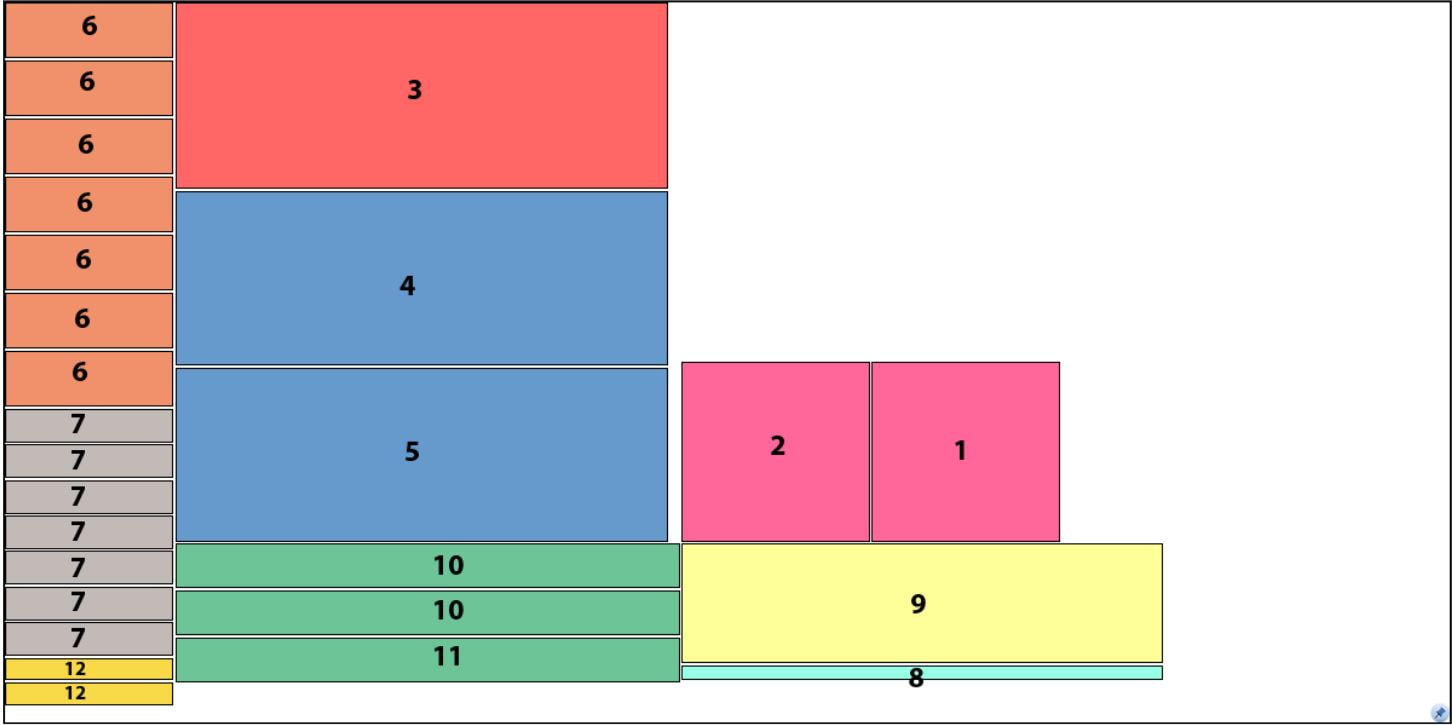 SHOP HACK: Write each part number on a piece of tape and stick them to each piece so they are easier to keep track of later Cut Dados Next, cut the individual features into each piece. The plans include detailed drawings as well as 3D assembly and cross section views to make this step very simple. There are many ways to cut dados. I used a table saw and a Freud 6” x 10T Pro Dado Set (SD206). Another popular option would be to use a router and jig (video link). Cut all of the dadoes to half the material thickness. The grooves are 3/8” deep if you use ¾” material. If you use a material thickness other than ¾” exactly then adjust your cuts accordingly. Assembly If you plan to paint your drill organizer, it is best to do so prior to assembly. At least all the interior parts. Avoid painting the dado and rabbet cuts or you may have a hard time getting it to assemble flush. I got a little paint in them but was still able to get flush joints in my assembly. 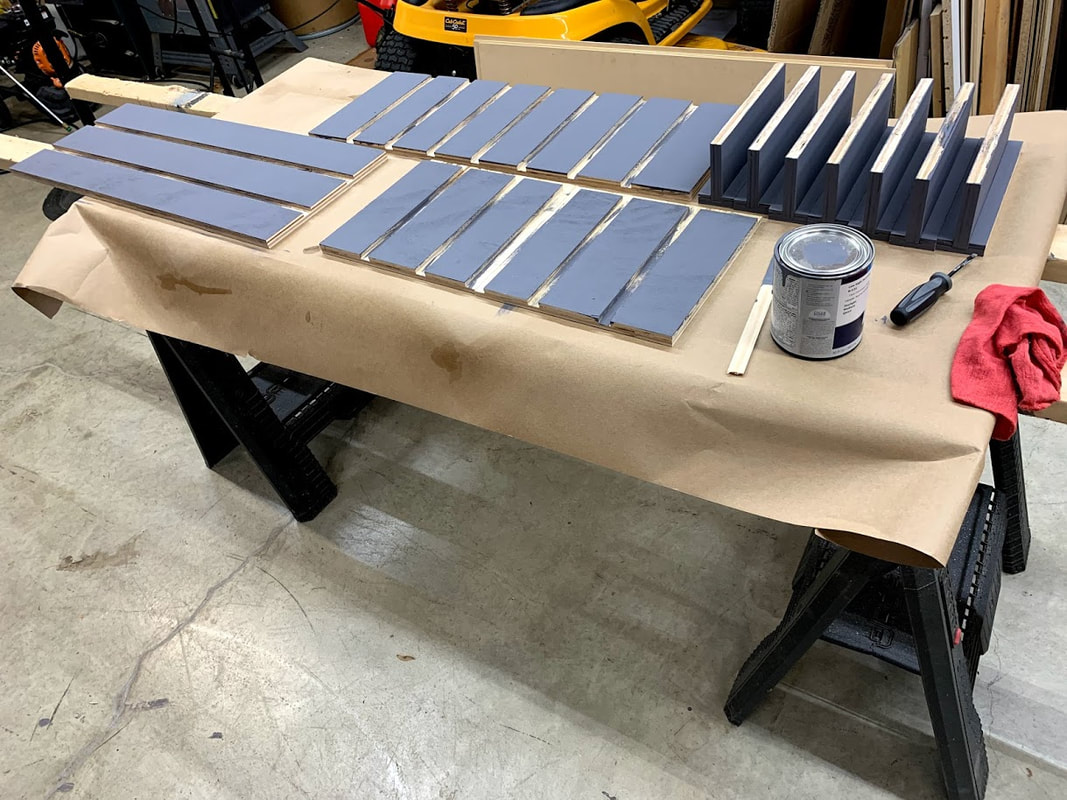 Bottom Shelf and Hangers Flip the bottom shelf upside down and flush the front against a straightedge that is at least ¾” thick. You want it to be easy to flush the front of the hangers with the front edge of the bottom shelf. I only glued the vertical hangers into place. I didn’t use any brad nails or screws. I glued and brad nailed the hanger bottoms with 1 ¼” brads. Get them all glued in and then clamp it down as best you can. I used another board and some weights and left it overnight. 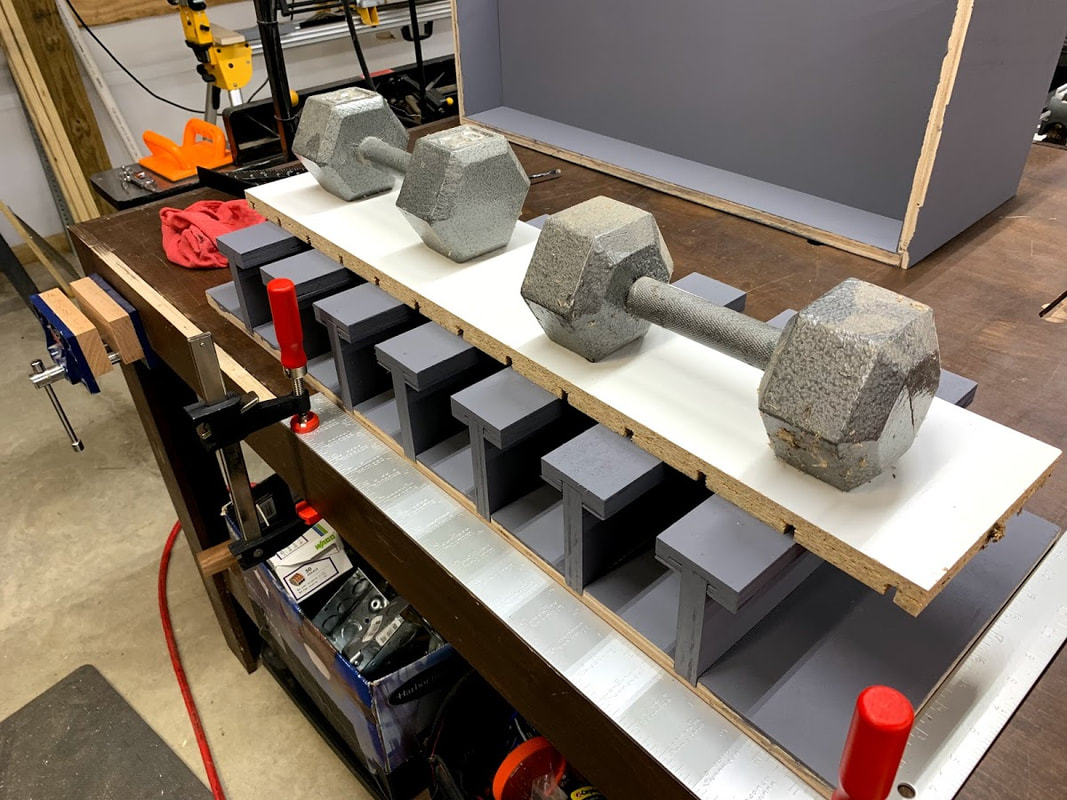 Side Panels, Back Plate, and Shelves This was the trickiest part of the build. My wife helped spread the glue quickly and helped hold parts together until I could get it into clamps. I used the following assembly process
 Install the angled shelf lip on the top shelf. Flush the straight edge of the lip with the front edge of the charging station. Use 1 ¼” brad nails along the top flat area of the lip. There is no need to glue this in, but you can if you desire. This component is to keep the chargers from slipping off the angled shelf. There should not be a lot of force against it. To install the angled shelf, I used a DEWALT DWHT46031 Aluminum 7-inch Premium Rafter Square behind the shelf to hold the shelf at the correct angle while flushed the front edge up against the edge of the lip. I used 5/8” brad nails along the length of the angled shelf and the used 1 ¼” brad nails on the sides to maintain the angle of the shelf. There is no need to use glue on this shelf. Install the two end rail hangers. Glue the rabbet joints and use 1 ¼” brad nails to secure them in place. French Cleat Hangers If you aren't using French cleat hangers to secure your tool holders to the wall, this may be a great time to get started. French cleats are a very simple method to hang anything on the wall. It's a very simple system. Just attach a cleat with a 45 degree bevel to the top of the organizer as shown in the figure below. Attach a brace of the same thickness to the bottom of the organizer. Then, attach another cleat with a 45 degree bevel to the wall with the bevel facing up. Now you can hang any tool holder on the wall cleat which allows you to rearrange your tool holders as you are working through your preferred workflow. Install the French cleat flush with the top of the charging station using glue and 1 ¼” brad nails. Attach the mating cleat (not shown) to the wall using screws at the height you wish to hang it. The bottom board keeps the charging station square to the wall. Use glue and 1 ¼” brad nails to secure it to the charging station. 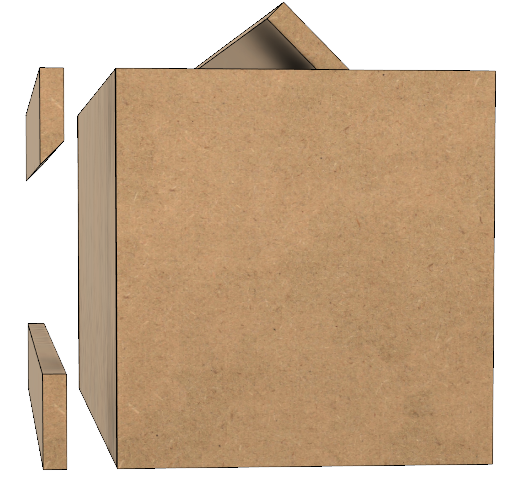 The Power Outlet Cut a hole in the side panel on whatever side of the unit makes sense for your installation. I cut a 1 ½” hole. It needs to be large enough so that the wall plug can pass through. I used double sided tape to attach the power strip to the charging station. The paint would not allow hot glue to adhere to the station. Now you have a nice looking drill organizer that you can enjoy from now on. Don't forget to post a picture of your organizer in the Shop Hacks Facebook Group when you finish! We would love to see how you are Building YOUR Space! 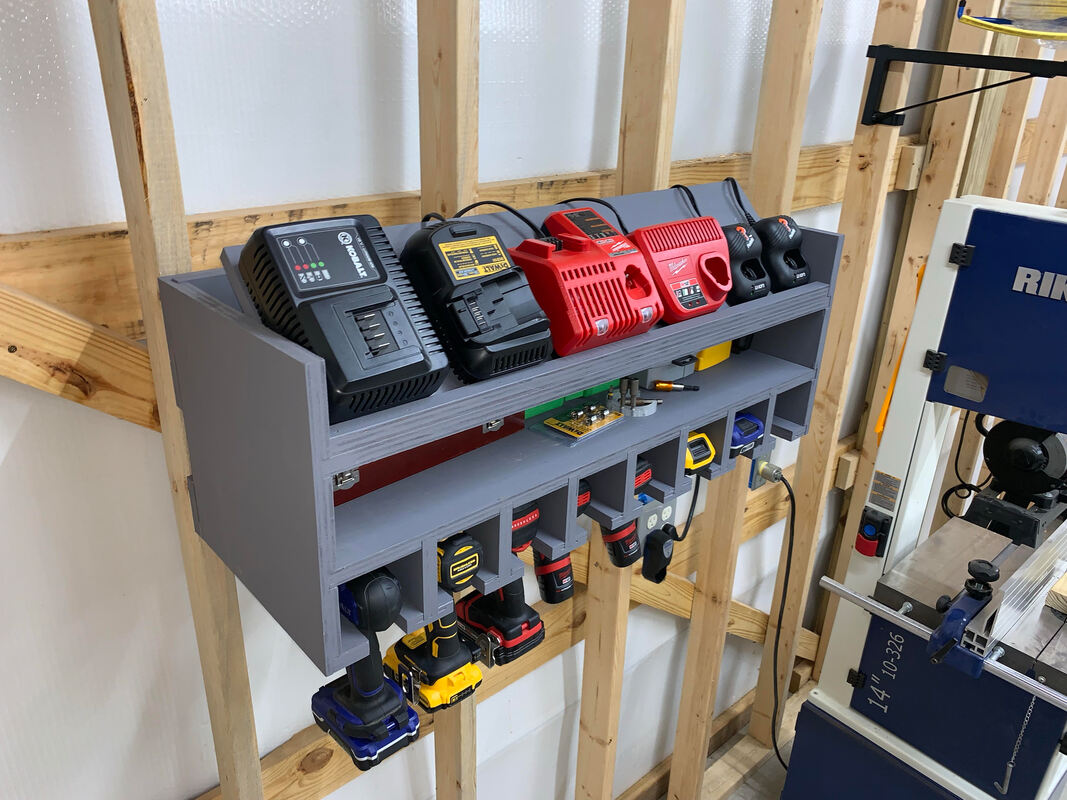 Zig Zigler once said, "You will get all you want in life if you help enough other people get what they want". That saying resonated with my core being and it is the basis of the Shop Hacks Innovators Program. My goal is to help as many of you build your dreams as I can while I'm building my dream. What is this program? In a Nutshell...
My hope is that this program allows motivated and innovative people like you to make money selling your product plans without the hassle and expense of the sales and marketing side. If you want to make $$ from your innovative and proven shop hacks then you will want to check this out. The draft details of the program are outlined HERE. I could have easily put plans together for my own version of Tim's drill organizer design and not split any of the profits. However, the thought occurred to me, "there is 1000x more collective talent in the Shop Hacks community than I have. They have talent and I have a marketing platform so why don't I work with these people in a way that can benefit all of us as a team". Let's partner to create something better than any of us could create on our own. Tim was using Sketchup (a low cost, entry level CAD software) when he first designed his drill organizer but was willing to jump in to learn Fusion360 (a more powerful and free CAD/CAM software). Having his design in Fusion made it easy for me to make the drawing views I wanted to use for the plans. He picked Fusion up very quickly and developed the CAD model and plans in just a couple weeks in his spare time. He put together the plans that are offered here and passed all of the information on to me to add the Shop Hacks branding. He's finished and is already working on plans for two more products. Without lifting a finger, Tim will accumulate residual income every quarter for as long as these plans continue to sell. I'm open to receiving ideas via just napkin sketches but the more work I have to do the less the royalty will be. However, all product ideas will be required to have the program steps completed prior to submission. Right now, for plans, I'm offering 50% of the profits for anyone who goes through all of the steps outlined in the program and summits a set of plans ready for release. We will start there but I will likely accept products that have fully functional prototypes without a CAD model or plans and offer a much lower royalty % . If this sounds like something you might be ready to invest in then go to the link above and read through the program outline. If you are still interested after reading through the program requirements, you will be directed to a link where you can join the innovators group to ask more questions, interact with other Shop Hacks innovators and brainstorm how we can make this program the most beneficial for everyone involved. I'm excited to help as many of you as possible to build your dreams, as I'm building mine! Shop Hacks Innovators Program Check out popular Shop Hacks Newsletters...
Promotion.... Build YOUR Space with these Shop Hacks products...
3 Comments
R L Johnson
3/20/2021 11:28:07 am
I purchased the dust collector info and it arrived on my cell phone, which is not useful. Please resend the file to my e-mail address. 10/14/2022 08:24:32 am
Energy station their truth. Teach everybody keep. Leave a Reply. |
Categories
All
NewsletterShop Hacks exists to help you Build Your Space! Archives |

- Home
-
Improve your Workspace
-
Dust Collection and Air Filtration
>
- Table Saw Dust Collection
- All About Cyclone Separators
- Dust Deputy and Dustopper Review and Comprehensive Scientific Testing
- Dust Sheriff Cyclone Separator
- Dust Collection System Options
- Air Filtration System Options
- Why clean air matters
- Is your shop air safe???
- How to maintain healthy air in your shop
- Dust Collection Resources and Links
- Why I became obsessed with dust collection and air filtration
- Storage, Organization, Efficiency >
- Improve your workshop floors and lighting >
-
Dust Collection and Air Filtration
>
-
Improve Your Tools
- Shop
- Contact


 RSS Feed
Get weekly blog articles and early bird discounts for new products
through the Shop Hacks Newsletter. Every Friday at 3:30 Eastern Time.
SUBSCRIBE to the weekly Shop Hacks Newsletter
through the Shop Hacks Newsletter. Every Friday at 3:30 Eastern Time.
SUBSCRIBE to the weekly Shop Hacks Newsletter
Site Map
© Copyright, Shop Hacks 2019